Finding the right custom brass casting manufacturer feels overwhelming when your project demands both precision and reliability. You’re not just looking for any foundry – you need a partner who understands complex geometries, maintains tight tolerances, and delivers consistent quality across production runs.
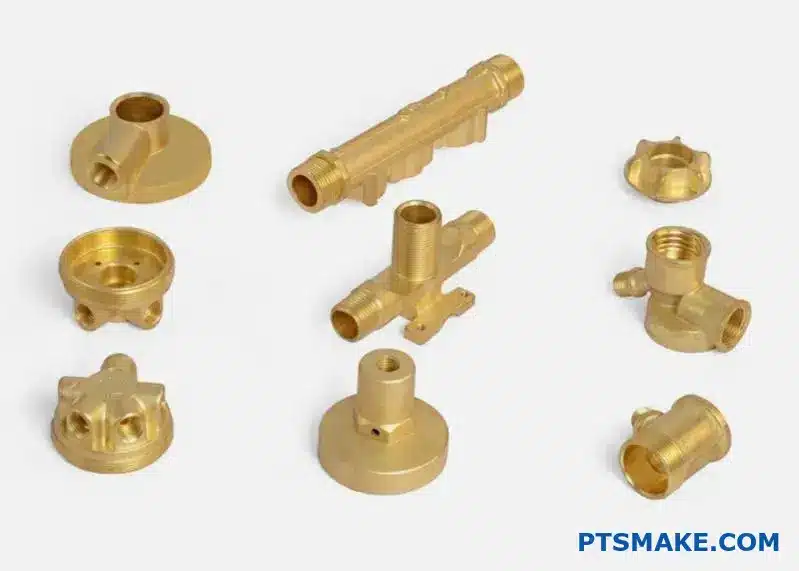
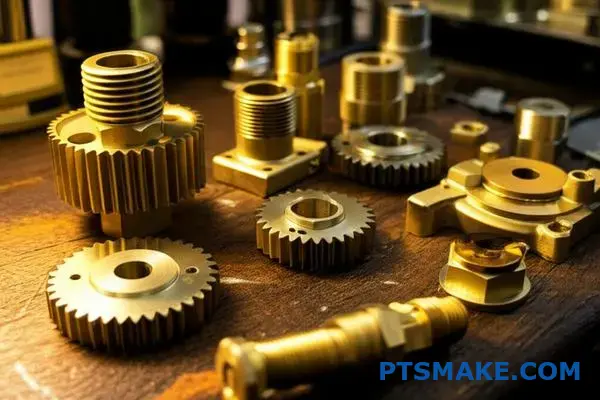
PTSMAKE specializes in custom brass casting with advanced sand, investment, and die casting capabilities, delivering precision parts from prototype through full production for aerospace, automotive, marine, and industrial applications.
I’ve worked with hundreds of engineers who struggled with casting defects, inconsistent surface finishes, and suppliers who couldn’t scale from prototypes to production volumes. The challenges become even more complex when you’re dealing with thin walls, intricate details, or specialized alloys for demanding applications like marine environments.
What defines a ‘castable’ brass alloy versus a ‘wrought’ one?
Have you ever wondered why you can’t just melt any piece of brass and pour it into a mold? The secret is in the alloy’s recipe. The difference isn’t just a name; it’s a fundamental metallurgical distinction.
The Alloying Difference
Castable alloys are designed for flow. Wrought alloys are made for strength and ductility. This is achieved by adding specific elements to the base copper-zinc mix. These additives completely change the material’s behavior when molten.
Key Property Comparison
| Property | Castable Brass | Wrought Brass |
|---|---|---|
| Fluidity | High | Low |
| Solidification | Controlled | Not a factor |
| Machinability | Often enhanced | Varies |
This thoughtful engineering is what makes high-quality brass casting possible.
The Science Behind the Melt
The distinction between these two types of brass is all about their intended purpose. A castable alloy must behave predictably in a liquid state. It needs to fill intricate molds completely without creating defects. This is where specific alloying elements become critical.
Silicon (Si): The Fluidity Enhancer
Adding silicon to brass dramatically improves its fluidity. This allows the molten metal to flow into thin sections and complex geometries of a mold before it solidifies.
In our experience at PTSMAKE, alloys with even a small amount of silicon show a marked improvement in filling detailed molds. This reduces the risk of misruns and cold shuts.
Aluminum (Al): The Surface Protector
When molten brass is exposed to air, it forms an oxide layer. Aluminum helps create a thin, tenacious oxide film on the surface of the melt. This film prevents further oxidation and reduces the formation of dross1, which are impurities that can get trapped in the final part. A cleaner melt means a higher quality casting.
Lead (Pb): The Machinability Master
Lead is a key player for parts that require secondary machining. It doesn’t dissolve in the brass. Instead, it exists as small, soft particles. During machining, these particles act as chip breakers. This results in small, manageable chips and a smoother surface finish, which is crucial for achieving tight tolerances.
The right alloy makes all the difference in a successful brass casting project.
The core difference between castable and wrought brass lies in their specific alloying elements. Additives like silicon, aluminum, and lead are crucial. They optimize the alloy for the casting process, enhancing fluidity, reducing defects, and improving final machinability.
How do sand, investment, and die casting methods for brass compare?
Choosing the right brass casting method is crucial. It directly impacts your project’s cost, quality, and timeline. Each method has unique strengths.
To simplify this choice, let’s compare them. We’ll look at key factors. This helps you match the method to your needs.
Quick Comparison Matrix
This table breaks down the main differences. It provides a clear overview for an initial assessment.
| Feature | Sand Casting | Investment Casting | Die Casting |
|---|---|---|---|
| Tooling Cost | Low | Moderate | High |
| Part Complexity | Low to Medium | High | Medium to High |
| Surface Finish | Rough | Excellent | Very Good |
| Dimensional Accuracy | Low | High | Very High |
| Production Volume | Low to Medium | Low to High | High |
| Typical Applications | Large parts, plumbing | Aerospace, jewelry | Automotive, electronics |
Deeper Dive into the Trade-Offs
The matrix gives a great starting point. But the real decision lies in understanding the trade-offs. It’s about balancing cost, quality, and volume.
Tooling Cost vs. Per-Part Cost
Sand casting has the lowest tooling cost. This makes it ideal for prototypes or small runs. However, the labor per part is higher.
Die casting is the opposite. The initial mold is a significant investment. But for high volumes, automated processes make the per-part cost very low.
Complexity and Finish
Investment casting truly shines for complex parts. It allows for intricate details and excellent surface finishes, often reducing secondary machining needs.
This is where we help clients at PTSMAKE. We analyze the design to see if the higher cost of investment casting saves money on finishing steps later. It’s a total cost calculation.
A key factor we also consider is internal porosity2. It’s a hidden risk in some casting methods that can weaken the final part. Our tests show die casting often yields denser parts.
| Method | Best For… | Key Consideration |
|---|---|---|
| Sand Casting | Low-volume, large parts | Rough finish requires machining. |
| Investment Casting | Complex geometries, fine details | Higher per-part cost for low volumes. |
| Die Casting | High-volume, high-precision parts | High upfront tooling investment. |
Selecting the right brass casting method involves balancing initial costs with long-term production needs. Each technique offers distinct advantages in precision, finish, and complexity, making the choice dependent on your specific project requirements and volume.
What are the main categories of castable brass alloys?
Brass isn’t just one material. It’s a family of alloys, each with a unique personality. The main castable types are grouped by their base composition.
This grouping helps us select the right material for a specific brass casting project. Understanding these families is key to success.
Yellow Brasses
These are the most common. They have a high zinc content, giving them a bright, yellow color. This makes them great for decorative items.
Red Brasses (Gunmetals)
Red brasses contain more copper and often tin. This gives them a reddish hue and superior corrosion resistance. They are very reliable for plumbing.
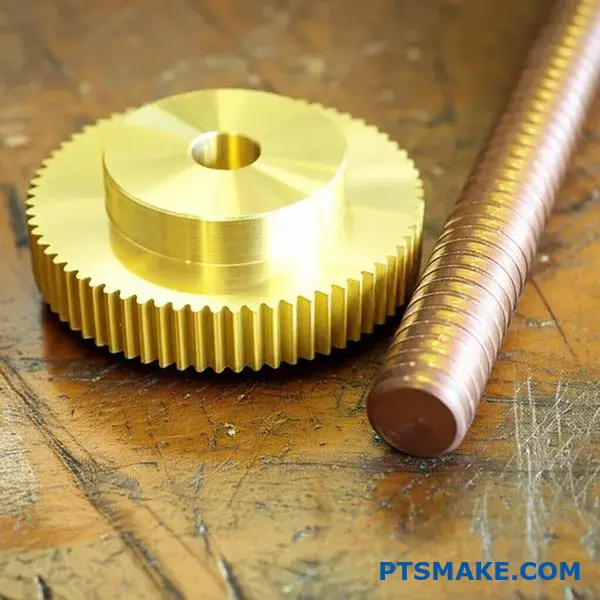
High-Tensile Brasses
Also known as manganese bronzes. These alloys include elements like manganese, aluminum, and iron. They are exceptionally strong and wear-resistant.
A simple breakdown looks like this:
| Alloy Family | Primary Alloying Elements | Key Properties | Typical Applications |
|---|---|---|---|
| Yellow Brass | Copper, Zinc (30-40%) | Good castability, aesthetic appeal | Faucets, decorative hardware |
| Red Brass | Copper, Tin, Lead, Zinc | Excellent corrosion resistance | Valves, fittings, pump parts |
| High-Tensile | Copper, Zinc, Mn, Al, Fe | High strength, wear resistance | Marine propellers, gears |
Choosing the right brass alloy is a balancing act. It’s often a trade-off between cost, performance, and appearance.
The Cost vs. Performance Trade-Off
Yellow brasses are generally less expensive due to their higher zinc content. Zinc is cheaper than copper. However, this high zinc content can lead to a specific type of corrosion.
This issue is known as dezincification3. It selectively removes zinc from the alloy, leaving a weak, porous copper structure. In past projects, we’ve seen this cause failures in harsh environments.
Red brasses, with less zinc and added tin, resist this corrosion much better. They are the go-to for durable plumbing and marine fittings where reliability is critical. Although they cost more upfront, they save money long-term.
When Strength is Everything
High-tensile brasses are in a different league. The addition of manganese, iron, and aluminum creates a much tougher material.
These alloys are engineered for high-stress applications. Think of marine propellers battling saltwater or heavy-duty gears in machinery. Their strength justifies the more complex and costly composition. Here at PTSMAKE, we use them for parts that simply cannot fail.
This comparison helps clarify the decision:
| Feature | Yellow Brass | Red Brass | High-Tensile Brass |
|---|---|---|---|
| Relative Cost | Low | Medium | High |
| Corrosion Resistance | Fair | Excellent | Very Good |
| Mechanical Strength | Moderate | Good | Excellent |
| Primary Advantage | Aesthetic & Cost | Durability | Strength |
Brass alloys are diverse. Yellow brass is for aesthetics and general use. Red brass offers superior corrosion resistance for plumbing. High-tensile brass provides exceptional strength for demanding mechanical parts. Each has a clear purpose.
What are the primary post-casting finishing processes for brass parts?
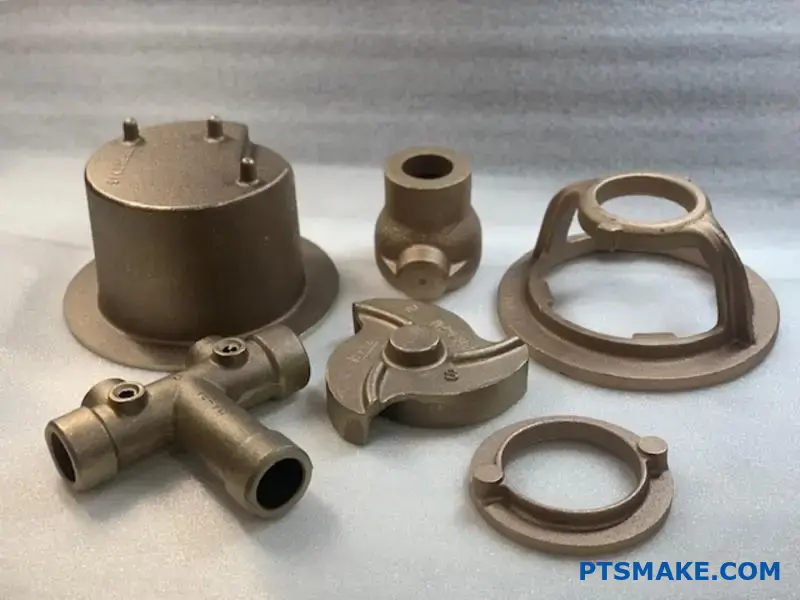
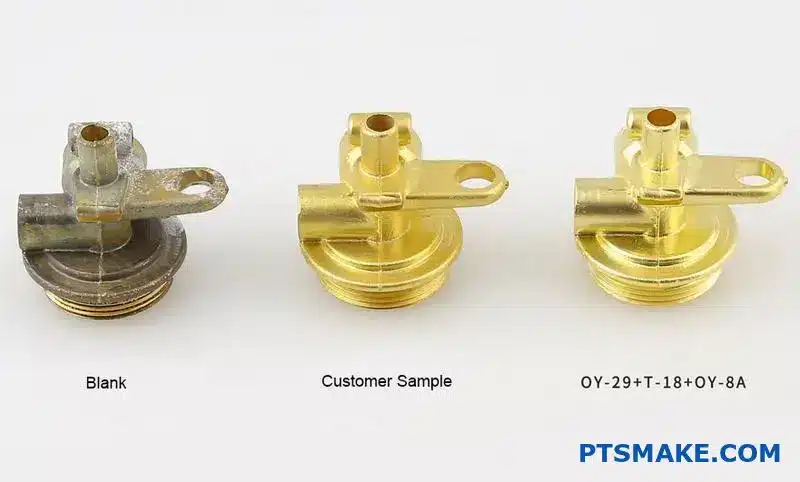
After a brass part is "knocked out" from its mold, it’s still a rough diamond. The journey from a raw casting to a finished product involves a clear, sequential process. Each step methodically refines the part.
This sequence is crucial for achieving the final specifications. It moves from large-scale material removal to fine surface detailing. The initial stages prepare the part for precision work later on.
Here’s a typical workflow we follow at PTSMAKE after the initial brass casting.
| Stage | Primary Operation | Purpose |
|---|---|---|
| 1. Degating | Sawing, Grinding | Remove gates and risers. |
| 2. Cleaning | Sandblasting, Tumbling | Remove scale and smooth surfaces. |
| 3. Machining | CNC Milling, Turning | Achieve tight tolerances. |
| 4. Finishing | Polishing, Lacquering | Final aesthetic and protection. |
This structured approach ensures quality at every step.
The choice of method at each stage is critical. It depends on the part’s design, intended use, and required finish. Simply following a list is not enough; you have to understand the ‘why’ behind each action.
Gate and Riser Removal
First, we cut off the gates and risers. For large, bulky attachments, a band saw is efficient. It removes a lot of material quickly. For smaller connections or harder-to-reach areas, we use grinding for better control and a smoother initial finish.
Surface Cleaning and Preparation
Next, we clean the entire surface. Sandblasting is aggressive. It uses high-pressure media to strip away oxides and mold residue. It leaves a uniform matte texture. Tumbling, on the other hand, is a gentler, bulk process. Parts are placed in a barrel with abrasive media and tumbled, smoothing edges and surfaces over time. It is great for deburring many small parts at once.
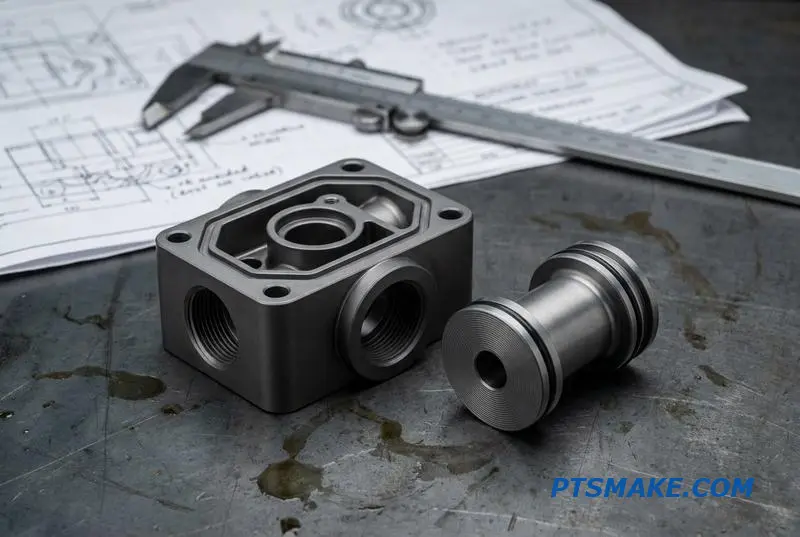
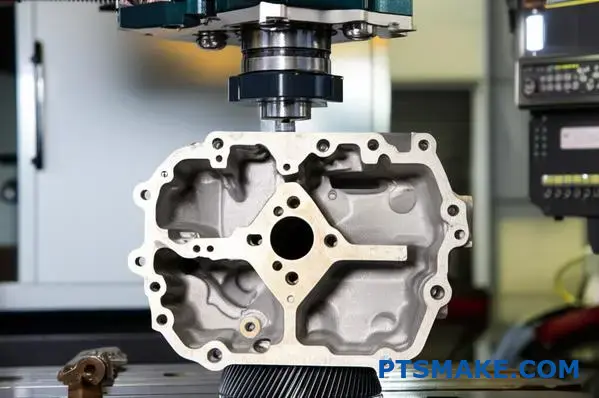
Precision Machining
Many brass casting parts require features that casting alone cannot produce. This is where CNC machining comes in. We create threaded holes, flat surfaces, and precise bores. This step ensures the part meets exact dimensional tolerances for assembly.
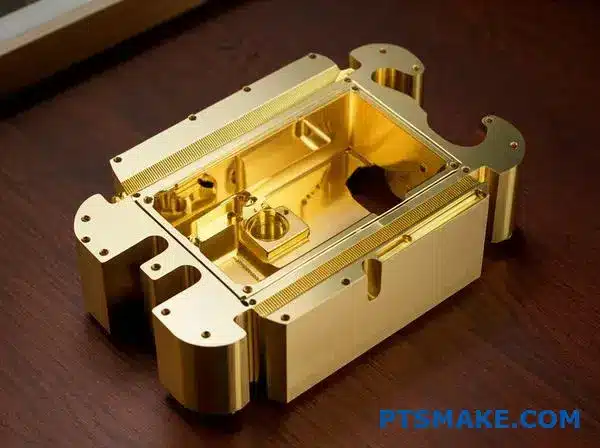
Surface Treatments and Coatings
The final step defines the part’s look and durability. Polishing creates a bright, reflective surface. Lacquering adds a clear protective layer to prevent tarnishing. For a unique, aged look, patination4 is used to create specific colors through a chemical reaction.
| Treatment | Result | Best For |
|---|---|---|
| Polishing | Bright, mirror-like | Decorative hardware |
| Lacquering | Clear, protective coat | Preventing tarnish |
| Patination | Colored, aged look | Artistic or architectural parts |
Each of these steps adds value. They transform a rough casting into a component ready for its final application.
Post-casting finishing is a multi-stage process. It systematically takes a raw brass part from rough to refined, ensuring it meets all functional and aesthetic requirements before it reaches the customer.
How do you structure a quality control checklist for brass casting?
A solid quality control checklist is your project’s blueprint for success. It prevents mistakes before they happen. I always break it down into key stages.
This ensures nothing is overlooked. From raw materials to the final part, every step matters.
Raw Material Inspection
This is your foundation. Bad material means a bad final product. We check for composition and purity.
Mold and Casting Process Checks
The mold and process parameters are critical for quality.
| Checkpoint | Standard |
|---|---|
| Mold Condition | Free of cracks, debris |
| Melt Temperature | Within ±10°C of spec |
| Pouring Speed | Consistent and controlled |
This structured approach is essential for consistent brass casting.
To truly master quality, we must detail each checkpoint. A simple check isn’t enough. You need to define what "pass" and "fail" look like. This removes any guesswork for the inspection team.
Post-Casting Inspection
After the part is cast, the real scrutiny begins. This is where we catch subtle but critical flaws.
Visual Inspection
This is the first line of defense. Inspectors look for surface-level issues. Common defects include cracks, surface roughness, or incomplete filling. Good lighting and trained eyes are essential here. We also look for signs of porosity5.
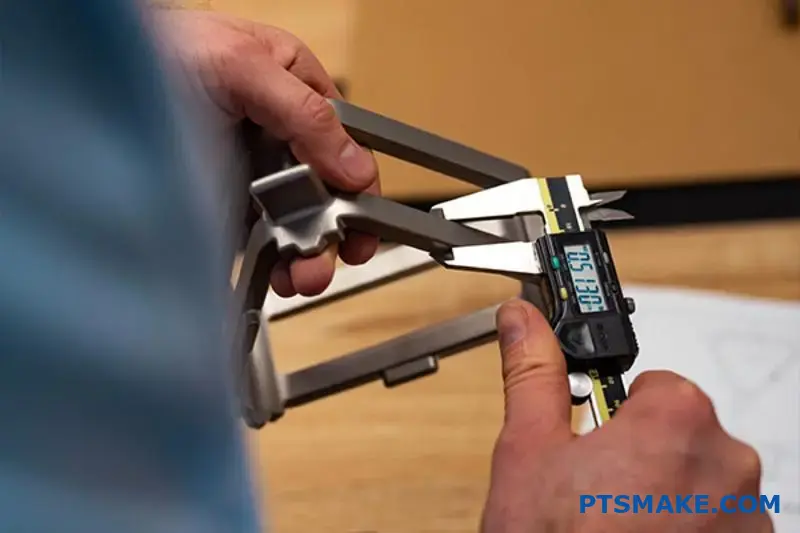
Dimensional Verification
This step ensures the part matches the design specifications. Tolerances are key in precision manufacturing.
| Measurement Point | Tool | Tolerance (example) |
|---|---|---|
| Overall Length | Digital Caliper | ±0.15 mm |
| Hole Diameter | Pin Gauge | ±0.05 mm |
| Key Feature Angle | CMM | ±0.5 degrees |
At PTSMAKE, we use calibrated tools like Coordinate Measuring Machines (CMMs) for complex geometries. This guarantees that every part we deliver meets the exact requirements of our clients. This level of detail protects the final product’s function.
A structured checklist is vital. Breaking it down by production stage—from raw material to final dimension checks—ensures comprehensive quality control. This systematic approach removes ambiguity and guarantees consistency in every brass casting part.
How does part geometry influence the choice of casting method?
Choosing the right casting method is a critical step. Your part’s geometry is the primary guide. It dictates which process is feasible and cost-effective.
We will establish a simple framework here. This helps match part features to the best process.
We’ll compare investment casting and sand casting. Understanding how wall thickness, cavities, and surface detail impact this choice is key to a successful project.
A Framework for Process Selection
The geometry of your part directly steers you toward a specific casting method. A simple design has many options. A complex one narrows the field considerably. Let’s break down the key features.
Wall Thickness
Wall thickness is a fundamental factor. Sand casting is generally better for parts with thicker, more robust walls. The process is less sensitive to cooling rates in heavy sections.
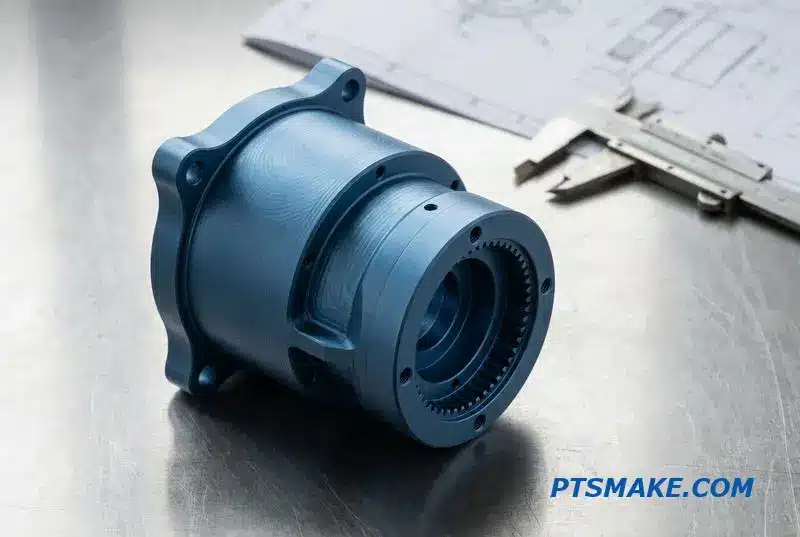
Investment casting, however, shines with thin-walled components. We can achieve walls as thin as 0.5 mm. This is ideal for lightweight or intricate designs where material saving is important.
Internal Cavities and Undercuts
Internal features often decide the method. Sand casting requires cores to create internal cavities, which can limit complexity. Undercuts are difficult and add cost.
Investment casting uses a wax pattern that simply melts away. This allows for highly complex internal geometries and undercuts without needing draft angles. It provides incredible design freedom. For parts requiring high dimensional accuracy6, this is a huge advantage.
Surface Finish and Detail
Your desired surface quality is a final, crucial checkpoint. Sand casting produces a rougher surface finish. It almost always requires secondary machining for a smooth feel.
Investment casting delivers a much finer surface. It often results in a near-net-shape part. For detailed components like many brass casting parts, this reduces post-processing costs.
| Feature | Sand Casting | Investment Casting |
|---|---|---|
| Wall Thickness | Best for thicker walls (>3mm) | Excels with thin walls (<1.5mm) |
| Internal Complexity | Limited by core design | Highly complex shapes possible |
| Undercuts | Difficult and costly | Easily accommodated |
| Surface Finish | Rough, requires machining | Smooth, near-net shape |
In essence, your part’s complexity is the deciding factor. Simple, bulky parts fit sand casting. Intricate, detailed parts with thin walls are perfect for investment casting. This framework helps make that initial, critical choice, saving time and money down the line.
How do you create a patina on a finished brass casting?
Here is a practical recipe for creating a patina. We will use the ammonia fuming method. This is a popular technique for brass casting parts.
This method gives a rich, aged look. It is important to follow each step carefully for the best results.
A Practical Recipe: Ammonia Fuming
Step 1: Prepare the Surface
First, clean the brass casting thoroughly. Any oil or dirt will cause an uneven finish. Degreasing is the most important step.
Step 2: Set Up the Fuming Chamber
You will need an airtight container. Place a small dish of ammonia at the bottom. Suspend the brass part above the liquid. The fumes, not the liquid, create the patina.
| Item | Purpose |
|---|---|
| Airtight Container | To trap ammonia fumes |
| Ammonia | The chemical agent |
| Brass Casting | The workpiece |
| Gloves & Goggles | Safety equipment |

Mastering the Patina Process
Achieving a professional-grade patina is about control. The fuming process is a chemical reaction. You must manage the variables carefully. Time, temperature, and ammonia concentration all affect the final color and texture.
In past projects at PTSMAKE, we learned that slight changes can create very different outcomes. A warmer environment often speeds up the reaction. This can produce deeper blues and greens on the brass casting.
The reaction of the fumes with the copper in the brass creates a beautiful blue-green layer. This is due to the formation of an ammoniacal copper complex7 on the surface.
Step 3: Neutralize the Reaction
Once you achieve the desired color, you must stop the reaction. Remove the part from the chamber. Submerge it in a solution of baking soda and water. This neutralizes the acidic ammonia residue.
Step 4: Seal the Finish
Finally, protect your new patina. Sealing prevents it from wearing off or changing further. You have a few options for this final step.
| Sealer | Finish Type | Durability |
|---|---|---|
| Wax | Soft, satin sheen | Moderate |
| Lacquer | Hard, glossy or matte | High |
Choosing the right sealer depends on the part’s final use. For decorative pieces, wax is often enough. For parts that will be handled, lacquer offers better protection.
Achieving the perfect patina requires careful surface preparation, a controlled fuming environment, and proper neutralization. Sealing the final finish is crucial to preserve the color and protect the brass casting from further change. Safety should always be your top priority.
How would you diagnose and solve recurring gas porosity issues?
Fine, consistent porosity is a frustrating defect. It signals a deep, systemic issue, not a one-off mistake. Guesswork won’t fix it.
A systematic investigation is the only path forward. We must check every stage methodically.
This approach moves from the simplest to the most complex variables. It saves time and resources. We start with raw materials. Then we review the melt process. Finally, we analyze the mold and gating design. This isolates the root cause effectively.
Unraveling the Mystery of Fine Porosity
When faced with consistent, fine porosity, a structured plan is essential. In past projects at PTSMAKE, we’ve developed a clear diagnostic sequence to pinpoint the source of the gas. This method eliminates variables one by one until the culprit is found.
Step 1: Raw Material Audit
We always start with the raw materials. Is there hidden moisture in the ingots, scrap, or additives? Even slight dampness can introduce significant hydrogen into the melt. We use specialized equipment to test moisture content before anything enters the furnace. This initial check is a simple but critical first step.
Step 2: Melt Procedure Verification
Next, we scrutinize the melting process. Proper fluxing and degassing are non-negotiable. For materials like brass casting, this stage is vital. Are the procedures being followed correctly every time? The ability of a mold to allow gas to escape is its permeability8. We verify that the degassing sequence is adequate for the alloy and batch size.
| Process Step | Correct Procedure | Common Mistake |
|---|---|---|
| Fluxing | Applied evenly at correct temperature | Incorrect amount or timing |
| Degassing | Proper lance depth and duration | Insufficient time or gas flow |
| Skimming | Clean removal of dross | Reintroducing oxides into melt |
Step 3: Mold and Gating System Analysis
If materials and melting are clear, we investigate the mold and gating. We check mold permeability to ensure gases can escape. We then use simulation software to analyze the gating system. Is it creating turbulence? A turbulent fill introduces air directly into the mold cavity, causing porosity.
Solving fine porosity requires a step-by-step investigation. Begin with raw materials, then review the melt procedure, and finally analyze the mold and gating system. This structured approach efficiently isolates and resolves the root cause of the defect.
How do you adapt your process for a thin-walled, complex part?
Handling delicate, thin-walled parts is a true test of a manufacturer’s skill. These projects are often prone to defects like misruns, where the material fails to fill the entire mold cavity.
The Challenge of Misruns
Misruns happen when molten material solidifies before it can completely fill the mold. This is a common issue with complex, thin-walled designs. Our initial goal is to prevent this.
Key Process Adaptations
To combat this, we adjust several key process parameters. Each change aims to improve material flow and ensure a complete fill before solidification begins. These adaptations are critical for success.
| Parameter | Standard Process | Adapted Process |
|---|---|---|
| Method | Die Casting | Investment Casting |
| Temperature | Standard | Increased |
| Mold Filling | Gravity/Pressure | Vacuum-Assisted |
| Gate Design | Conventional | High-Flow Redesign |
For a truly challenging part, standard adjustments might not be enough. In our experience at PTSMAKE, a combination of advanced techniques is often required for these delicate components. It’s a holistic approach.
Advanced Casting Solutions
A recent brass casting project highlighted these issues. The part had walls less than 1mm thick. Our solution involved switching from die casting to investment casting. This method provides superior detail and surface finish.
We also increased the pouring temperature. This adjustment reduces the material’s viscosity, improving its fluidity9. Better flow means the metal travels faster and further into the intricate cavities of the mold.
Redesigning for Flow
Modifying the mold itself is crucial. We implemented a vacuum-assist system. This removes air from the cavity, reducing back-pressure and helping the molten metal fill every detail completely.
We also redesigned the gates and runners. By making them larger and positioning them strategically, we ensure a faster, more uniform fill. This is a critical step to prevent premature cooling.
| Technique | Primary Benefit | Best For |
|---|---|---|
| Investment Casting | High precision, complex shapes | Intricate geometries |
| Higher Temperature | Improved material flow | Thin-walled sections |
| Vacuum-Assist | Eliminates trapped air | Very fine details |
| Gate Redesign | Faster, uniform mold filling | Preventing misruns |
Successfully producing thin-walled, complex parts requires a multi-faceted strategy. Adapting the casting method, temperature, and mold design are essential steps to prevent defects like misruns and achieve the desired component quality.
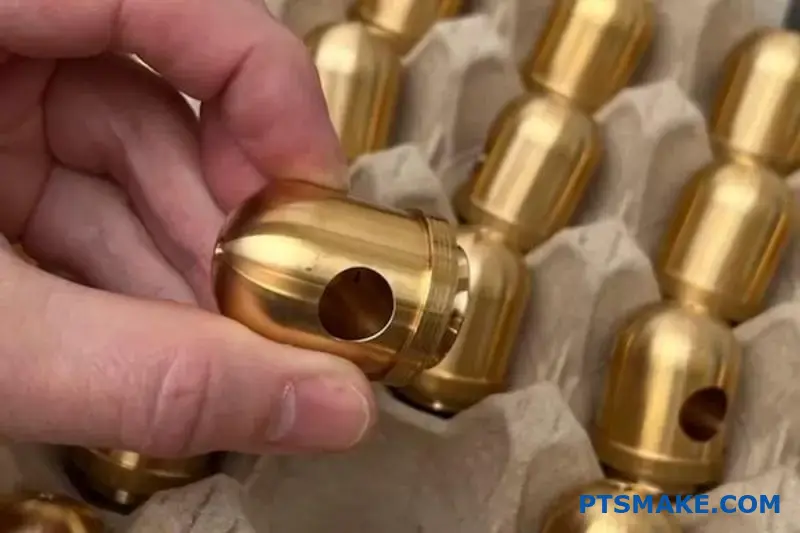
How do you transition from casting single pieces to a small batch?
Scaling up from single casts to small batches needs a smart plan. It is not just about making more; it’s about making them efficiently and consistently.
A New Way of Thinking
You must shift from a one-off mindset to a production workflow. This involves creating systems for every step.
Core Strategies for Scaling
| Area | Objective |
|---|---|
| Molding | Increase speed and repeatability |
| Melting | Maximize furnace uptime |
| Finishing | Ensure uniform quality |
This structured approach turns a craft into a reliable process, vital for materials like brass casting.
Moving to batch production is a big step. It requires you to build efficiency and consistency into your process from the start. Success depends on standardization.
Create a Match Plate Pattern
Using a match plate is a major upgrade. It combines the top (cope) and bottom (drag) patterns onto one board. This method speeds up molding significantly. It also guarantees perfect alignment for every mold, reducing defects.
Optimize Furnace Operations
For multiple melts, furnace efficiency is key. Preheating your metal charge can cut down melt times. It also helps maintain a stable temperature.
You must plan your pours carefully. Ensure your crucible10 holds enough molten metal for several molds. This simple step avoids delays and temperature drops between each pour, saving both time and energy.
Standardize Your Finishing Process
Inconsistent finishing can ruin a good batch. Create a standard operating procedure for every finishing step. This ensures every piece meets the same quality standard.
| Finishing Task | Key Goal | Quality Check |
|---|---|---|
| Gate Removal | Remove cleanly | Inspect for smooth, flush surface |
| De-burring | Remove sharp edges | Consistent feel and edge finish |
| Surface Polishing | Achieve desired look | Compare to a master part |
At PTSMAKE, we embed these repeatable systems into our workflow. This guarantees that the last part is as perfect as the first.
Successfully scaling to small-batch casting hinges on a strategic approach. It involves using match plates for faster molding, optimizing furnace use for efficiency, and standardizing the finishing process to guarantee consistency across every part.
How do you cost a brass casting job for a client?
Pricing a brass casting job accurately is not guesswork. It is a systematic process. A transparent and detailed model ensures clients understand exactly what they are paying for.
This approach builds trust from the start. It breaks down every element of the job.
Core Cost Factors
We build our quotes from the ground up. This involves tracking several key cost centers that directly influence the final price for any brass casting project.
Major Pricing Components
A clear breakdown prevents surprises. Here are the fundamental pillars of our pricing model.
| Category | Description |
|---|---|
| Direct Materials | The cost of brass and consumables. |
| Energy Consumption | Fuel needed to power the furnace. |
| Labor Investment | Hours for all hands-on tasks. |
| Margin & Overhead | Covers business costs and profit. |
Building a Comprehensive Pricing Model
A truly accurate quote goes beyond the basics. At PTSMAKE, we have refined a model that accounts for every variable. This ensures fairness and predictability for our clients.
Direct Material & Energy Costs
The price of brass ingot is the largest variable. It fluctuates with the market. We also factor in consumables like molding sand, flux, and crucible wear. Energy for the furnace is another direct cost.
The Value of Labor
Labor isn’t a single line item. We break it down into specific stages. This includes molding, melting, pouring, and finishing. Finishing and post-processing often require the most skilled labor and time.
Managing Risk and Quality
No manufacturing process is perfect. We include a small percentage to account for potential rejects. This preemptive step ensures we can deliver the required quantity without delays or cost overruns. This is where the science of melting, a key part of pyrometallurgy11, becomes critical for minimizing waste.
Final Price Structure
Here’s how these elements come together in a structured quote. This model provides a clear view of the total cost.
| Cost Component | Details | Impact on Price |
|---|---|---|
| Brass Ingot | Based on current market price plus shipping. | High / Volatile |
| Consumables | Sand, flux, crucible lifespan. | Moderate |
| Labor Hours | Molding, melting, pouring, finishing, QA. | High / Complexity-Driven |
| Reject Allowance | A small percentage based on part complexity. | Low-Moderate |
| Profit Margin | Covers overhead and ensures sustainable business. | Final Adjustment |
A solid pricing model for a brass casting job details all costs. It covers materials, labor, and even potential rejects. This transparency is fundamental to building a lasting partnership with a client.
How do you choose a brass alloy for a marine application?
Choosing the right material is critical for marine parts. Saltwater is extremely corrosive. A wrong choice leads to rapid failure. Standard yellow brass, common in many applications, is often a poor choice here.
It simply cannot withstand the harsh marine environment. We must look at specialized alloys. Naval brass or aluminum bronze are far better options. Their unique properties ensure durability and long-term performance for any component exposed to seawater.
Why Standard Brass Fails in Saltwater
Let’s put this into a real-world context. Imagine designing a valve for a ship’s cooling system. The part will be constantly exposed to saltwater. Using a standard yellow brass (like C260) would be a mistake.
Why? The high zinc content in yellow brass makes it vulnerable to a process called [dezincification]()12. Essentially, the zinc leaches out of the alloy. This leaves behind a weak, porous copper structure that will fail.
Comparing Marine-Grade Brass Alloys
For marine applications, you need alloys designed to resist this specific type of corrosion. Naval brass and aluminum bronze are excellent choices. Naval brass adds a small amount of tin, which inhibits dezincification. Aluminum bronze provides even greater strength and corrosion resistance.
The selection process at PTSMAKE often involves analyzing these trade-offs. Whether starting from a billet or a near-net shape from a brass casting process, the alloy choice is paramount.
Here is a simple comparison based on our test results:
| Alloy Type | Key Alloying Element | Saltwater Corrosion Resistance | Strength |
|---|---|---|---|
| Yellow Brass (C260) | ~30% Zinc | Poor | Moderate |
| Naval Brass (C464) | ~39% Zinc, 1% Tin | Good | Good |
| Aluminum Bronze (C954) | ~11% Aluminum | Excellent | High |
This table clearly shows why yellow brass is unsuitable. The choice between Naval Brass and Aluminum Bronze depends on the specific strength and longevity requirements of your project.
The Critical Role of Alloying Elements
The small additions of other elements are what make the difference. The tin in naval brass is a game-changer. It dramatically slows down the corrosive process that plagues standard brass. It offers a good balance of performance and cost.
Aluminum bronze takes it a step further. The aluminum creates a tough, passive oxide layer on the surface. This layer protects the metal from the chloride ions in seawater. It is an ideal choice for high-stress, critical components.
Factors Beyond Corrosion
While corrosion resistance is the top priority, other factors matter. You must also consider mechanical strength and machinability.
Here is a quick breakdown of factors:
- Mechanical Load: Will the part be under high stress? If so, aluminum bronze is superior.
- Manufacturing Process: Naval brass is generally easier to machine than aluminum bronze.
- Project Budget: Naval brass is often more cost-effective than aluminum bronze.
In our experience, we help clients weigh these factors. We ensure the final material choice meets all engineering and budget requirements for the marine application.
For saltwater exposure, avoid standard yellow brass. Naval brass and aluminum bronze provide the necessary corrosion resistance and strength. Your final choice depends on the specific mechanical and budget needs of your component, a decision we often help clients navigate at PTSMAKE.
Get Your Brass Casting Quote from PTSMAKE Experts Today!
Ready to bring your precision brass casting project to life? Contact PTSMAKE for a fast, customized quote. Our team delivers reliable, high-quality castings—from prototype to production—to meet your exact requirements. Take the next step and send your RFQ now!

Understand the chemistry behind casting defects and how to prevent them in your designs. ↩
Learn how porosity can affect your part’s integrity and performance. ↩
Learn about this common corrosion process and how alloy selection can prevent component failure. ↩
Learn about the chemical processes used to create a variety of artistic finishes on brass surfaces. ↩
Discover how this common casting defect can affect your part’s strength and performance. ↩
Learn how this term impacts your part’s function and assembly. ↩
Understand the chemical reaction that gives your brass its beautiful blue-green patina. ↩
Learn how mold permeability is measured and why it is critical for preventing gas-related defects. ↩
Learn how melt fluidity directly impacts the quality and success of your thin-walled parts. ↩
Learn about crucible types and how they impact metal quality and furnace efficiency in your casting process. ↩
Learn the high-temperature science behind purifying metals to achieve superior casting quality. ↩
Click to understand how this corrosion process works and why it’s critical to avoid in marine applications. ↩