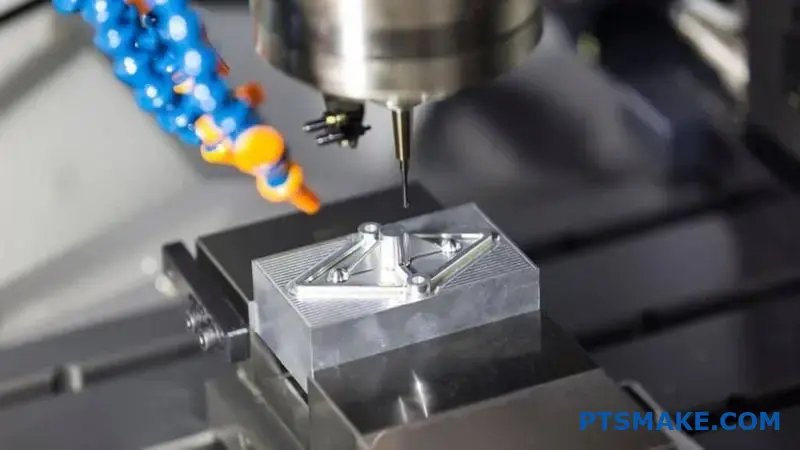
Ever noticed how some aluminum products develop an uneven, patchy bronze color over time, completely ruining their professional appearance? Poor bronze anodizing specification and execution can turn your premium product into an eyesore, costing thousands in rework and damaging your brand reputation.
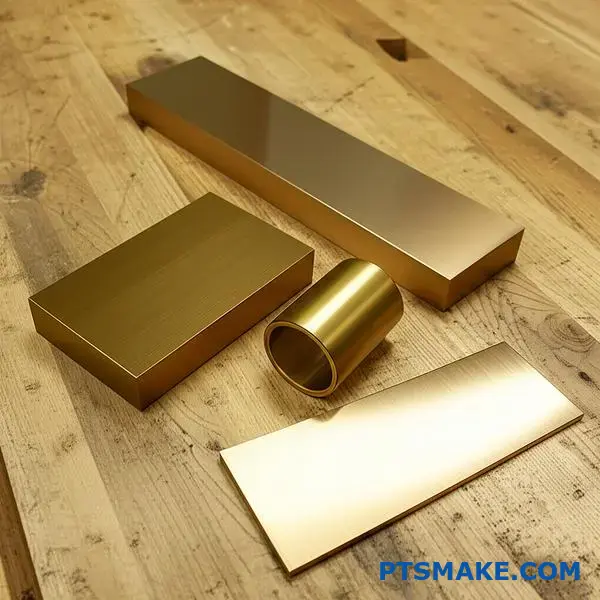
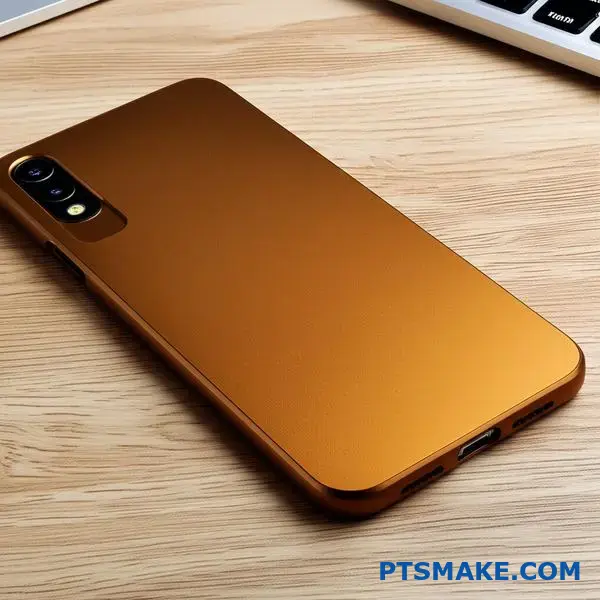
Bronze anodized aluminum achieves its distinctive color through a two-step electrolytic process where metallic salts like tin sulfate are deposited into anodic pores, creating durable finishes with enhanced corrosion resistance and consistent coloration when properly specified.
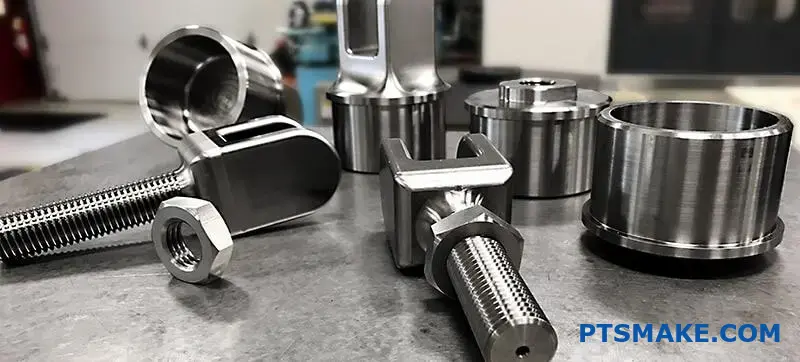
I’ve worked with bronze anodizing at PTSMAKE for over 15 years, helping clients avoid costly mistakes and achieve perfect finishes. This guide covers everything from color chemistry to failure analysis, giving you the knowledge to specify and manage bronze anodized projects successfully.
How is the ‘bronze’ color chemically created during anodizing?
Have you ever wondered about that rich, durable bronze finish on aluminum parts? It’s not paint. It’s a sophisticated chemical process.
The Two-Step Coloring Magic
We create this beautiful color using a two-step electrolytic coloring method. This ensures a consistent and lasting finish.
The process first builds a porous layer. Then, it deposits metallic salts into those pores to create the color. This results in a very durable bronze anodized aluminum surface.
| Factor | Effect on Color |
|---|---|
| Deposition Time | Longer time darkens the shade |
| Voltage | Higher voltage darkens the shade |

A Deeper Look at Electrolytic Coloring
The real art is in the second step. After creating a clear anodic layer, we place the aluminum part into an acidic solution. This bath is filled with metallic salts, usually tin sulfate.
We then apply an alternating current (AC) to the part. This step is where precise control is essential for the final color.
The Role of Metallic Salts
The AC voltage drives tiny metal ions from the tin sulfate solution. These ions are deposited deep into the bottom of the pores created during the first step. They are not a surface coating; they become an integral part of the anodic layer. This is why the color is so resistant to wear and UV light.
Controlling the Final Shade
Achieving a specific bronze shade, from light champagne to dark bronze, is all about precision. The darkness of the color depends directly on the amount of metal deposited.
We control this deposition by managing time and voltage. More time in the bath or a higher voltage results in more metal particles, creating a darker finish. The part’s surface impedance1 also plays a key role in how evenly the current is distributed.
| Parameter Control | Light Bronze | Medium Bronze | Dark Bronze |
|---|---|---|---|
| Deposition Time | Short | Medium | Long |
| AC Voltage | Low | Medium | High |
In our projects at PTSMAKE, we have calibrated this process to deliver exact color consistency across large production runs.
The bronze color is created using a two-step electrolytic process. An initial oxide layer is formed, and then metallic salts are precisely deposited into its pores. The final shade is carefully controlled by adjusting the voltage and deposition time for a durable finish.
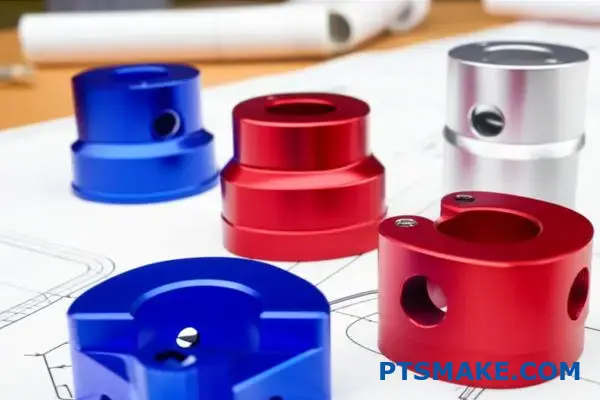
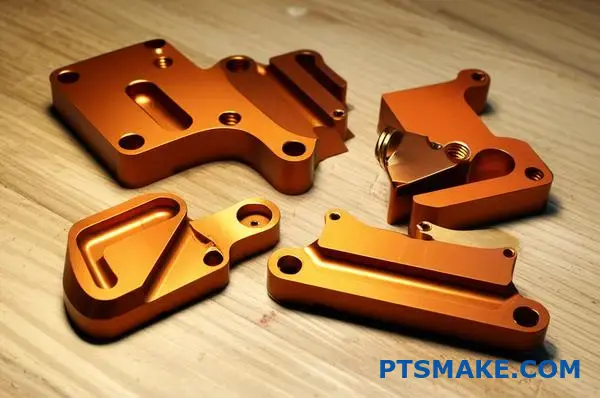
What are the core properties of a bronze anodized finish?
A bronze anodized finish does more than just add color. It creates a new, integral surface on the aluminum. This process significantly boosts the material’s performance. It’s a true functional upgrade.
This protective layer is much harder and more durable than the raw aluminum underneath. In past projects at PTSMAKE, we’ve seen how this improves part longevity.
Let’s look at a direct comparison.
| Property | Raw Aluminum | Bronze Anodized Aluminum |
|---|---|---|
| Hardness | Soft (≈ 2.5 Mohs) | Very Hard (≈ 9 Mohs) |
| Corrosion | Susceptible | Highly Resistant |
| Appearance | Dull, prone to scratches | Rich color, abrasion-resistant |
Unpacking the Performance Gains
The benefits of a bronze anodized finish extend far beyond initial aesthetics. These enhanced properties are crucial for components in demanding environments, which we frequently encounter.
Superior Hardness and Wear Resistance
The anodizing process converts the aluminum surface into aluminum oxide. This layer is incredibly hard, approaching the hardness of diamond on the Mohs scale.
This makes the surface highly resistant to scratches and abrasion. It’s a huge advantage over raw aluminum, which is quite soft and easily damaged. This durability is key for functional parts.
Environmental Resilience
Corrosion resistance is dramatically improved. In our tests, bronze anodized aluminum parts can withstand hundreds of hours of salt spray testing without degradation. Raw aluminum would fail quickly under similar conditions.
The bronze color is also highly stable against UV light. The color is embedded within the porous oxide layer, preventing the fading and chalking you see with paint. This ensures a long-lasting, consistent appearance for outdoor applications.
Unique Electrical Characteristics
The aluminum oxide layer is an excellent electrical insulator. This property, known as high dielectric strength2, is vital for electronics enclosures. It prevents accidental short circuits between the housing and the internal components. This protective feature is a core reason clients specify a bronze anodized aluminum finish for their electronic products.
A bronze anodized finish transforms aluminum, making it exceptionally hard, durable, and resistant to corrosion and UV exposure. Its excellent electrical insulation properties also make it a top choice for protecting sensitive electronics, offering a reliable and long-lasting solution.
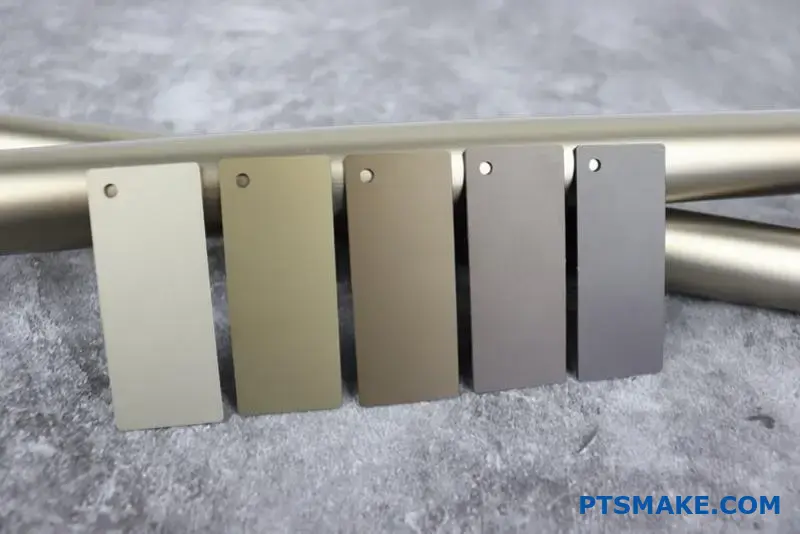
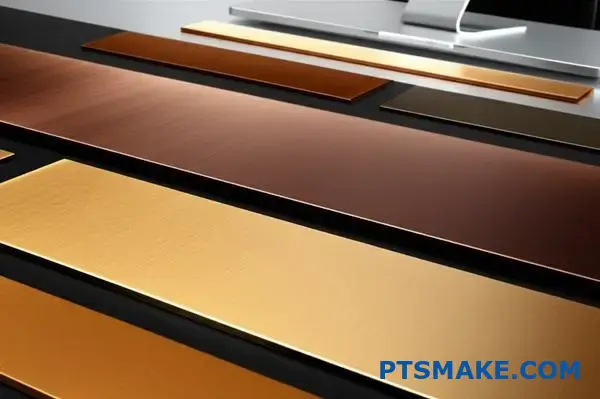
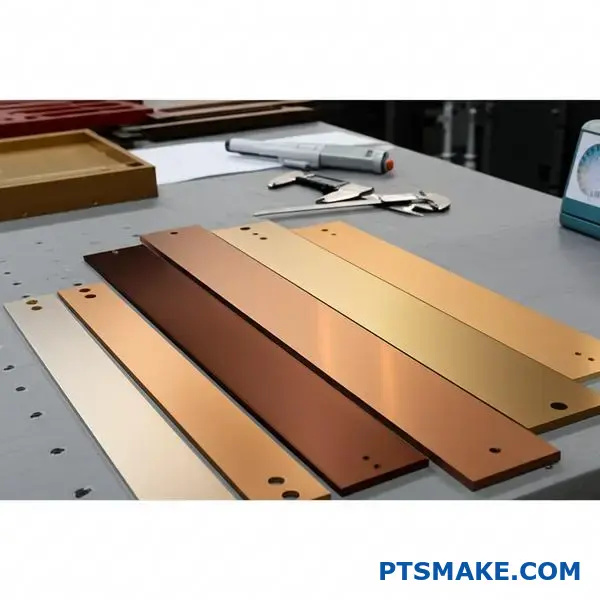
What is the full spectrum of bronze anodized shades available?
Categorizing the Bronze Anodized Palette
Bronze anodizing offers a rich spectrum, not a single color. The shades range from a light champagne to a deep, near-black. This variation allows for significant design flexibility.
These finishes are typically categorized for clarity. At PTSMAKE, we often work with clients to select the perfect tone for their project. Understanding these common categories is the first step.
| Shade Category | Common Description | Typical Application |
|---|---|---|
| Light Bronze | Champagne, light gold hue | Architectural trim, consumer electronics |
| Medium Bronze | Classic, warm brown tone | Window frames, decorative panels |
| Dark Bronze | Deep chocolate brown | High-end fixtures, signage |
| Statuary Bronze | Near-black, very dark | Monumental and artistic pieces |

How We Achieve Specific Shades
Achieving a specific bronze shade is a precise science. It is not just about dipping aluminum in a tank. We control several key process variables to get consistent, repeatable results for every batch.
Specification and Control
Clients specify a shade using control samples or industry color codes. Our job is to translate that target into a precise manufacturing recipe. This ensures the bronze anodized aluminum parts match perfectly.
The key is managing the anodizing process itself. The color comes from inorganic salts deposited into the pores of the aluminum oxide layer. The amount and distribution of these deposits determine the final shade.
Key Process Variables
Three main factors control the final color’s depth and consistency. Based on our tests, even small changes can affect the outcome. We carefully monitor immersion time in the coloring tank, the electrical current density3, and the chemical concentration of the coloring solution.
Longer immersion times and higher current densities typically result in darker shades.
| Process Variable | Effect on Shade | Our Control Method |
|---|---|---|
| Immersion Time | Longer time = Darker color | Automated timers and process controls |
| Current Density | Higher density = Deeper color | Precision power supply monitoring |
| Solution Chemistry | Concentration impacts color saturation | Regular chemical analysis and adjustments |
By mastering these variables, we deliver the exact bronze shade you envisioned.
Understanding the bronze spectrum and the process variables is key. It allows for precise color matching. This ensures your final parts meet exact aesthetic and functional requirements, from prototype to production.
How are bronze anodized finishes classified by industry standards?
Navigating bronze anodized finishes requires understanding key standards. These aren’t just rules; they are a shared language for quality. They ensure everyone, from designer to manufacturer, is on the same page.
Major standards bodies set the benchmarks. Each has a different focus. This dictates the performance and appearance of the final product.
Key Standards Organizations
- AAMA: Primarily for architectural applications.
- Qualanod: The European standard for quality.
- MIL-A-8625: A stringent U.S. military specification.
Let’s look at their primary applications.
| Standard | Primary Focus | Geographic Region |
|---|---|---|
| AAMA | Architectural Aluminum | North America |
| Qualanod | Architectural Quality | Europe |
| MIL-A-8625 | Military & Defense | United States |
Understanding these distinctions is the first step. It helps in selecting the right finish for your project’s needs.
AAMA: The Architectural Benchmark
For architectural projects, the American Architectural Manufacturers Association (AAMA) standards are vital. AAMA 611 is the most relevant specification. It outlines performance for anodized aluminum.
This standard defines two classes. Class I has a thicker anodic coating (0.7 mils or 18 microns). Class II has a thinner coating (0.4 mils or 10 microns). For exterior bronze anodized aluminum, Class I is essential for durability.
Qualanod: The European Quality Seal
In Europe, Qualanod provides a quality label for anodizing. It is a comprehensive system. It covers process control, equipment, and final product testing.
Qualanod ensures consistent quality across different anodizers. This is crucial for large projects with multiple suppliers. It specifies coating thickness, sealing quality, and abrasion resistance. At PTSMAKE, we often reference Qualanod for clients with projects spanning the European market, ensuring compliance and quality. It helps define the expected service life of a finish, a key factor in material tribology4.
MIL-A-8625: The Military Standard
The U.S. military’s MIL-A-8625 is the most demanding standard. It covers anodizing for defense and aerospace applications.
It specifies two main types: Type I (chromic acid) and Type II (sulfuric acid). Bronze finishes fall under Type II. This standard also has two classes: Class 1 (non-dyed) and Class 2 (dyed). For bronze, Class 2 is used, with strict requirements for color uniformity and corrosion resistance.
| Specification | Key Requirement | Typical Application |
|---|---|---|
| AAMA 611 Class I | ≥18 µm thickness | Exterior architecture |
| Qualanod AA 20 | 20 µm average thickness | High-wear architecture |
| MIL-A-8625 Type II | Corrosion & wear resistance | Aerospace, defense parts |
Choosing the right standard is critical. It directly impacts your part’s longevity, appearance, and cost.
AAMA, Qualanod, and MIL-A-8625 offer distinct frameworks for classifying bronze anodized finishes. Each standard ensures quality and performance tailored to specific applications, from architectural exteriors to demanding military components, guiding material selection and processing.
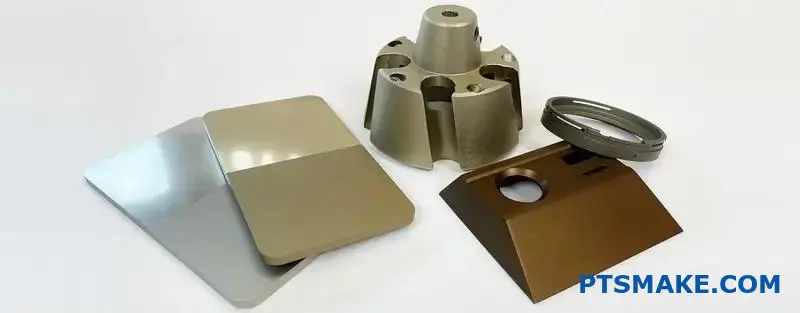
What are the common surface textures combined with bronze anodizing?
Before we apply the bronze anodizing, the part’s surface texture is key. This pre-mechanical finish defines the final look. It dictates how light plays across the surface.
Think of it as the canvas for the color.
Brushed Finish
A brushed finish creates fine, parallel lines. This gives the bronze a satin-like, metallic sheen. It’s great for hiding minor imperfections.
Polished Finish
Polishing creates a mirror-like, reflective surface. When anodized bronze, this results in a deep, rich color. The high gloss makes the part stand out.
Bead-Blasted Finish
Bead blasting produces a uniform, matte, non-directional texture. For bronze anodized aluminum, this creates a soft, non-reflective finish. It has a modern, muted appearance.
Here’s a quick comparison:
| Finish Type | Visual Effect | Common Use Case |
|---|---|---|
| Brushed | Linear, satin sheen | Architectural panels, appliances |
| Polished | Mirror-like, high gloss | Decorative trim, luxury goods |
| Bead-Blasted | Matte, non-reflective | Electronic casings, high-tech parts |
This initial texture is a critical decision. It completely changes the character of the bronze anodized part.
The interaction between texture and light is where the magic happens. It’s not just about the color; it’s about how that color is perceived. A polished surface, for example, creates a strong specular reflection5, making the bronze color appear darker and more saturated in certain angles.
Conversely, a bead-blasted texture diffuses light. This results in a very consistent color from all viewing angles. The bronze appears softer and warmer, without harsh glare. It’s a choice we often recommend at PTSMAKE for user-interface components to reduce eye strain.
Satin Finish
A satin finish is a middle ground. It’s less reflective than polished but smoother than brushed. It gives the bronze a sophisticated, low-sheen luster that feels premium to the touch. It provides a balanced aesthetic.
Choosing the right texture is a critical step in product design. In our experience, the final application dictates the best choice. A consumer electronic device might use bead blasting for a clean, modern feel. High-end architectural trim often uses a brushed finish for its classic elegance.
Based on our tests with clients, we’ve found the texture can subtly alter the perceived hue of the bronze anodizing.
| Finish | Light Interaction | Perceived Bronze Hue | Hides Fingerprints |
|---|---|---|---|
| Polished | Highly reflective, sharp | Deep, dark, rich | Poor |
| Brushed | Directional reflection | Varies with light angle | Good |
| Satin | Soft, diffused sheen | Even, subtle luster | Very Good |
| Bead-Blasted | Highly diffuse, matte | Soft, uniform, light | Excellent |
This choice affects not just aesthetics but also functional aspects like scratch resistance and fingerprint visibility.
Mechanical pre-finishes like brushing, polishing, and bead blasting fundamentally alter the final appearance of bronze anodized parts. Each texture interacts with light uniquely, affecting color depth and sheen. This choice is a crucial design consideration for both aesthetics and functionality.
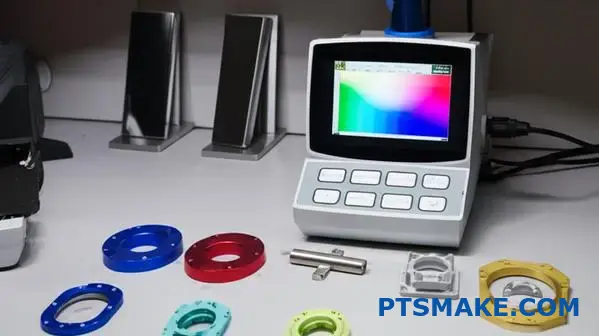
How is color consistency specified and measured objectively?
How do we move past "it looks right"? Subjective checks are unreliable. For true precision, we need numbers.
This is where objective color measurement comes in. It uses a scientific system to define and verify color.
The CIELAB Color Space
We use the CIELAB system, or Lab*. It maps every color with three values. This provides a universal language for color specification.
Defining Tolerances with Delta E (ΔE)
Delta E (ΔE) measures the "distance" between two colors. A low ΔE means the colors are very close. This is crucial for consistency.
| Measurement Method | Description | Advantage |
|---|---|---|
| Visual Check | Relies on human eye and standard lighting. | Quick and simple for initial checks. |
| CIELAB & ΔE | Uses a spectrophotometer for Lab* data. | Quantitative, repeatable, and objective. |
This system ensures every part is a perfect match.
Relying on the human eye alone is a recipe for inconsistency. Two people can look at the same part and see a different shade. This is especially true with complex finishes. For example, a batch of bronze anodized aluminum parts can show slight variations.
These variations might be missed by eye but can be significant. The CIELAB color space solves this problem by assigning a precise coordinate to every color.
Understanding the Lab* Values
The system works with three axes:
- **L***: Represents lightness, from 0 (black) to 100 (white).
- **a***: Represents the red-green axis.
- **b***: Represents the yellow-blue axis.
Using a device called a spectrophotometer6, we measure these values from a master sample. This becomes our standard. We then define an acceptable Delta E (ΔE) tolerance. This is the maximum allowable color difference.
For any production part, we measure its Lab* values. We calculate the ΔE between it and the master sample. If it’s within tolerance, it passes. It’s that simple and precise.
| Delta E (ΔE) Value | Perceptual Interpretation | Typical Use Case |
|---|---|---|
| < 1.0 | Not perceptible by human eye | High-end automotive panels |
| 1.0 – 2.0 | Perceptible through close observation | Consumer electronics casing |
| 2.0 – 3.5 | Perceptible at a glance | General industrial parts |
This data-driven approach removes all guesswork.
Objective color measurement uses the CIELAB system and Delta E tolerances. This method replaces subjective opinion with precise data, ensuring every part we produce at PTSMAKE meets your exact color specifications, guaranteeing consistency across the entire production run.
How can you control color consistency across a large project?
Moving from theory to practice is key. To truly manage color, you need tangible controls. It’s about setting clear, physical benchmarks that leave no room for interpretation.
This approach prevents subjective arguments. It creates a shared, physical reality for you, your team, and us at PTSMAKE. Here are the methods we rely on.
Establish Master Color Standards
First, we create a "master" sample. This is the one perfect piece that defines the target color. All future parts are compared against this single standard.
Define Visual Range
Next, we agree on an acceptable range. We create samples showing the lightest and darkest acceptable shades. This is crucial for finishes like bronze anodized aluminum.
Manage Production Batches
Finally, we control production batches. We request parts from the same manufacturing lot whenever possible. This minimizes variables in processes like anodizing or painting.
| Method | Primary Goal | Best For |
|---|---|---|
| Master Standard | Sets the single ideal color target | High-precision color requirements |
| Visual Range | Defines acceptable light/dark limits | Finishes with natural variation |
| Batch Control | Minimizes process-related shifts | Large volume production runs |
Controlling color is less about software and more about physical discipline. It requires clear communication and agreement before the first part is ever made for mass production.
The Role of Physical Samples
A digital color code is a great start. But it cannot capture the effect of texture, gloss, or material. A physical master standard is non-negotiable.
In past projects at PTSMAKE, we’ve seen how a single approved sample saves weeks of debate. It becomes the ultimate source of truth for everyone involved.
For materials like bronze anodized aluminum, the perceived color changes with the light and viewing angle. That’s why defining an acceptable visual range with physical samples is so important.
We establish a "light limit" and a "dark limit" sample. Any production part must fall between these two physical benchmarks. This removes subjectivity from quality control. It’s a simple pass or fail test.
The Importance of Batching
Color consistency is also tied to process stability. For anodizing, factors like temperature and chemical concentration can cause slight variations between batches.
This is why we often recommend producing all parts for a single assembly from the same material lot and anodizing batch. This minimizes the risk of visible differences when components are assembled side-by-side. Slight shifts in color from anodizing bath depletion7 are less noticeable if all parts shift together. Based on our tests, this is the most effective way to ensure a uniform appearance across a final product.
Effective color management relies on master standards, clear visual range samples, and smart batch control. These practical steps remove guesswork, ensuring the final product meets your exact visual specifications.
How do you design parts to avoid common anodizing defects?
Smart design is your first line of defense. It prevents most common anodizing defects before they ever happen. This is a core principle of Design for Manufacturing (DFM).
Simple changes can make a huge difference. By planning ahead, you ensure a flawless finish.
Key Design Considerations
Three areas need your attention:
- Drainage for chemicals
- Rounded corners and edges
- Placement of contact points
These small details save time and money.
DFM for Anodizing
A well-designed part moves smoothly through the anodizing line. This reduces manual labor and lowers the risk of defects.
| Problem Area | Design Solution | Defect Prevented |
|---|---|---|
| Trapped Liquid | Add Drainage Holes | Chemical Stains & Streaks |
| Sharp Corners | Use Generous Radii | Burning & Bare Spots |
| Visible Marks | Specify Racking Points | Contact Marks on Cosmetic Surfaces |
Thinking about the anodizing process during design is crucial. It’s not just a coating; it’s an electrochemical process. Every feature on your part interacts with the chemical baths and electrical current.
Radii Over Sharp Corners
Sharp internal corners are a common source of trouble. They can trap acid, leading to streaks after sealing. Sharp external corners can cause issues too.
The electrical current concentrates on sharp outer edges. This can cause "burning," an overly thick and brittle oxide layer. Using generous radii, we recommend at least 0.5mm, ensures the current flows evenly. This is especially vital for a uniform appearance, like on a bronze anodized aluminum part.
The Importance of Drainage
Blind holes and deep pockets are like cups. They trap cleaning solutions and acids. When the part moves to the next tank, these trapped liquids bleed out, causing stains.
Adding small, well-placed drainage holes allows fluids to escape. This simple step eliminates chemical carryover, a major cause of cosmetic rejection.
Controlling Racking Points
Every part must be held by a rack to receive electrical current. These contact points will not get anodized, leaving small bare spots. You should always specify where these racking points can go.
Placing them on non-critical surfaces hides these marks. Ignoring this can lead to a Faraday cage effect8 in some cases, causing inconsistent coating. At PTSMAKE, we work with you to identify the best racking locations early in the design phase.
| Guideline | Why It Matters | Best Practice |
|---|---|---|
| Generous Radii | Ensures uniform current density and prevents acid trapping. | Minimum 0.5mm radius on all corners. |
| Drainage Holes | Prevents chemical bleed-out and staining. | Add small holes in pockets and blind holes. |
| Specified Racking | Hides bare spots on non-cosmetic surfaces. | Mark acceptable contact points on your drawings. |
Effective DFM for anodizing involves simple yet critical steps. Adding radii, planning for drainage, and specifying racking points will prevent most common defects. This ensures a consistent, high-quality finish while minimizing production delays and costs.
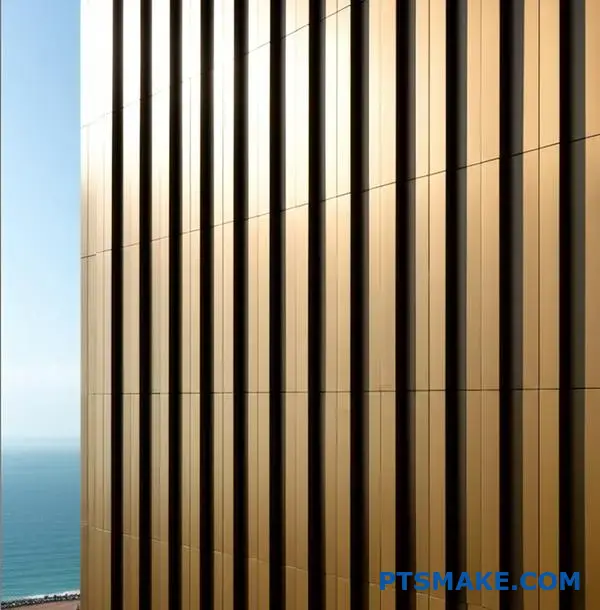
Case Study: Specifying a finish for a coastal high-rise facade.
Coastal projects present unique challenges. The combination of salt spray, high UV exposure, and wind-driven rain is relentless on building materials.
Choosing the right finish is not just an aesthetic decision. It is critical for long-term performance and durability. Let’s break down the specifications for a successful high-rise facade.
Key Environmental Factors
The environment dictates our material choices. Each factor requires a specific countermeasure in the finish specification.
| Factor | Primary Impact | Specification Response |
|---|---|---|
| Salt Spray | Corrosion & Pitting | Thick Anodic Layer |
| High UV Radiation | Color Fading | Stable Pigments |
| Wind-Driven Rain | Water Intrusion | High-Performance Seal |
Our goal was a system that would perform for decades.
Justification for the Specification
In past projects at PTSMAKE, we’ve seen how one wrong choice can compromise an entire facade. Every detail matters, from the base alloy to the final seal. This is how we built a robust specification for this demanding environment.
Base Material: 5005 Alloy Sheet
We started with 5005 aluminum alloy. While other alloys like 6061 offer more structural strength, 5005 provides a far superior surface for anodizing. It ensures a uniform, visually consistent appearance, which is vital for large architectural surfaces.
Finish: AAMA 611 Class I
The core of the protection is the anodizing itself. We specified an AAMA 611 Class I architectural finish. This mandates a minimum thickness of 0.7 mil (18 microns). This thicker Anodic Oxide Layer9 creates a formidable barrier. It is essential for resisting corrosion from airborne salts.
Color and Seal
The specified dark bronze color provides excellent UV stability. The inorganic pigments used for bronze anodized aluminum are highly resistant to fading.
Finally, a high-performance seal is non-negotiable. It closes the natural pores in the anodized layer, preventing corrosive agents from penetrating the surface.
| Component | Specification | Rationale for Coastal Use |
|---|---|---|
| Alloy | 5005 Aluminum Sheet | Superior uniformity for anodizing. |
| Finish | AAMA 611 Class I | ≥0.7 mil thickness for corrosion resistance. |
| Color | Dark Bronze | Excellent UV stability and color retention. |
| Seal | High-Performance | Prevents absorption of salt and pollutants. |
This complete system works together to protect the facade.
This case study shows that a durable coastal facade relies on a synergistic system. The alloy, anodizing class, color, and seal must all be chosen specifically to combat salt, UV, and moisture for long-term integrity and appearance.
How would you resolve a color mismatch dispute between parties?
When a color dispute arises, subjectivity must be removed. The goal is to rely on objective data, not opinions. This is the only path to a fair resolution.
We use a clear, data-driven process. It’s especially useful for finishes like bronze anodized aluminum, where appearance can be subjective.
The Resolution Framework
The process involves comparing production parts to the master sample. We use a spectrophotometer to get precise color data. The results are clear and numerical.
| Step | Action | Outcome |
|---|---|---|
| 1 | Retrieve Master Sample | Establishes the agreed-upon color standard. |
| 2 | Select Production Parts | Gathers samples from the disputed batch. |
| 3 | Measure with Spectrophotometer | Obtains objective Lab* color values. |
| 4 | Compare ΔE Values | Quantifies the difference against the tolerance. |
This method turns a disagreement into a simple data check.
From Opinion to Objective Fact
The foundation for resolving any color dispute is the initial agreement. Before production, both parties must agree on a color master and a Delta E (ΔE) tolerance. This number defines the maximum acceptable color deviation.
When a dispute occurs, we bring out the tools. We take the retained master sample and several production parts. We then measure them under controlled lighting conditions. This is crucial for consistent results.
Using Data to Decide
A spectrophotometer doesn’t "see" color like the human eye. It measures the spectral data of a surface to generate precise coordinates. These coordinates exist within the CIELAB color space10, a three-dimensional model of color.
This process calculates the ΔE value. It’s a single number representing the distance between the sample’s color and the master’s color. For a batch of bronze anodized aluminum parts, the results are unambiguous.
Sample Measurement Comparison
| Sample ID | Master Lab* | Part Lab* | ΔE Value | In Spec (Tolerance < 2.0) |
|---|---|---|---|---|
| Part-001 | 55, 10, 25 | 55.2, 10.5, 25.1 | 0.55 | Yes |
| Part-002 | 55, 10, 25 | 54.1, 11.5, 26.0 | 2.02 | No |
| Part-003 | 55, 10, 25 | 55.5, 9.8, 24.5 | 0.73 | Yes |
The data makes the decision for us. If the ΔE value is within the agreed tolerance, the part passes. If it’s outside, it fails. There is no room for debate. This is the professional standard we uphold at PTSMAKE.
Resolving a color mismatch requires shifting from subjective views to objective facts. Using a spectrophotometer to compare production parts against a master sample provides clear ΔE values. This data-driven approach ensures a fair and indisputable conclusion based on pre-agreed standards.
When is bronze anodizing not the right choice of finish?
Bronze anodizing offers a durable and beautiful finish. However, it’s not a universal solution for every project. The right choice depends entirely on your product’s final application.
Sometimes, other finishing processes are simply better suited.
Key Decision Factors
Color & Aesthetics
If you need a specific color that isn’t metallic, like a bright red or blue, anodizing won’t work. The process is limited to a specific range of colors.
Environmental Resistance
For parts exposed to extreme chemicals or acids, standard anodizing might not provide enough protection. A more robust coating may be necessary.
Post-Finish Assembly
Planning to weld parts after they are finished? Anodizing creates an insulating layer that complicates welding significantly.
Here is a quick guide to help you decide.
| Scenario | Bronze Anodizing | Better Alternative |
|---|---|---|
| Needs a bright, non-metallic color | No | Powder Coating |
| Extreme chemical exposure | No | PVDF Coating |
| Welding after finishing | No | Finish after welding |
While bronze anodized aluminum is a fantastic choice for many applications, understanding its limits is crucial. At PTSMAKE, we help clients navigate these decisions to avoid costly mistakes. Let’s break down when an alternative finish is superior.
A Closer Look at Alternative Finishes
When Color Palette is a Priority
Powder coating is your best option for extensive color choice. It uses a dry powder applied electrostatically. This process offers thousands of colors, textures, and gloss levels. It provides a thick, durable finish that is more chip-resistant than liquid paint.
For Harsh Chemical Environments
When a part needs to withstand harsh chemicals, solvents, or extreme UV exposure, a PVDF coating is superior. Its fluoropolymer11 base offers exceptional chemical inertness. In past projects with clients in the chemical processing industry, we’ve seen PVDF coatings far outperform anodizing in terms of long-term stability and protection.
Welding Post-Finishing
Anodizing creates a hard, non-conductive aluminum oxide layer. This layer must be ground off before welding, adding an extra step and risking damage to the part. It is far more efficient to perform all welding on the raw aluminum and then apply the finish.
This table provides more detail.
| Feature | Bronze Anodizing | Powder Coating | PVDF Coating |
|---|---|---|---|
| Color Options | Limited metallic range | Nearly unlimited | Good range, not as vast as powder coat |
| Chemical Resistance | Good | Moderate | Excellent |
| UV Resistance | Very Good | Good | Excellent |
| Weldability | Poor (must be removed) | Poor (must be removed) | Poor (must be removed) |
| Best For | Durability, metallic look | Color customization | Extreme environments |
Choosing the right finish isn’t just about looks; it’s about performance and manufacturing efficiency. Consider the entire lifecycle of your part. Bronze anodizing has its place, but sometimes alternatives like powder coating or PVDF are a smarter engineering and business decision.
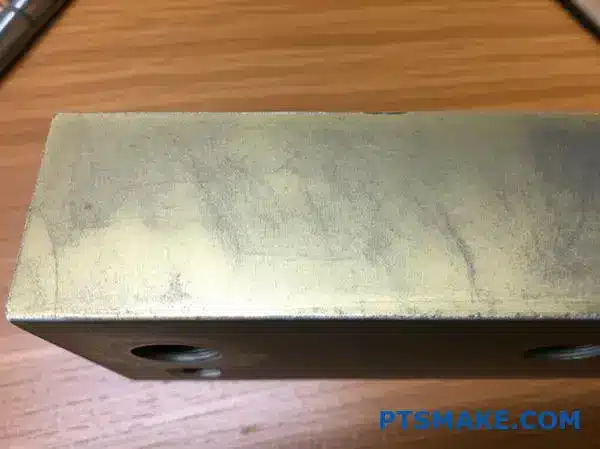
Analyze a failure: Why did a bronze finish fade in 5 years?
A client showed us a faded bronze anodized aluminum part. It looked terrible after only five years outdoors. This was a classic case of failure.
Let’s break down the likely culprits. Based on our analysis, we can narrow it down to three main suspects.
Each one represents a critical step in the anodizing process. Getting any of them wrong leads to this kind of failure.
| Potential Cause | Description |
|---|---|
| Coating Class | Class II was used instead of the more durable Class I. |
| Poor Seal | The anodic layer was not sealed properly after dyeing. |
| Unstable Dye | An organic dye was used instead of metallic salts. |
When a finish fails, we must investigate the root cause. In my experience, it’s rarely just one thing. Often, it’s a combination of factors. Here’s a deeper look at our three hypotheses for this faded part.
An Underspecified Coating
Anodized coatings come in two main types for architecture. Class I is for exteriors, and Class II is for interiors.
A Class II coating is much thinner. It simply cannot handle harsh UV rays, acid rain, and temperature swings. For outdoor use, specifying a Class I coating is essential for long-term durability.
The Critical Role of Sealing
After an aluminum part is anodized and colored, the surface is porous. The sealing stage closes these pores, trapping the color particles inside.
A poor or incomplete seal leaves the color vulnerable. It’s like leaving a door open during a storm. UV radiation and moisture get in and break down the dye. Proper sealing protects the anodic layer porosity12 and locks in the color.
Choosing the Right Colorant
The method of coloring is also a key factor. Not all bronze colors are created equal. The choice here makes a massive difference.
Organic Dyes vs. Metallic Salts
Many suppliers use organic dyes because they are cheaper. However, they have poor UV stability and fade quickly in sunlight.
Metallic salts, applied through electrolytic coloring, are far more durable. These inorganic particles are highly resistant to UV degradation.
| Colorant Type | UV Stability | Recommended Use |
|---|---|---|
| Organic Dyes | Low | Indoor Applications |
| Metallic Salts | High | Outdoor / Architectural |
For a long-lasting bronze anodized aluminum finish, metallic salts are the only reliable choice for outdoor applications.
The premature fading on this bronze part wasn’t an accident. It stemmed from clear process failures: using an indoor-grade coating, improper sealing, or a low-cost organic dye. These mistakes are avoidable with proper specifications and quality control.
How can you innovate with bronze anodized aluminum in product design?
Bronze anodized aluminum offers timeless elegance. But true innovation means going beyond the standard. Don’t just select a finish; design it.
Think about how to make your product stand out. You can create unique visual and tactile experiences. This elevates your design from good to exceptional.
Pushing Creative Boundaries
Combining materials is a great start. Also, consider creating custom patterns and textures. These methods can define a product’s identity.
| Standard Approach | Innovative Approach |
|---|---|
| Single material use | Combination with wood/steel |
| Uniform surface | Custom patterns/textures |
| Basic brushed finish | Selective masking effects |
True product distinction lies in the details. Moving beyond a simple bronze finish opens up many design possibilities. It’s about being intentional with the surface itself. In past projects at PTSMAKE, we’ve explored these custom approaches with clients.
Advanced Finishing Strategies
Combining Materials for Contrast
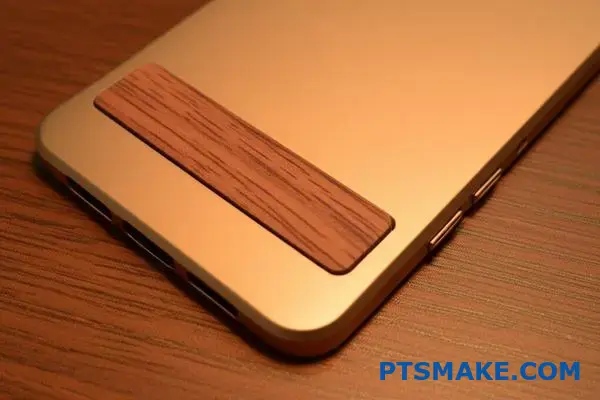
Pairing bronze anodized aluminum with other materials creates a striking look. Imagine the warmth of bronze next to natural wood. Or the contrast against polished stainless steel. This technique adds both visual interest and a premium feel to any product.
Creating Patterns with Masking
You can create incredibly detailed patterns on the surface. We achieve this using techniques before the anodizing step. For example, subtractive patterning13 allows for logos or geometric designs. This leaves parts of the raw aluminum exposed or dyed a different color, creating a sharp two-tone effect.
Developing Custom Textures
Why stick to a standard brushed finish? We can explore other options. Techniques applied before anodizing can create unique tactile feelings.
| Technique | Resulting Effect |
|---|---|
| Laser Etching | Fine, precise lines and patterns |
| Bead Blasting | A uniform, non-directional matte finish |
| Mechanical Brushing | Custom linear or circular textures |
These pre-treatments change how the surface feels and reflects light. This adds another layer of sophistication to the final product.
To innovate with bronze anodized aluminum, look beyond the color. Combine it with other materials, use masking for unique patterns, and develop custom textures. These details can truly define your product and create a memorable user experience.
Discover Bronze Anodized Aluminum Solutions at PTSMAKE
Ready to elevate your project with expert bronze anodized aluminum finishing? Contact PTSMAKE now for a fast, tailored quote. Our precision manufacturing delivers consistent color, durability, and unbeatable reliability—trusted by world-class brands. Send your inquiry today and start building with confidence!

Learn how this electrical property is crucial for achieving precise and consistent color results in anodizing. ↩
Learn how this property can protect your sensitive electronic components from electrical failure. ↩
Learn how this electrical parameter directly impacts the final color and coating quality. ↩
Understand the science of friction, wear, and lubrication on surfaces. ↩
Learn how light physics impacts the perceived quality and appearance of your finished parts. ↩
Learn about the instrument that makes objective color measurement possible and ensures quality. ↩
Learn how chemical changes in the anodizing process affect your product’s final color and finish. ↩
Learn how part geometry influences electrical fields to prevent uneven anodized coatings. ↩
Understand the science of how this protective layer is formed and its key properties for durability. ↩
Explore the 3D model used for precise, objective color communication in manufacturing. ↩
Discover how this high-performance polymer provides superior chemical and UV resistance for your parts. ↩
Understand how this layer’s microscopic structure is crucial for colorfastness and corrosion resistance. ↩
Learn the technical details of creating intricate, permanent designs on anodized aluminum surfaces. ↩