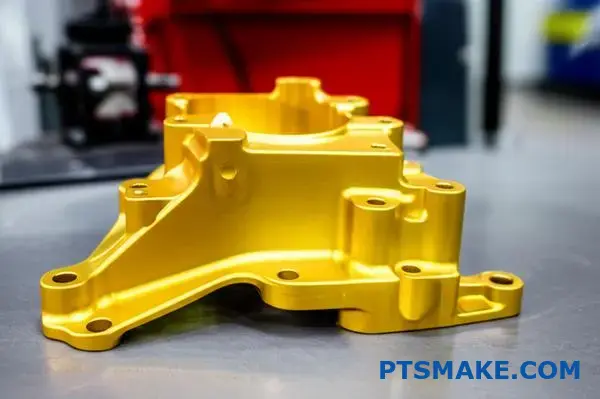
Finding the perfect gold anodized finish for your aluminum parts can feel like chasing a moving target. You invest time and resources, only to face inconsistent colors, batch variations, and finishes that don’t meet your specifications.
Gold anodizing is technically a coloring process that dyes aluminum’s oxide layer to simulate gold appearance, not actual gold plating. The process involves sulfuric acid anodizing followed by organic or inorganic dye application to achieve various gold shades with different durability characteristics.
I’ve worked with clients who struggled with these exact challenges at PTSMAKE. This guide breaks down the technical fundamentals, process controls, and quality systems you need to achieve consistent, high-quality gold anodized finishes from prototype to production.
Why is ‘gold anodizing’ technically coloring aluminum to look gold?
The term ‘gold anodizing’ often creates confusion. Many people think it involves applying real gold to a part.
However, that is not the case. It is a specific surface treatment for aluminum. We use it to create a beautiful, gold-colored finish.
A Matter of Chemistry, Not Precious Metal
This process enhances aluminum’s durability and appearance. It does so without the high cost of actual gold.
Let’s look at a quick comparison.
| Finishing Process | Uses Real Gold? | Base Material |
|---|---|---|
| Gold Anodizing | No | Aluminum |
| Gold Plating | Yes | Various Metals |
This distinction is crucial for material selection.
The Anodizing Process Explained
So, how does it work? Anodizing is an electrolytic process. It thickens the natural oxide layer on aluminum’s surface. This creates a hard, durable, and porous coating.
This controlled oxidation is key to the entire finish. It’s much tougher than the raw aluminum underneath.
Creating the Gold Color
Once we form this porous oxide layer, we introduce color. This is typically done through two methods.
1. Dyeing
The anodized part is submerged in a tank. This tank contains a dissolved organic dye of a gold color. The pores in the oxide layer absorb this dye.
2. Electrolytic Coloring
Alternatively, metal salts are deposited into the pores. A second electrolytic1 step does this. The type of metal salt and process conditions determine the final color, which can be a stable gold shade.
The final step is sealing. The part is treated, often with hot water. This closes the pores, locking the color in permanently. It also boosts corrosion resistance. At PTSMAKE, we manage each step carefully. This ensures a consistent and durable finish for every component.
| Step | Key Action | Result |
|---|---|---|
| 1. Anodize | Grow oxide layer | Creates porous surface |
| 2. Color | Add dye or salts | Fills pores with color |
| 3. Seal | Close pores | Locks in color, adds protection |
Gold anodizing creates a protective, gold-colored finish on aluminum without using any actual gold. The process involves growing a porous oxide layer and then coloring it, offering both aesthetic appeal and enhanced durability for parts.
What role does the aluminum alloy play in final appearance?
Not all aluminum alloys are created equal. Especially when it comes to appearance after anodizing. The final look depends heavily on the alloy you choose.
Different series, like 6061 or 7075, contain unique alloying elements. These elements directly influence the base color of the anodic film. This initial color affects how the part accepts dye.
Achieving a specific shade, like in gold anodizing, starts here. The alloy choice is the foundation for the final color and consistency.
| Alloy Series | Key Alloying Elements | Typical Oxide Layer Color |
|---|---|---|
| 5052 | Magnesium (Mg) | Clear, transparent |
| 6061 | Magnesium (Mg), Silicon (Si) | Light Grayish |
| 7075 | Zinc (Zn), Copper (Cu) | Yellowish, Dark Gray |
The Influence of Alloying Elements on Color
The specific metals mixed into the aluminum create different outcomes. Think of it as a canvas. Some alloys give you a clean, white canvas, while others give you a gray or yellow one.
Copper’s Impact in 7075
For instance, 7075 alloy is known for its high strength, thanks to copper. However, this copper content creates a naturally darker, often yellowish or brownish, oxide layer. When you try to apply a light gold dye, the base color can muddy the final appearance. The result is often a duller, less vibrant gold.
Magnesium’s Advantage in 5052
On the other hand, 5052 alloy, with magnesium as its primary element, produces a very clear and transparent oxide layer. This makes it an excellent choice for bright, decorative colors. The clear base doesn’t interfere with the dye. It allows for a true and consistent gold anodizing finish.
The structure of the coating itself is also affected. Some alloys produce a more uniform oxide layer porosity2, which is key for consistent dye absorption. In past projects at PTSMAKE, we’ve guided clients toward 5052 for purely cosmetic parts for this very reason.
| Alloy | Dye Absorption & Final Appearance | Best For |
|---|---|---|
| 5052 | Excellent, uniform dye uptake | Bright, decorative colors |
| 6061 | Good, versatile, slight gray tint | General purpose, functional |
| 7075 | Fair, can appear mottled or dull | High-strength parts, dark colors |
Alloy selection is a critical first step. The inherent properties of the aluminum, dictated by its alloying elements, directly influence the base color of the anodic film and its ability to absorb dye, setting the stage for the final aesthetic outcome.
How does anodic film thickness relate to perceived gold color?
Achieving the perfect gold color isn’t just about the dye. The thickness of the anodic film is the real controller. It dictates the color’s depth and durability.
At PTSMAKE, we precisely manage this process. We adjust key factors to build the right foundation for your desired finish.
Key Control Factors
Anodizing time and current density are crucial. Longer times or higher currents create a thicker oxide layer. This control is fundamental for consistent results in gold anodizing.
| Parameter | Effect on Thickness |
|---|---|
| Anodizing Time | Longer time = Thicker film |
| Current Density | Higher density = Thicker film |
This thickness directly impacts how the gold dye is absorbed. It’s a critical step for a quality finish.
The relationship between process parameters and film thickness is very direct. It’s a science we have refined over many projects. Think of it as building a structure with a specific, required height.
Controlling Film Growth
We manipulate the electrical charge to control the oxide layer’s growth rate. The amount of charge passed through the part determines the film thickness. We precisely calculate the required current density3 and anodizing time to achieve this. This ensures the porous aluminum oxide layer reaches the target depth for optimal dye absorption.
Why Thickness Matters for Gold Color
A thicker anodic film has deeper, more porous structures. This physical characteristic allows it to absorb more gold dye particles. The result is a richer, more vibrant gold appearance that our clients often request for premium products.
A thin film simply cannot hold enough dye. This leads to a pale, washed-out color that lacks visual depth and perceived quality.
Furthermore, a thicker, properly sealed film provides superior lightfastness. It protects the dye from UV degradation, ensuring the gold color remains true over time without fading.
| Film Thickness | Color Depth | Lightfastness |
|---|---|---|
| Thin | Pale, less saturated | Lower |
| Thick | Rich, vibrant | Higher |
In past projects at PTSMAKE, matching film thickness to the specific gold dye and end-use application has proven key for success.
Controlling anodizing time and current density is essential for building the right oxide thickness. This directly influences the depth, vibrancy, and UV resistance of the final gold finish, ensuring a high-quality, long-lasting appearance for your parts.
What defines a high-quality gold anodized finish from first principles?
Defining a quality gold anodized finish goes beyond a simple visual check. We must use objective Key Performance Indicators (KPIs). These metrics separate a merely good finish from an exceptional one.
Visual & Physical Standards
Color uniformity is the first test. The hue should be consistent across the entire part surface. Batch-to-batch consistency is equally critical for multi-part assemblies. Film thickness also plays a huge role.
A thicker anodic layer generally offers better protection. We measure these aspects precisely.
| Metric | Importance | How It’s Measured |
|---|---|---|
| Color Uniformity | Ensures a consistent look on a single part. | Spectrophotometer, Visual Inspection |
| Batch Consistency | Critical for products with multiple components. | Colorimeter, Control Samples |
| Film Thickness | Directly impacts durability and corrosion resistance. | Eddy Current Gauge |
True quality is proven through rigorous testing. A beautiful gold finish is useless if it scratches or corrodes easily. We must quantify its durability to ensure it performs well in its intended environment.
Quantifying Durability and Resistance
Abrasion resistance is a key factor. We often use the Taber test to simulate wear and tear over time. This tells us how the surface will hold up against physical contact. It’s a non-negotiable test for high-contact parts.
Corrosion resistance is another pillar of quality. Depending on the application, a part might be exposed to moisture or harsh chemicals. The salt spray test4 is a common method we use. It accelerates corrosion to predict long-term durability.
Finally, we assess lightfastness. Will the gold color fade when exposed to UV light over time? For products used outdoors or near windows, this is a critical performance indicator.
| Performance Test | What It Measures | Why It Matters |
|---|---|---|
| Taber Test | Abrasion Resistance | Predicts how the finish withstands physical wear. |
| Salt Spray Test | Corrosion Resistance | Ensures durability in humid or corrosive settings. |
| Lightfastness Test | UV Stability / Color Fade | Guarantees the gold color remains vibrant over time. |
At PTSMAKE, combining these tests gives our clients a complete picture of the finish’s performance, ensuring it meets their specifications.
A high-quality gold anodized finish is defined by measurable KPIs. These include visual consistency in color and thickness, along with proven resistance to abrasion, corrosion, and UV fading. These tests ensure both aesthetic appeal and long-term functional reliability.
What are the main types of gold anodizing processes available?
Achieving that perfect gold finish isn’t a one-size-fits-all process. The method we choose at PTSMAKE depends on your final application. It really comes down to the coloring technique used after the initial anodizing step.
The main categories are dyeing and electrolytic coloring. Each offers a different balance of color vibrancy, durability, and cost. Understanding them is key to a successful product.
Main Coloring Methods
Here is a quick overview of the primary methods.
| Coloring Method | Key Feature |
|---|---|
| Organic Dyeing | Bright, vibrant colors |
| Inorganic Dyeing | Good UV resistance |
| Electrolytic Coloring | Highest durability |
This choice directly impacts the part’s final look and performance.
When we talk about gold anodizing, the conversation is really about coloring an aluminum oxide layer. The durability and appearance of the final product depend entirely on how we introduce that color. Each method has distinct advantages for specific applications.
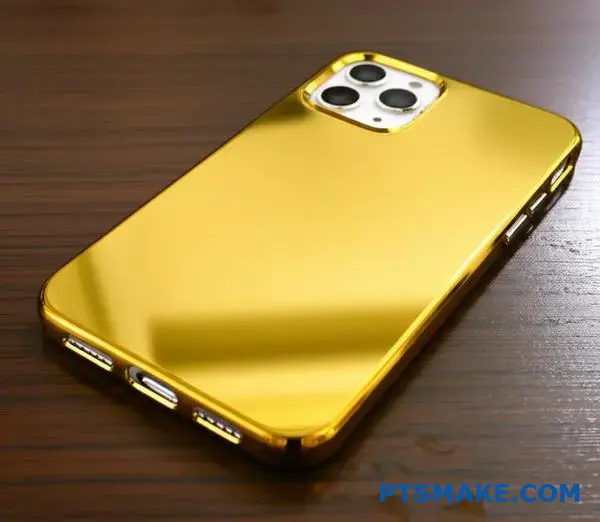
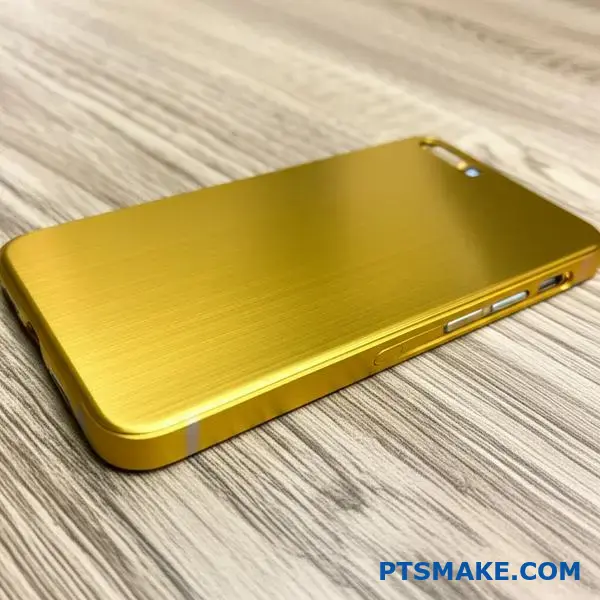
Organic Dyeing
This is the most common method for achieving bright, decorative gold tones. After anodizing, the part is submerged in a tank of hot, water-based organic dye. The porous oxide layer absorbs the color, which is then sealed in. It’s a great, cost-effective option for consumer electronics.
Inorganic Dyeing
Inorganic dyeing uses metallic salts instead of organic compounds. These particles precipitate within the pores of the coating. This method often provides better lightfastness5 than many organic dyes, though the color palette can be more limited. It strikes a balance between appearance and resilience.
Two-Step Electrolytic Coloring
For maximum durability, electrolytic coloring is the top choice. This is a two-step process. First, we create the standard anodic layer. Then, the part goes into a second bath with metallic salts. An AC voltage is applied, depositing metal particles into the pores. This creates incredibly durable, fade-resistant finishes from light bronze to deep gold.
| Method | Color Vibrancy | Durability (UV/Wear) | Typical Use Case |
|---|---|---|---|
| Organic Dyeing | High | Low to Medium | Consumer electronics, decorative trim |
| Inorganic Dyeing | Medium | Medium to High | Outdoor architectural components |
| Electrolytic Coloring | Subtle Tones | Very High | High-wear parts, automotive trim |
The electrolytic process is favored for parts that need to withstand harsh environments.
Choosing the right gold anodizing process involves balancing aesthetics with performance. Whether you need a bright, decorative finish or a highly durable, lightfast coating for harsh environments, understanding these coloring methods ensures your final product meets every specification.
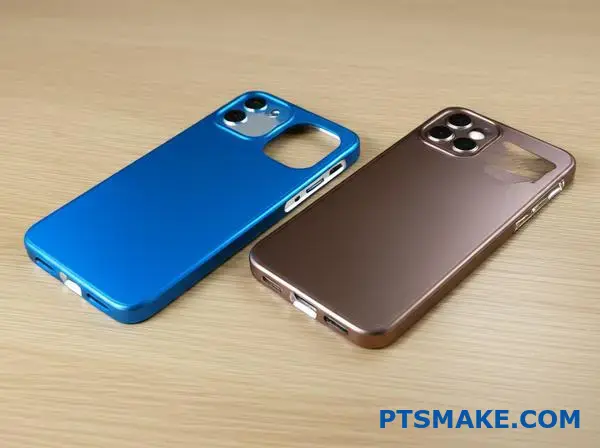
How do organic vs. inorganic dyes for gold differ in performance?
Choosing between organic and inorganic dyes is a critical decision. It directly impacts your product’s final look, durability, and cost. Each type has distinct advantages and disadvantages.
Organic dyes provide a brilliant, wide spectrum of colors. However, their performance under stress, like UV exposure, can be limited.
In contrast, inorganic dyes offer superior stability. Their color range is more constrained, but they excel in harsh environments. The best choice depends on your specific application needs.
Here is a quick comparison:
| Feature | Organic Dyes | Inorganic Dyes |
|---|---|---|
| Color Range | Very Wide & Vibrant | Limited, Earth Tones |
| UV Stability | Lower | High |
| Heat Resistance | Moderate | High |
| Cost | Generally Lower | Generally Higher |
| Bath Maintenance | More Complex | Simpler |
A Deeper Performance Analysis
When we look closer, the trade-offs become clearer. This helps in making an informed decision for your parts, especially in demanding applications like gold anodizing. The right dye ensures the finish meets performance specifications.
Color Vibrancy vs. Durability
Organic dyes are absorbed into the pores of the anodized layer. This creates deep, vibrant colors. Think of bright reds, blues, and greens. However, these organic molecules can break down over time.
Inorganic dyes are different. They are formed by precipitating metallic salts within the pores. This process creates an extremely durable, fade-resistant finish. These colors are typically more subtle, like bronze, black, and gold tones.
UV Stability and Heat Resistance
For products used outdoors or in high-heat environments, stability is key. Our tests show inorganic dyes significantly outperform organic ones here.
Organic dyes can fade quickly under direct sunlight. Their lightfastness6 is a primary concern for many applications. They also have lower heat resistance, which can limit their use.
Inorganic options, due to their metallic salt structure, are nearly immune to UV degradation and can withstand much higher temperatures without color shifting.
Operational Complexity and Cost
Organic dye baths often require more careful monitoring. They can be sensitive to contamination and pH fluctuations, adding complexity.
Inorganic dye baths are typically more stable and easier to maintain. While the initial dye cost might be higher, the reduced maintenance and superior durability can offer better long-term value for high-performance projects.
Organic dyes provide vibrant colors at a lower cost, but they lack the UV and heat stability of inorganic dyes. Inorganic options are incredibly durable and stable, making them ideal for demanding applications despite a more limited color palette and higher initial cost.
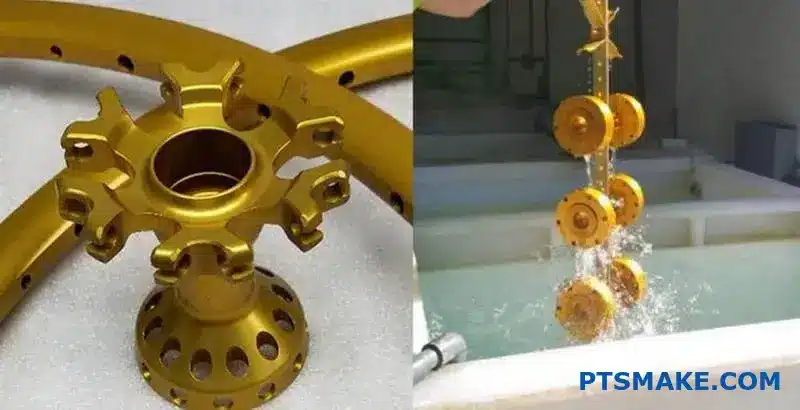
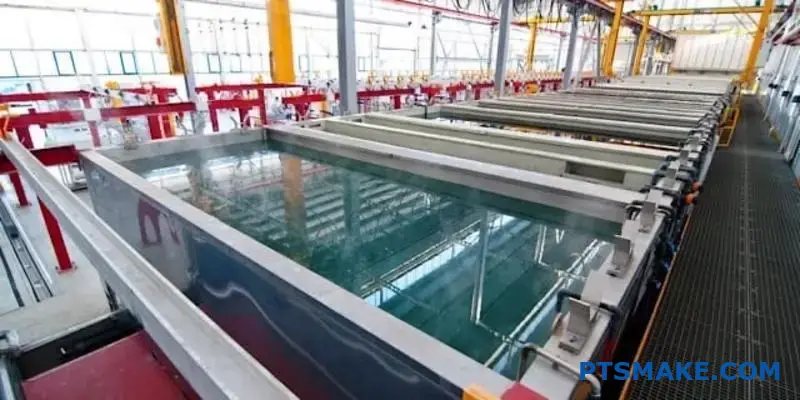
What is the structure of a complete gold anodizing production line?
A complete gold anodizing line is a highly organized sequence. Each station prepares the part for the next critical step. Think of it as a domino effect. If one step fails, the entire finish is compromised.
The process flow is logical and unforgiving. At PTSMAKE, we follow a strict multi-stage sequence. This ensures consistent, high-quality results for every component.
The Core Sequence of Tanks
Here is a typical layout of the production line tanks.
| Step Number | Tank / Station | Purpose |
|---|---|---|
| 1 | Alkaline Cleaning | Removes oils and grease |
| 2 | Rinse | Removes cleaning agents |
| 3 | Etching (Caustic) | Creates a uniform matte surface |
| 4 | Rinse | Removes etching solution |
| 5 | Desmut | Removes alloy residue |
| 6 | Rinse | Prepares for anodizing |
| 7 | Anodizing | Forms the oxide layer |
| 8 | Rinse | Removes acid residue |
| 9 | Dyeing (Gold) | Colors the part |
| 10 | Rinse | Removes excess dye |
| 11 | Sealing | Closes the anodic pores |
| 12 | Final Rinse | Final cleaning |
This structured flow is essential for a flawless finish.
The sequence isn’t just a tradition; it’s rooted in surface chemistry. Each step meticulously prepares the aluminum substrate for the next. Skipping a rinse, for example, leads to contamination. This is called "drag-out," where chemicals from one tank spoil the next.
Why Each Step is Non-Negotiable
Poor pre-treatment is a common failure point. If cleaning is incomplete, the etching will be uneven. This results in a blotchy appearance after anodizing. Similarly, inadequate desmutting leaves behind residues that can cause spots or discoloration. The integrity of the final gold anodizing finish depends entirely on this disciplined progression.
This is especially true for achieving specific colors. For durable gold tones, a process called Electrolytic coloring7 is often used. This method deposits metallic salts into the pores of the anodic layer, creating a very lightfast finish. It requires an exceptionally clean and well-prepared surface to work correctly.
The Critical Role of Rinsing
Rinsing might seem minor, but it’s crucial. We’ve seen projects from other suppliers fail simply due to poor rinsing. It prevents cross-contamination between highly reactive chemical baths.
| Skipped Step | Potential Consequence |
|---|---|
| Cleaning | Uneven etch, poor anodizing adhesion |
| Desmut | Dark spots, streaks, discoloration |
| Rinsing | Chemical contamination, stained finish |
| Sealing | Poor corrosion resistance, color fading |
Every tank has a purpose. Following the sequence ensures the anodic layer is clean, uniform, and ready for a perfect gold finish.
The gold anodizing line is a precise, sequential process. Each tank, including every rinse stage, is essential for building a durable and visually perfect coating. Skipping steps inevitably compromises the final quality, leading to costly rework and delays.
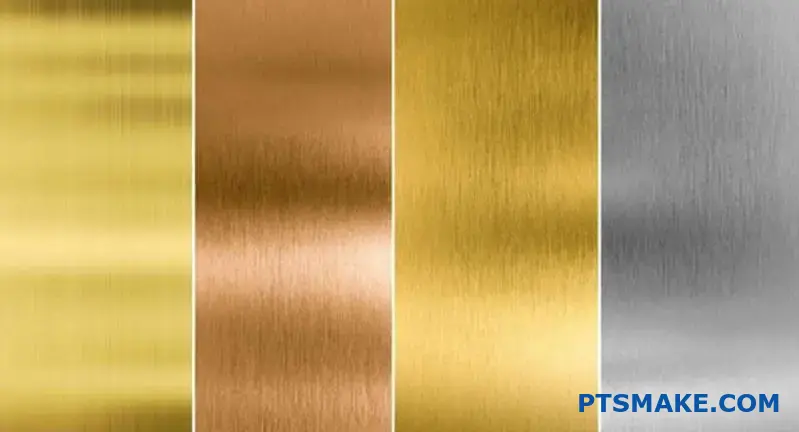
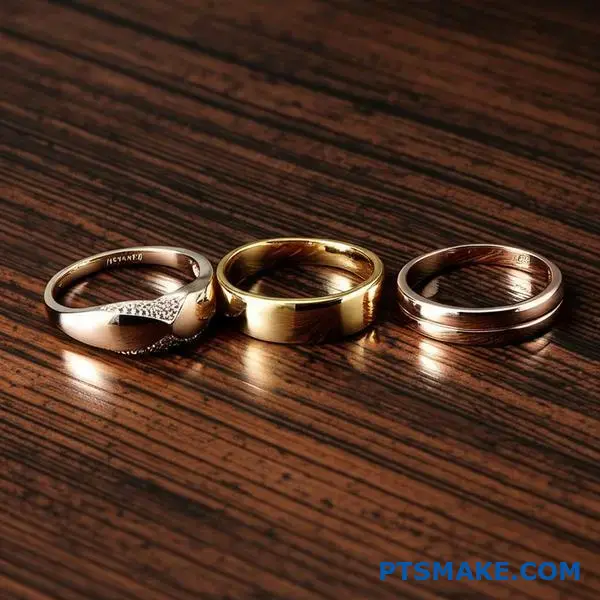
How are different shades of gold (14k, 18k, rose gold) achieved?
Achieving the perfect shade of gold isn’t luck; it’s a controlled science. The process relies on precise manipulation of several key variables. Think of it like a recipe.
We must carefully manage every step. This ensures the final color matches the exact client specification.
Key Control Factors
The main factors we adjust are the dye, immersion time, and bath conditions. Each plays a distinct role.
| Control Factor | Impact on Final Color |
|---|---|
| Dye Blend | Determines the hue (e.g., yellow vs. rose) |
| Concentration | Affects the color’s saturation and depth |
| Immersion Time | Controls how much dye is absorbed |
| Bath Conditions | pH and temperature influence dye uptake rate |
Mastering these elements is essential for consistent results.
Achieving a specific gold shade through anodizing is a meticulous process. It goes far beyond simply dipping a part into a dye. At PTSMAKE, we treat it as a core part of precision engineering.
Blending Dyes for Hue Control
To create a rose gold finish, we don’t use a single "rose gold" dye. Instead, we create a custom blend. We start with a yellow gold base and add precise amounts of red dye until we hit the target hue. It’s a delicate balance.
Adjusting for Color Depth
The richness of the color is controlled by two factors. Dye concentration and immersion time work together. A higher concentration or a longer immersion will result in a deeper, more saturated color. This is how we produce both a light 14k look and a deep 18k shade.
The Role of the Dye Bath
The chemistry of the electrolyte bath8 is critical. Even small changes in pH or temperature can dramatically alter the final shade. We maintain our dye baths within extremely tight tolerances to guarantee color consistency across an entire production run. This control is fundamental to high-quality gold anodizing.
| Variable | Adjustment | Resulting Effect |
|---|---|---|
| Temperature | Increase | Faster dye absorption, potentially darker shade |
| pH Level | Alter | Changes dye solubility and uptake rate |
| Time | Extend | Deeper color saturation |
| Concentration | Increase | More intense, less transparent color |
Controlling these factors allows us to deliver repeatable, high-quality finishes that meet precise design requirements every single time.
Mastering gold anodizing requires precise control over dye blends, concentration, immersion time, and bath chemistry. This scientific approach ensures we can consistently replicate any target shade, from light 14k to rich rose gold, meeting exact client specifications every time.
How do specifications like MIL-A-8625 apply to gold anodizing?
MIL-A-8625 is a crucial military specification. It sets the standard for anodic coatings on aluminum. When we talk about gold anodizing, we are usually looking at Type II, Class 2.
Type II refers to sulfuric acid anodizing. Class 2 means the coating is dyed. The specification doesn’t list "gold" as a color. But it provides the rules any color, including gold, must follow.
Key MIL-A-8625 Requirements
This spec ensures the finish is more than just cosmetic. It dictates performance. At PTSMAKE, we treat it as a blueprint for quality.
| Requirement | Focus for Gold Anodizing |
|---|---|
| Film Thickness | Durability and color depth |
| Corrosion Resistance | Long-term protection of the substrate |
| Color Uniformity | Consistent appearance across a batch |
Meeting these standards is non-negotiable for aerospace, defense, and medical applications.
Understanding MIL-A-8625 is key to successful gold anodizing projects. This spec is not just a guideline; it’s a strict set of performance criteria. It ensures the final product is both beautiful and robust.
Breaking Down Type II, Class 2 for Gold
The specification details exactly what to measure. This includes coating weight, thickness, and resistance to corrosion. It’s a comprehensive quality check.
Film Thickness Nuances
For Type II, thickness is critical. It typically ranges from 0.0003 to 0.0007 inches. This thin layer provides hardness and wear resistance. The dye for gold anodizing is absorbed into this porous layer before sealing. A consistent thickness ensures a uniform color.
Performance Testing
Corrosion resistance is tested using a salt spray test (ASTM B117). The part must withstand 336 hours without showing signs of corrosion. The coating also needs good lightfastness9, so the gold color doesn’t fade when exposed to UV light. In past projects, we’ve found dye quality is paramount here.
| Test Parameter | MIL-A-8625 Requirement (Typical) | Implication for Gold Finish |
|---|---|---|
| Salt Spray (ASTM B117) | 336 hours minimum | The anodic layer must fully protect the aluminum. |
| Coating Weight | Varies by alloy | Influences corrosion resistance and dye uptake. |
| Color Match | Match approved sample | Requires tight process control for consistency. |
Ultimately, the spec guarantees that a gold anodized part is reliable for its intended environment. It’s a promise of quality that we take very seriously.
MIL-A-8625 provides a clear framework for gold anodizing. It ensures the finish meets strict criteria for thickness, corrosion resistance, and color stability. This guarantees a high-performance part, not just a decorative one, which is our focus at PTSMAKE.
How do you develop a process sheet for a specific gold color?
Creating a repeatable gold color isn’t magic. It’s science. We call it the "recipe," or the process sheet. This document is the single source of truth.
It ensures every part looks identical. From the first prototype to the ten-thousandth unit. This sheet records every critical parameter. It guarantees consistency for every single batch.
At PTSMAKE, this is a non-negotiable step. It eliminates guesswork and ensures quality.

A comprehensive process sheet is your blueprint for success. It details every step with precision. Missing even one variable can lead to color variations.
Core Material and Preparation
First, specify the exact aluminum alloy. Different alloys, like 6061 versus 7075, react differently. This changes the final color. Etch time and chemical concentration are also critical. They prepare the surface for anodizing.
Anodizing and Dyeing Parameters
This is where the color is truly born. We record anodizing settings like voltage, current density, and time. Then comes the dyeing stage. Every detail matters here.
We document the specific dye name and its concentration. Time, temperature, and pH level of the dye bath are also recorded. Even factors like bath agitation10 are noted for perfect uniformity.
Here is a simplified example of what a process sheet section might look like.
| Parameter | Specification | Notes |
|---|---|---|
| Alloy Type | Aluminum 6061-T6 | Customer Specified |
| Etch Time | 90 seconds | Caustic etch solution |
| Anodizing Voltage | 15 V | +/- 0.5 V tolerance |
| Dye Name | Gold S-3 | Brand/Supplier Name |
| Dye Temp | 60°C | Maintain within 1°C |
| Dye pH | 5.5 | Check every hour |
| Sealing Method | Mid-temp nickel acetate | Ensures durability |
Final Sealing
The final step is sealing. The method used, whether hot water or a chemical seal, locks in the color. It also enhances durability. This must be consistent for every part.
A detailed process sheet is the foundation of repeatable gold anodizing. It transforms an art into a precise, controllable science, ensuring every part meets exact specifications and quality standards.
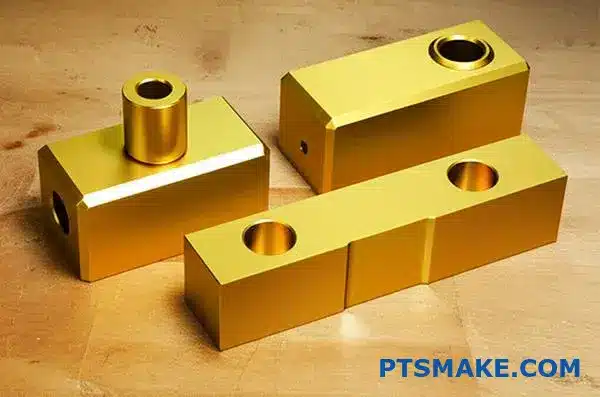
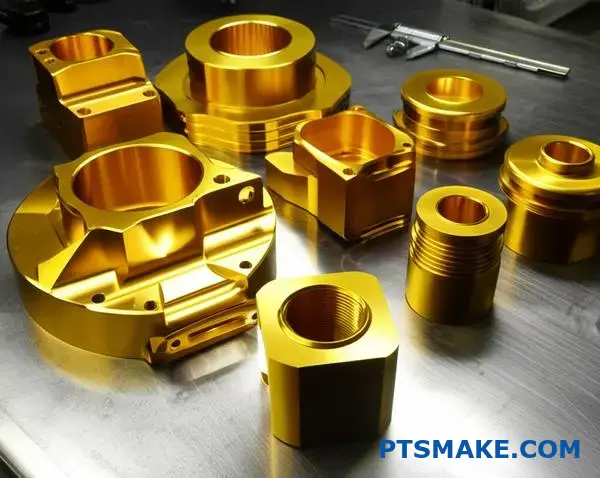
How do you achieve a consistent gold finish on complex geometries?
Achieving a consistent gold finish on complex parts is a real test of skill. The main challenge comes from features like deep bores or shielded areas.
These geometries often prevent uniform current flow. They also limit access for the dye during the gold anodizing process.
This results in an uneven or faded appearance. It compromises both the look and the protective quality of the finish. Let’s explore how we tackle this.
Common Geometric Challenges
| Feature | Primary Challenge | Result of Poor Process |
|---|---|---|
| Deep Bores | Poor Current Penetration | Lighter or No Anodizing Inside |
| Shielded Areas | Blocked Solution Flow | Uneven Color Distribution |
| Sharp Internal Corners | High Current Density | Burning or Thicker Coating |

Overcoming Shielded Areas with Advanced Techniques
Solving inconsistent finishes on complex parts requires more than a standard approach. We can’t simply dip the part and hope for the best. Success lies in controlling the electrical current and solution flow.
For deep holes or internal cavities, the Faraday cage effect11 is a major obstacle. The exterior surfaces essentially shield the interior areas from the electrical field. To counter this, we often use auxiliary cathodes. These are supplementary electrodes placed strategically inside or near the shielded feature. They create a more direct path for the current, promoting a uniform anodic film growth where it’s needed most.
The Critical Role of Custom Fixtures
Custom racking is just as important. In past projects at PTSMAKE, we’ve found that how a part is held in the tank is crucial. A custom-designed rack or fixture can orient the component to minimize shielded areas and ensure optimal flow of the anodizing solution.
| Method | Orientation Control | Consistency | Suitability for Complexity |
|---|---|---|---|
| Standard Racking | Poor | Low | Low |
| Custom Racking | Excellent | High | High |
Adjusting Anodizing Parameters
Finally, we fine-tune the process parameters. Based on our testing, slightly increasing the voltage or extending the immersion time can help drive the process into hard-to-reach areas. Adjusting bath temperature and dye concentration also helps ensure the color is absorbed uniformly across the entire part.
A uniform gold finish on complex geometries isn’t about one single trick. It’s the combination of advanced tooling like auxiliary cathodes, custom racking, and precise process control that delivers a flawless, consistent result that meets specifications.
How do you create a system for repeatable batch-to-batch color matching?
A robust quality system is non-negotiable. It is the backbone of repeatable color matching. This is especially true for sensitive finishes.
The Role of Control Panels
In every batch, we include control panels. These are standard samples. They act as our visual and instrumental baseline.
This ensures every run is compared against the same master standard.
Objective Color Data
We rely on data, not just eyes. A spectrophotometer provides objective color data. This removes guesswork from the equation.
For finishes like gold anodizing, this is critical.
Tight Process Windows
Finally, we establish strict operational windows. Every parameter is tightly controlled.
| Parameter | Control Limit | Purpose |
|---|---|---|
| Temperature | ±1°C | Affects dye uptake |
| Time | ±5 seconds | Controls color depth |
| Voltage | ±0.5V | Impacts oxide layer |
This systematic approach guarantees consistency. It moves color matching from an art to a science.
Building this system requires discipline. Simply having the tools is not enough. You must integrate them into your workflow.
Beyond Visual Inspection
Relying only on the human eye is a common pitfall. Lighting conditions change. Operator fatigue is real. This leads to inconsistent results.
That’s why objective data is superior. We use a spectrophotometer12 to capture Lab* values. These numbers don’t lie. They provide a precise color fingerprint.
Understanding Lab* Values
- **L***: Lightness (0=black, 100=white)
- **a***: Red/Green value
- **b***: Yellow/Blue value
This data allows us to set exact tolerances. For example, a batch of gold anodizing parts must fall within a tiny ∆E (delta E) value.
The Power of Process Control
Tight operational windows are your best defense. They prevent color drift before it starts. Every variable, from chemical concentration to rinse time, is monitored.
At PTSMAKE, we document every step. This creates a detailed process history. If a batch is off, we can pinpoint the exact cause. This continuous feedback loop drives improvement and ensures reliability for our clients.
| Process Stage | Key Variable | Our Control Method |
|---|---|---|
| Anodizing | Current Density | Automated Rectifier |
| Dyeing | pH Level | Continuous Monitoring |
| Sealing | Water Purity | Regular Testing |
This level of control is essential. It’s the difference between hoping for a match and engineering one.
A successful color matching system combines three key elements. Use physical control panels for a baseline. Employ spectrophotometers for objective data. And enforce tight, documented process windows. This transforms color matching into a repeatable, scientific process.
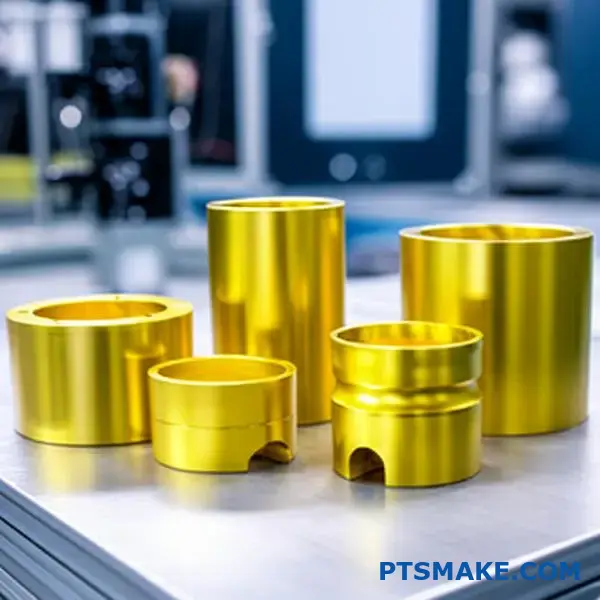
How can you innovate new gold finishes beyond standard colors?
True innovation in gold finishes means moving beyond the color chart. We must shift from simple application to active creation. It’s about crafting unique visual and tactile experiences.
This requires thinking differently. How can we combine processes to achieve something new?
Creating Dynamic Color Effects
Instead of one solid color, consider gradients. Techniques like multi-step dyeing can create beautiful ombre or two-tone effects on a single part.
Introducing Novel Textures
The feel of a part is as important as its look. Combining different surface preparations before the gold anodizing process opens up endless possibilities for texture.
| Technique | Standard Approach | Innovative Approach |
|---|---|---|
| Coloring | Single-step dyeing | Multi-step ombre or two-tone dyeing |
| Texture | Uniform bead blast or polish | Combining masked bead blasting and polishing |
Let’s break down how to achieve these advanced finishes. It’s about layering techniques to create depth and character in the final product. At PTSMAKE, we love exploring these combinations with our clients.
Multi-Step Dyeing for Visual Depth
Creating an ombre effect is a delicate process. It involves controlling the immersion time or dye concentration across the part’s surface. This creates a smooth gradient from light to dark gold.
For a sharp two-tone finish, masking is key. We can protect one area of the part while dyeing the other. This gives you crisp lines and distinct color zones. This is perfect for branding or creating visual accents.
Combining Surface Preparations
This is where the real creativity begins. Before the gold anodizing stage, we can manipulate the part’s surface. The underlying Substrate Topography13 has a huge impact on the final look.
For example, we can bead blast a part for a soft, matte finish. Or we can use bright dipping for a highly reflective, mirror-like surface.
But what if we combine them? Imagine masking a logo, bead blasting the background, and then bright dipping the entire piece. The result is a part with both matte and gloss textures, a truly custom finish.
| Pre-treatment Combination | Resulting Gold Finish | Best For |
|---|---|---|
| Masking + Bead Blasting | Matte background with polished accents | High-contrast branding, decorative patterns |
| Partial Polishing + Bead Blasting | Dual-texture feel (smooth and matte) | Enhancing grip, creating unique tactile feel |
| Bright Dipping + Laser Etching | Reflective surface with precise markings | Intricate designs, high-end electronics |
Innovation goes beyond color. By combining advanced dyeing and multi-textured surface preparations, you can create truly unique gold finishes that make your products stand out.
Partner with PTSMAKE for World-Class Gold Anodizing Solutions
Ready to achieve flawless, consistent gold anodizing for your critical parts? Contact PTSMAKE today for expert guidance and a fast, competitive quote. Leverage our precision manufacturing expertise and take your next project from concept to reality—reliably, on time, and to the highest standards!

Understand the science behind this critical surface treatment for metal components. ↩
Discover how porosity affects color consistency and the durability of your anodized finish. ↩
Learn how this electrical parameter is precisely controlled to achieve your desired finish. ↩
Learn how this accelerated corrosion test predicts a finish’s long-term durability. ↩
Discover how this property affects the long-term appearance and lifespan of your finished parts. ↩
Understand how this property is measured and why it is critical for your product’s lifespan. ↩
Discover how metallic salts create stable, fade-resistant colors in anodized coatings. ↩
Learn more about the chemical composition and its critical impact on the anodizing process. ↩
Learn how dye quality is tested to ensure your part’s color won’t fade. ↩
Understand how controlling dye bath movement prevents streaks and ensures even color. ↩
Understand how this electrical phenomenon impacts coating consistency and how we overcome it. ↩
Discover how this instrument provides precise, numerical color data, eliminating subjective visual assessment in quality control. ↩
See how micro-level surface features influence the final anodized look and feel. ↩