Selecting the wrong stainless steel fitting can lead to catastrophic system failures, costly downtime, and safety hazards. Many engineers struggle with the complexity of pressure ratings, connection types, and material specifications when designing critical fluid systems.
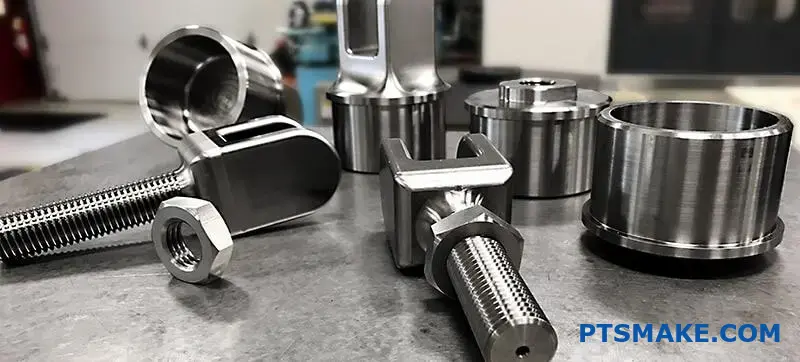
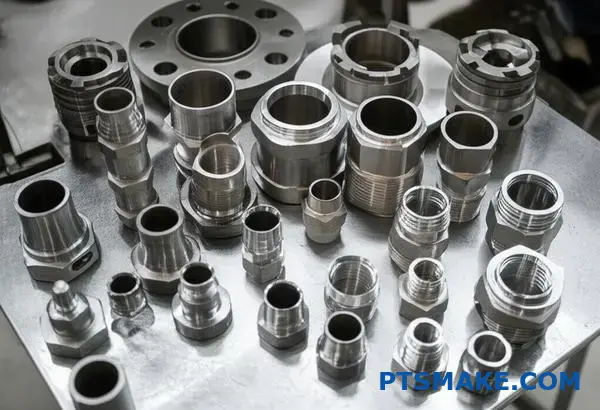
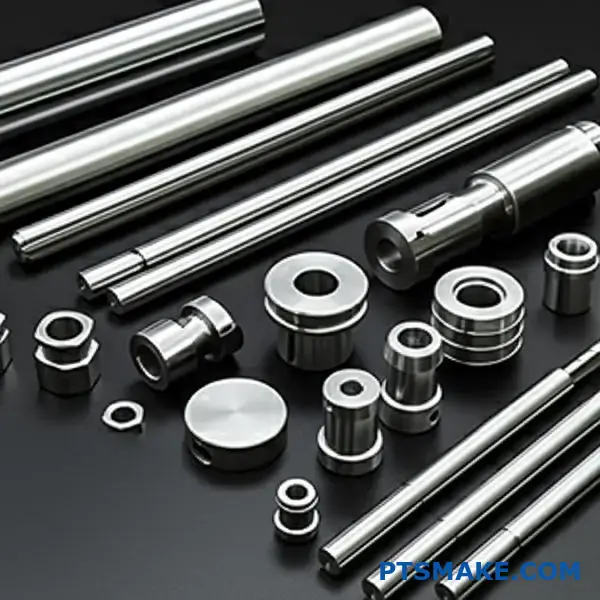
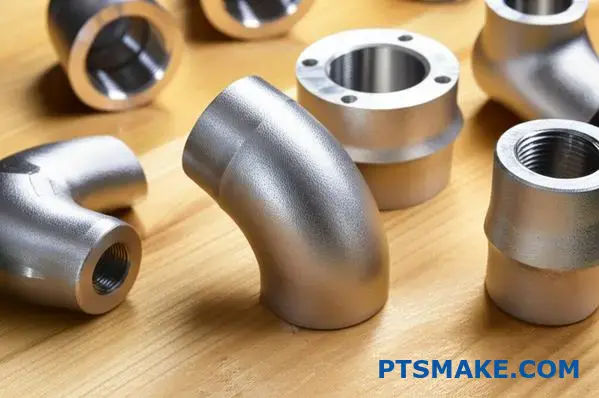
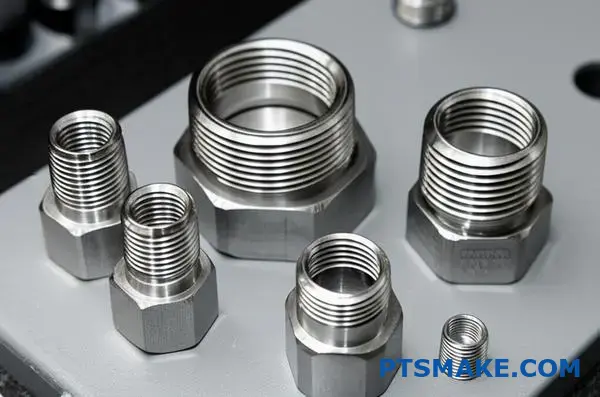
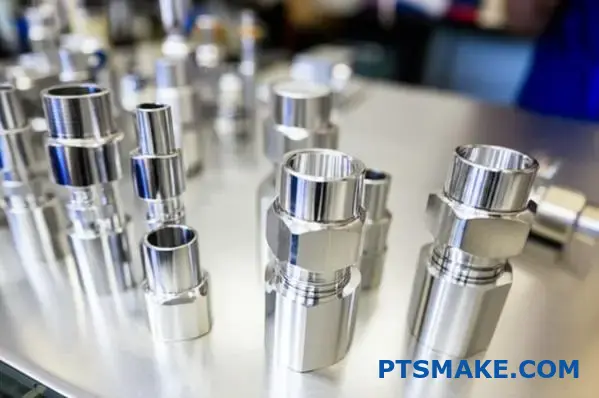
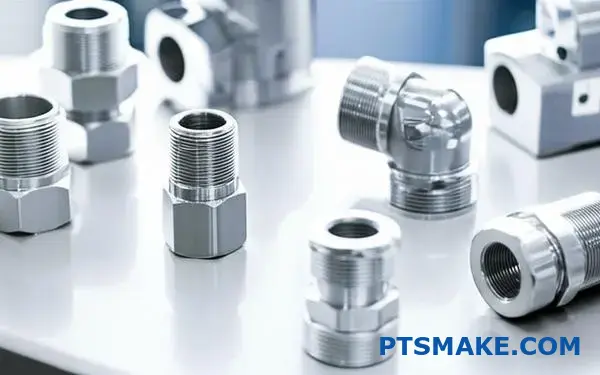
Custom stainless steel fittings are precision-engineered components that connect, control, and direct fluid flow in piping systems, manufactured to specific pressure ratings, connection types, and material grades for diverse industrial applications.

Working with complex fluid systems over the years has taught me that proper fitting selection requires understanding multiple technical factors. This guide covers 14 essential questions that will help you make informed decisions about stainless steel fittings for your next project.
What does a fitting’s pressure rating practically mean?
A fitting’s pressure rating is a critical safety specification. It’s not just a random number. It defines the Maximum Allowable Working Pressure (MAWP) that a fitting can safely handle at a specific temperature.
Understanding Pressure Classes
Pressure ratings, like 150# or 3000#, are standardized classes. They help engineers quickly identify a component’s capability within a system. Higher numbers mean greater pressure capacity.
| Rating Class | General Application |
|---|---|
| 150# | Low-pressure, non-critical |
| 300# | Medium-pressure systems |
| 3000# | High-pressure hydraulic |
Always remember that temperature directly affects this rating. A fitting rated for 150# at room temperature won’t handle the same pressure at high temperatures.
The Critical Link Between Pressure, Temperature, and Safety
Mismatching pressure ratings is a recipe for disaster. A system is only as strong as its weakest component. If you use a 150# fitting in a system designed for 600#, you’ve created a dangerous failure point. This can lead to leaks, bursts, and catastrophic equipment failure.
At PTSMAKE, we often machine custom stainless steel fittings. We always verify that the material choice and design meet the specified pressure-temperature requirements for the client’s application. This is a non-negotiable part of our process.
Pressure Derating with Temperature
As temperature increases, a material’s strength decreases. This means the MAWP of a fitting goes down. This concept is known as derating. Manufacturers provide charts that show the allowable pressure for a fitting at various temperatures. Before finalizing any design, we ensure that every component is validated through processes like hydrostatic testing1 to confirm its integrity.
Here is a simplified example of how pressure ratings change with temperature for a common material.
| Temperature (°F) | Allowable Pressure (psi) |
|---|---|
| -20 to 100 | 285 |
| 300 | 230 |
| 500 | 200 |
Ignoring these derating factors can lead to unexpected failures, even if the system operates below the fitting’s base pressure rating.
A fitting’s pressure rating is its maximum allowable working pressure at a specific temperature. Mismatching ratings or ignoring temperature effects creates significant safety hazards, making the weakest fitting a critical point of failure for the entire system.
What are the most common manufacturing methods for fittings?
When selecting fittings, the manufacturing method is critical. It directly impacts strength, finish, and cost. Understanding these processes helps you make an informed choice for your application.
The three main methods are forging, casting, and machining. Each offers a unique balance of features. Let’s compare them.
| Method | Primary Advantage |
|---|---|
| Forging | Maximum Strength |
| Casting | Complex Shapes |
| Machining | High Precision |
This comparison helps in selecting the right process. It is especially true for demanding parts like stainless steel fittings, where performance is key.
Choosing the right method is a critical engineering decision. It involves balancing performance requirements with budget constraints. At PTSMAKE, we guide clients through this process daily.
Forging: The Power of Pressure
Forging involves shaping metal using localized compressive forces. The metal is heated and hammered or pressed into a die.
This process refines the metal’s internal grain structure2, which results in exceptional strength and fatigue resistance. Forged fittings are ideal for high-pressure and high-temperature systems where failure is not an option. However, the surface finish is typically rougher and requires secondary operations.
Casting: Complexity Made Simple
Casting involves pouring molten metal into a mold shaped like the final fitting. It cools and solidifies into the desired form.
This method excels at creating complex and intricate shapes that would be too expensive or impossible to produce otherwise. It is cost-effective for high-volume production. The trade-off can be lower strength compared to forging due to potential porosity.
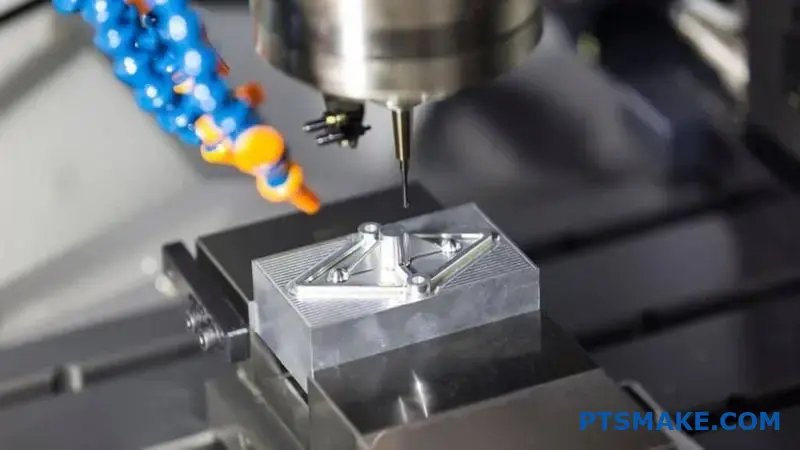
Machining: The Precision Standard
Machining starts with a solid piece of metal, known as bar stock. Material is precisely cut away using CNC machines to achieve the final shape.
This method provides the highest dimensional accuracy and the best surface finish. It’s perfect for fittings requiring tight tolerances and sealing surfaces.
| Feature | Forging | Casting | Machining from Bar Stock |
|---|---|---|---|
| Strength | Excellent | Good | Very Good |
| Surface Finish | Rough | Moderate | Excellent |
| Unit Cost | Moderate | Low (High Volume) | High |
| Tooling Cost | High | Moderate | Low |
In short, your choice depends on the application’s demands. Forging delivers strength, casting handles complexity, and machining provides precision. Each method offers a distinct set of trade-offs that you must weigh carefully to achieve the desired outcome for your project.
What is the role of key industry standards like ASME/ASTM?
Industry standards are the bedrock of modern manufacturing. They provide a common language for engineers, suppliers, and customers. This ensures everyone is on the same page.
Think of it as a universal rulebook. It guarantees that parts are safe, reliable, and perform as expected.
A Foundation for Trust
Standards like ASME and ASTM remove guesswork. They build a foundation of trust between partners. Without them, every project would start from scratch, leading to chaos.
This framework is essential for global supply chains.
| Standard Aspect | Purpose | Example |
|---|---|---|
| Material Grade | Ensures consistent chemical and mechanical properties | ASTM A276 for stainless steel bars |
| Dimensions | Guarantees parts fit together correctly | ASME B1.1 for screw threads |
| Test Method | Verifies quality and performance reliably | ASTM E8 for tension testing |
Standards are not just abstract rules. They are practical blueprints for reliability. At PTSMAKE, we rely on them daily to deliver predictable results for our clients.
Dictating Practical Reliability
Standards define the core attributes of a component. This ensures its performance in real-world applications. They cover three critical areas.
Material Specifications
Standards dictate the exact chemical makeup and metallurgical properties3 of materials. For example, when a drawing calls for 316 stainless steel fittings, ASTM standards define its precise corrosion resistance and strength. This is not negotiable.
Dimensional Control
Standards specify not just dimensions but also tolerances. This control over acceptable variation is crucial. It ensures that a part we machine in China will perfectly fit a component made in Germany. This interchangeability is key to modern assembly.
Testing Protocols
How do you prove a part is strong enough? Standards define the tests. They specify the procedures for verifying hardness, load-bearing capacity, and fatigue resistance. This creates a clear, repeatable process for quality assurance, ensuring every part meets or exceeds specifications.
| Component Feature | Standardized Approach | Non-Standardized Approach |
|---|---|---|
| Material | Defined grade (e.g., ASTM A36) | Vague "steel" description |
| Tolerance | +/- 0.05 mm per ASME Y14.5 | "Make it fit" |
| Testing | Mandatory pressure test to 1.5x rating | Optional, inconsistent checks |
Standards provide a clear, enforceable framework. They ensure materials, dimensions, and testing protocols align to create interchangeable, safe, and high-quality parts. This is fundamental to achieving practical reliability in every project.
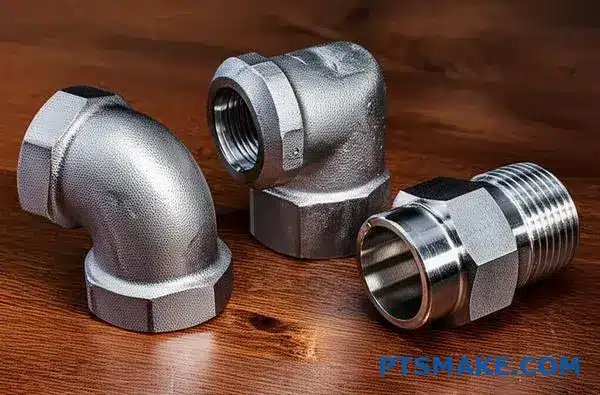
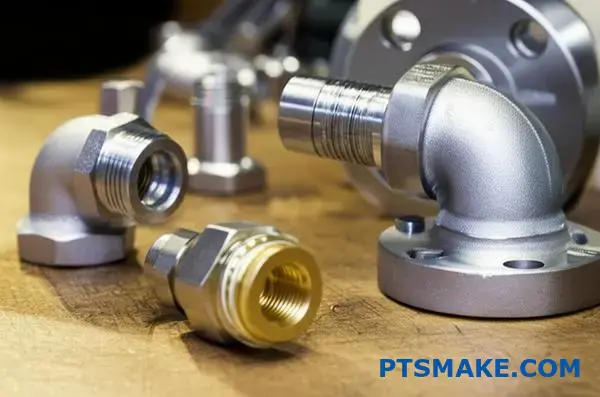
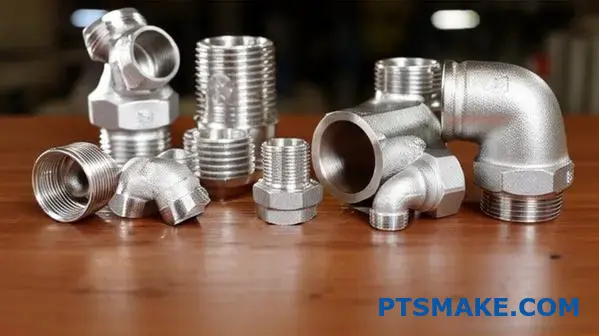
What are the main categories of fittings by connection type?
Choosing the right fitting goes beyond size. The connection method is key. It ensures your system is secure and leak-free. Different types suit different pressures and applications.
Let’s explore the primary connection methods. This will build a clear mental map for you. We’ll cover threaded, welded, compression, and flanged fittings. Each has unique strengths.
Here’s a quick overview to get started:
| Connection Type | Common Use | Pressure Rating |
|---|---|---|
| Threaded | Low-pressure | Low to Medium |
| Welded | High-pressure | High |
| Compression | Instrument lines | Varies |
| Flanged | Large pipes | Varies |
This table gives a basic idea. Now, let’s dive deeper.
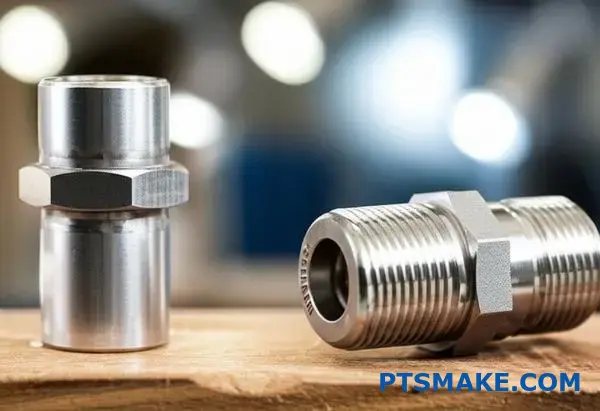
Threaded Fittings: The Basics
Threaded connections are common for smaller pipes. They use tapered threads like NPT or parallel threads like BSP. They are easy to assemble and disassemble. This makes them great for non-critical systems.
However, they can be prone to leaks. Sealants are often needed. With stainless steel fittings, you must watch out for galling4. This can ruin the threads during assembly.
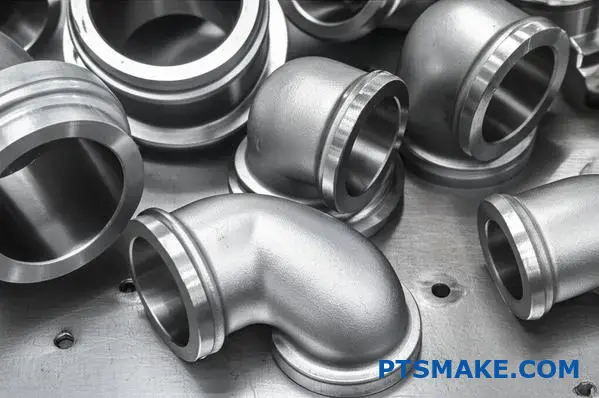
Welded Fittings: Permanent Solutions
Welding creates a permanent, leak-proof bond. This is ideal for high-pressure and high-temperature systems. There are two main types.
| Weld Type | Pipe Size | Joint Strength |
|---|---|---|
| Socket Weld | Small Diameter | Good |
| Butt Weld | All Sizes | Excellent |
Socket Weld vs. Butt Weld
Socket weld fittings have a recess for the pipe. A fillet weld is applied. It’s simpler but can create a crevice. Butt weld fittings are beveled and welded end-to-end. This offers a smoother flow and higher strength.
Flanged and Compression Fittings
Flanged fittings are for larger pipes. They are bolted together with a gasket. This makes maintenance easy. Compression fittings use a ferrule to grip the pipe. They are perfect for areas where welding is not feasible.
In summary, connection types vary widely. Threaded fittings offer convenience, while welded options provide permanence and strength. Flanged and compression fittings solve specific needs for maintenance and heat-free connections. Choosing the correct type is vital for system performance and safety.
How are fittings classified by their function in a system?
Fittings are the essential connectors in any piping system. They are best understood by their job. Each one has a specific role.
Thinking about function simplifies everything. It helps you choose the right part for the right task. This approach avoids costly mistakes. We can group them into five main categories.
Primary Fitting Functions
Here is a simple breakdown of the main functional groups for fittings. This clarity is crucial, especially when specifying materials like durable stainless steel fittings.
| Function | Common Fitting Types |
|---|---|
| Change Direction | Elbows, Bends |
| Change Size | Reducers, Bushings |
| Branch Flow | Tees, Crosses |
| Connect Pipes | Couplings, Unions |
| Stop Flow | Caps, Plugs |
A Deeper Look at Functional Groups
Each functional group contains fittings with distinct designs. These variations accommodate different pressures, materials, and assembly requirements. Understanding these nuances is vital for robust system design.
Directional Fittings
Elbows are the most common type. They typically come in 90° and 45° angles. This allows for sharp turns or gradual directional shifts in the pipeline. Street elbows have one female and one male end.
Size-Changing Fittings
Reducers connect pipes of different diameters. A concentric reducer is cone-shaped and maintains the pipe centerline. An eccentric reducer is flat on one side, which is useful for preventing air pockets in liquid lines.
Branching Fittings
Tees create a single 90° branch from a main line. Crosses create two 90° branches, forming a “+” shape. The choice depends on how many branches you need from one point. Careful planning here impacts system efficiency and flow dynamics5.
Connection and Termination Fittings
Couplings join two identical pipes. Unions also join pipes but are designed to be easily taken apart for maintenance. For stopping flow, caps fit over the end of a pipe, while plugs fit into an opening.
At PTSMAKE, we frequently machine custom fittings for specific applications, ensuring the function perfectly matches our client’s unique system demands.
Classifying fittings by function simplifies system design. Whether changing direction, size, or connecting pipes, each group serves a distinct purpose. This approach ensures you select the correct component, leading to a more efficient and reliable system.
What is the system for classifying threaded fitting standards?
Not all threads seal in the same way. This is a critical point in engineering design. The main difference lies in tapered versus parallel threads.
Tapered threads, like NPT, seal along the thread flanks. The threads wedge together to create a seal. Parallel threads, like BSPP, need a separate gasket or O-ring.
This fundamental difference impacts how fittings are chosen and installed.
| Thread Type | Sealing Method |
|---|---|
| Tapered (NPT) | Thread Flanks (Wedging Action) |
| Parallel (BSPP) | Gasket or O-Ring |
Understanding this is the first step to preventing leaks. It ensures your system has long-term integrity.
Tapered Threads: The NPT Standard
National Pipe Taper (NPT) is the U.S. standard. Its threads are tapered, meaning the diameter changes along the length. When tightened, the male and female threads compress against each other.
This creates a strong mechanical joint. However, the helical leak path along the thread crests requires a sealant. Teflon tape or pipe dope fills these small gaps to ensure a leak-proof connection. This method creates a strong interference fit6 between the threads.
Parallel Threads: The BSPP Standard
British Standard Pipe Parallel (BSPP) threads are straight. They do not rely on thread interference for sealing. The seal occurs when a gasket, washer, or O-ring is compressed.
This compression usually happens between a shoulder on the male fitting and the face of the female fitting. This design is excellent for systems requiring frequent disassembly and reassembly without damaging the threads. At PTSMAKE, we often recommend BSPP for such applications.
The Problem of Incompatibility
Mixing different thread standards is a common source of failure. An NPT male fitting will partially screw into a BSPP female fitting, but they will never seal properly. The pitch, angle, and diameter are different. This mismatch creates leak paths that no amount of sealant can fix. This is particularly important for high-pressure systems using durable materials like stainless steel fittings.
| Feature | NPT (Tapered) | BSPP (Parallel) |
|---|---|---|
| Thread Form | Tapered | Parallel |
| Sealing Point | Thread Flanks | Gasket/O-Ring |
| Sealant | Required | Not on threads |
| Reusability | Limited | High |
Tapered threads like NPT seal by wedging together, requiring sealant. Parallel threads like BSPP use a separate gasket for the seal. Their fundamentally different designs make them incompatible, and attempting to mix them will always result in leaks and potential system failure.
How do pressure classes create a system for forged fittings?
Pressure classes for forged fittings are a straightforward system. They tell you how much pressure a fitting can safely handle. Think of them as simple ratings: 2000, 3000, and 6000 psi.
A higher number means a higher pressure rating. This rating directly relates to the fitting’s wall thickness. A Class 6000 fitting will be much thicker and more robust than a Class 2000 fitting.
Key Pressure Classes
The most common classes you’ll encounter are 2000, 3000, and 6000. Each is designed for different levels of service.
| Pressure Class | Typical Application | Wall Thickness |
|---|---|---|
| 2000 | Low-pressure | Standard |
| 3000 | Medium-pressure | Heavier (Sch 80/XH) |
| 6000 | High-pressure | Very Heavy (Sch 160) |
This system ensures you select the right part for the job, preventing failures.
The pressure class system, governed by standards like ASME B16.11, provides a reliable framework. It’s not just about slapping a number on a part. The classification is a result of careful engineering calculations.
These calculations consider the material’s properties and the fitting’s dimensions. For many common materials, the class number directly corresponds to the maximum working pressure in pounds per square inch (psi).
Material and Design Impact
However, the material itself is a critical factor. For instance, high-quality stainless steel fittings might offer superior performance even within the same class compared to a standard carbon steel part. The material’s yield strength7 is a key variable in these calculations.
In past projects at PTSMAKE, we’ve seen how material choice affects performance under pressure. A stronger alloy allows for a design that can withstand higher stress, ensuring long-term reliability.
The class also dictates other dimensions, not just wall thickness.
Dimensional Changes with Class (Example: 1" 90° Elbow)
| Pressure Class | Approx. Center-to-End | Approx. Weight |
|---|---|---|
| 3000 | 1.12 in | 0.5 lbs |
| 6000 | 1.38 in | 1.1 lbs |
As you can see, a higher class means a physically larger and heavier fitting. This is necessary to safely contain higher pressures. It’s a system built on proven engineering principles.
Pressure classes like 2000, 3000, and 6000 provide a clear guide to a fitting’s strength. This rating directly reflects its wall thickness and material integrity, ensuring you choose the correct component for safe, high-pressure operations.
How does surface finish (Ra value) classify a fitting?
Surface finish, defined by its Ra value, is a critical specification. It is not just about how shiny a part looks. It classifies a fitting’s suitability for a specific job.
A higher Ra value means a rougher surface. A lower Ra value indicates a smoother, more polished surface.
The Ra Value Spectrum
This spectrum helps classify fittings for different industries. Each level has a specific purpose and cost associated with it.
For many applications, especially with stainless steel fittings, the right finish is key.
| Ra Value (µin) | Finish Type | Common Applications |
|---|---|---|
| > 63 Ra | Mill Finish | General industrial, structural |
| 32-63 Ra | Standard Machined | Non-critical hydraulic systems |
| 16-32 Ra | Polished | Food processing, dairy |
| < 15 Ra | Fine Polish | Pharmaceutical, biotech, semiconductor |
This classification ensures fittings meet industry standards for safety and performance.
Why Ra Matters Beyond Appearance
The function of a fitting is directly tied to its surface finish. A rough surface has microscopic peaks and valleys. These can trap particles, harbor bacteria, or create leak paths in seals.
For example, in the pharmaceutical industry, a smooth surface is non-negotiable. It prevents contamination and ensures the product remains pure. This is a matter of public safety.
Matching Finish to Function
In our projects at PTSMAKE, we guide clients on this. An industrial fitting for a chemical plant doesn’t need a mirror polish. Its main job is corrosion resistance, which a standard machined finish provides cost-effectively.
However, a fitting for a bioreactor requires an extremely low Ra value. The extra polishing steps add cost, but they are essential for performance. Understanding the arithmetic mean roughness8 helps in making precise engineering choices.
| Industry | Key Requirement | Typical Ra Range (µin) |
|---|---|---|
| General Industrial | Durability, corrosion resistance | 32 – 125 Ra |
| Food & Beverage | Cleanability, corrosion resistance | 16 – 32 Ra |
| Pharmaceutical | Sterility, no contamination | < 15 Ra |
Choosing the wrong finish can lead to system failure or contamination. It is a critical design decision.
Surface roughness, or Ra value, is a functional classification. It ranges from standard industrial finishes to highly polished sanitary grades. This specification directly impacts a fitting’s performance, safety, and suitability for its intended application, from preventing leaks to ensuring sterility.
How do you select the correct fitting for a specific fluid?
Choosing the right fitting can feel complex. I break it down into a simple, three-step process. This method removes guesswork and ensures system integrity.
First, check material compatibility. Then, define your pressure and temperature needs. Finally, pick the right connection type.
Following these steps methodically prevents costly failures. It ensures your system is safe, reliable, and efficient. This is the core of smart engineering design.
A Step-by-Step Decision Framework
| Step | Action | Key Consideration |
|---|---|---|
| 1 | Material Compatibility | Fluid type, corrosion, contamination |
| 2 | System Demands | Max pressure and temperature ranges |
| 3 | Connection Type | Application, ease of assembly, leak-proof needs |

Breaking Down the Selection Process
A systematic approach is crucial. Each step builds upon the last, guiding you to the optimal choice for your application. Let’s look closer at these critical decision points.
Step 1: Material Compatibility First
The fluid dictates the material. You must prevent corrosion, contamination, and material degradation. For instance, aggressive chemicals often require robust options like stainless steel fittings.
We’ve seen projects where an incompatible plastic fitting failed under chemical exposure. Water systems might use brass or plastic. However, high-purity applications demand inert materials. Always consult a chemical compatibility chart. This includes checking Elastomeric compatibility9 for any seals in the system.
Step 2: Define Pressure and Temperature
Your system’s operating conditions are non-negotiable. Exceeding a fitting’s pressure or temperature rating leads to leaks or catastrophic failure.
Manufacturers provide clear specifications for their products. For example, a standard brass fitting has different limits than a high-pressure steel one.
| Fitting Material | Typical Max Pressure | Temperature Range |
|---|---|---|
| PVC Plastic | 150 PSI | 32°F to 140°F |
| Brass | 1,200 PSI | -65°F to 250°F |
| Stainless Steel | 10,000+ PSI | -425°F to 1200°F |
Step 3: Choose the Connection Type
Finally, select the connection style. Threaded fittings are common but may require sealant. Compression fittings offer excellent seals without special tools. Welded fittings provide permanent, leak-proof connections for critical applications. The choice depends on maintenance needs and assembly requirements.
This three-step process—material, conditions, and connection—provides a reliable framework. It simplifies a complex decision, ensuring your fluid handling system is built for safety, longevity, and performance, preventing costly errors before they happen.
How do you properly install a threaded NPT fitting?
Properly installing a threaded NPT fitting is crucial. It ensures a leak-free seal for the system’s lifetime. A failed connection can cause significant downtime and safety issues.
The process is straightforward but requires attention to detail.
The Core Installation Steps
Success lies in following a simple, three-part method. This applies whether you are working with brass or durable stainless steel fittings.
| Step | Action | Goal |
|---|---|---|
| 1 | Clean | Remove contaminants |
| 2 | Seal | Apply sealant/tape |
| 3 | Tighten | Achieve a mechanical seal |
Each step builds upon the last. Skipping one compromises the entire joint.
A Deeper Dive into Installation Technique
A correct installation goes beyond just screwing two parts together. It’s about creating a perfect, long-lasting seal. In projects at PTSMAKE, we see how small details impact overall system reliability.
The Critical First Step: Cleaning
Always start with clean male and female threads. Use a wire brush and a degreasing agent. Any debris, oil, or old sealant can create a path for leaks or prevent proper engagement. This simple step is your first line of defense against failure.
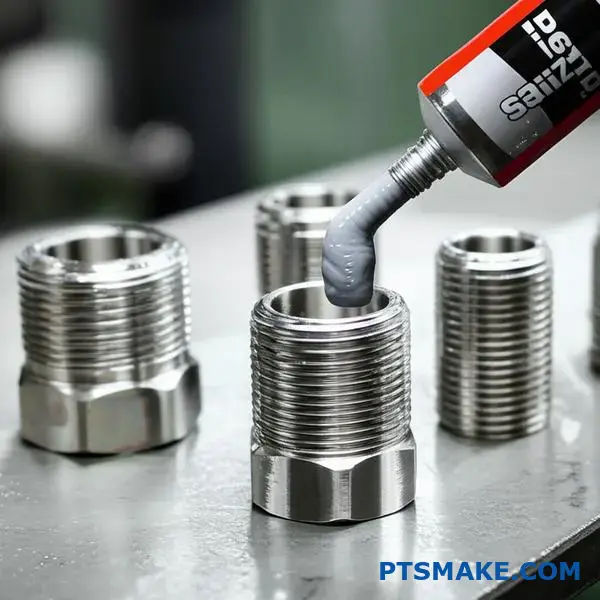
Applying Sealant Correctly
Sealant choice matters. PTFE tape and pipe dope are common. For tape, wrap it 2-3 times in the direction of the threads (clockwise). Importantly, leave the first one or two threads bare. This prevents sealant from breaking off and contaminating the system.
This is especially critical in sensitive hydraulic or pneumatic systems. Small particles can cause major component damage downstream. Improper sealing can also lead to thread galling10, particularly with stainless steel fittings.
The Art of Tightening
Tighten the fitting until it is "hand-tight." Then, use a wrench for an additional one to two turns. The goal is to create a seal by deforming the threads, not to bottom them out.
| Condition | Risk | Consequence |
|---|---|---|
| Over-tightening | Stress Cracks | Catastrophic failure, leaks |
| Under-tightening | Poor Seal | Persistent, slow leaks |
Experience gives you a feel for this. The resistance should increase steadily. If it suddenly gets very hard, stop. You might be cross-threading or hitting the end of the taper.
A clean, correctly sealed, and properly tightened NPT fitting is fundamental for system integrity. Over-tightening is a common mistake that can crack the fitting, leading to leaks and costly repairs. Always prioritize the correct technique over brute force.
How do you choose between welding and threaded connections?
Making the right choice comes down to a clear framework. I often use a decision matrix to guide clients. It simplifies complex choices.
This tool helps weigh the most critical factors for your project. Let’s start with the basics.
Key Initial Questions
Think about permanence versus maintenance. Is the joint intended to last forever, or will you need access later? This is the first split in the decision path.
| Feature | Welding | Threaded Connections |
|---|---|---|
| Permanence | Permanent | Non-Permanent |
| Maintenance | Difficult | Easy |
This simple table already clarifies the primary trade-off between the two methods.
Expanding the Decision Matrix
To make a truly informed decision, we need more detail. Factors like pressure, vibration, and cost play a huge role. In past projects at PTSMAKE, we’ve seen simple choices have major long-term impacts.
Welding creates a single, continuous piece of metal. This results in a strong, leak-proof bond ideal for high-pressure systems. It essentially creates a hermetic seal11 that is second to none for integrity.
Threaded connections, however, offer unmatched flexibility. They are perfect for systems that require regular maintenance, inspection, or future modification. This is especially true for many common applications involving stainless steel fittings.
Detailed Comparison
Here is a more comprehensive matrix we use to evaluate the best approach. It helps balance upfront effort with long-term needs.
| Criteria | Welding | Threaded Connections |
|---|---|---|
| Pressure Rating | Very High | Low to Medium |
| Leak Integrity | Excellent | Good (sealants often needed) |
| Vibration Resistance | Excellent | Poor (can loosen over time) |
| Disassembly | Destructive | Non-destructive |
| Required Skill | High (Certified Welder) | Moderate |
| Initial Cost | Higher (Labor/Equipment) | Lower (Parts/Labor) |
This expanded view provides the clarity needed for complex engineering decisions.
Choosing between welding and threaded connections requires a clear decision matrix. Welding is ideal for permanent, high-integrity seals in high-pressure systems. Threaded connections offer crucial flexibility and ease of maintenance for systems that may need future disassembly.
How do you prevent galling (cold welding) in threaded fittings?
Galling, or cold welding, is a frustrating problem. It happens when threads seize under pressure, often ruining parts. This is especially common with materials like stainless steel fittings. Preventing it is key.
Use a Proper Lubricant
Your first defense is a quality anti-seize lubricant. It creates a critical barrier between the mating threads.
| Lubricant Type | Best Use Case |
|---|---|
| Nickel-Based | High Temperatures |
| Copper-Based | General Purpose |
| Moly-Based | High Pressure |
Tighten Slowly
Rushing assembly generates heat from friction. This heat increases the risk of galling. A slow, deliberate tightening speed is always safer.
Ensure Threads Are Clean
Never assemble parts with damaged or dirty threads. Burrs, nicks, or debris create high-pressure points where galling can start.
Let’s get into the specifics of galling prevention. The core issue is a form of adhesive wear12. Under high contact pressure, microscopic high points on the thread surfaces can shear and weld together. This action rips off material, causing the threads to seize.
The Mechanism of Anti-Seize
An anti-seize compound does more than just lubricate. It’s a mix of lubricating solids and grease. These solids fill the microscopic gaps on the thread surfaces. This physically separates the metal parts, preventing the high-friction contact that leads to welding. In our projects at PTSMAKE, selecting the right compound is a standard part of our assembly protocol.
Selecting the Right Compound
The choice of lubricant is critical for long-term performance.
| Lubricant Base | Max Temperature | Important Note |
|---|---|---|
| Nickel | Up to 2400°F (1315°C) | Ideal for stainless steel fittings |
| Copper | Up to 1800°F (980°C) | Can cause issues with stainless |
| Molybdenum | Up to 750°F (400°C) | Excellent for extreme pressure |
Why Speed Matters
When you tighten a fastener, you generate friction, and friction creates heat. If done too quickly, this heat can’t dissipate. The localized temperature spike softens the metal at the contact points, making it much more likely to gall. Slowing down is a simple yet effective solution.
Pre-Assembly Thread Inspection
Always inspect threads visually and by feel before assembly. A small burr or piece of debris can initiate the entire galling process. A clean thread is a reliable thread.
To prevent galling, always use the right anti-seize lubricant for your material. Tighten slowly to avoid heat buildup, and meticulously inspect threads for any damage or debris before you start the assembly. These simple steps are crucial for success.
How do you perform a simple pressure test on a system?
Performing a pressure test is a systematic process. It confirms a system’s integrity. We break it down into four fundamental steps. Each step is crucial for safety and accuracy.
Following these steps ensures no leaks exist. It also confirms that components, including any stainless steel fittings, can handle the operational stress.
The Four Core Steps
First, isolate the system completely. This prevents accidental pressurization of other areas. Then, fill it with your chosen medium. This could be water for a hydrostatic test or air for a pneumatic one.
Next, you slowly apply pressure. Finally, you hold that pressure and carefully inspect for any signs of leaks or material failure.
| Step | Action | Purpose |
|---|---|---|
| 1 | Isolate | Confine pressure to the test area |
| 2 | Fill | Introduce the test medium |
| 3 | Pressurize | Apply controlled stress to the system |
| 4 | Hold & Inspect | Check for leaks and structural integrity |
Hydrostatic vs. Pneumatic Testing
The choice between water (hydrostatic) and air/gas (pneumatic) is critical. Hydrostatic testing is generally safer. Water is nearly incompressible, so a failure results in a leak, not an explosion.
Pneumatic testing uses compressed gas. This stores a significant amount of energy. A failure can be catastrophic. We only recommend it when a system cannot tolerate water.
Determining Test Pressure
A common rule of thumb is to pressurize the system to 1.5 times its Maximum Allowable Working Pressure13. You must reach this pressure gradually. A sudden pressure spike can cause premature failure. Always use a calibrated pressure gauge for accuracy.
The Inspection Phase
Once at test pressure, the holding period begins. This can range from minutes to hours, depending on the standard you follow. During this time, look for pressure drops on the gauge. Also, visually inspect all joints, welds, and connections for leaks. When testing with air, a soap solution helps reveal small leaks by forming bubbles.
| Test Type | Medium | Safety Profile | Common Use Case |
|---|---|---|---|
| Hydrostatic | Water | High (safer) | Boilers, pipelines |
| Pneumatic | Air / Gas | Lower (higher risk) | Systems where water is prohibited |
Executing a pressure test involves four key stages: isolation, filling, pressurization, and inspection. Understanding the medium and target pressure is critical for a safe and effective test, verifying the integrity of the system and its components.
How do you choose fittings for a cryogenic application?
Let’s consider a challenging scenario. You need fittings for a liquid nitrogen system. The temperature will plummet to -196°C (-321°F).
This is a critical decision point. Many common metals become fragile, like glass, at these temperatures. They can shatter under stress.
For these applications, austenitic stainless steels are the go-to choice. Grades like 304 and 316 are excellent. They maintain their strength and, crucially, their ductility. This prevents catastrophic failure in extreme cold. Choosing the right stainless steel fittings is non-negotiable for safety.
Material Behavior at Cryogenic Temperatures
| Material Type | Low-Temp Behavior | Recommended for Cryo |
|---|---|---|
| Austenitic Stainless Steel | Remains Ductile | Yes |
| Carbon Steel | Becomes Brittle | No |
| Aluminum Alloys | Remains Ductile | Yes |
| Most Plastics | Become Brittle | No |
Why Austenitic Steels Excel
The secret lies in the material’s microstructure. Austenitic stainless steels have a face-centered cubic (FCC) crystal structure. This structure is inherently stable at low temperatures. It doesn’t have a ductile-to-brittle transition temperature14.
This means it won’t suddenly become brittle as it gets colder. It retains its toughness, which is the ability to absorb energy and deform without fracturing.
In contrast, materials like carbon steel have a body-centered cubic (BCC) structure. These materials undergo a transition from ductile to brittle as the temperature drops. Using them in cryogenic systems is a major safety hazard.
At PTSMAKE, we guide clients through these material science fundamentals. We ensure the selected material matches the application’s demands perfectly. Choosing 304 or 316 stainless steel fittings isn’t just a preference; it’s a requirement based on physics.
Comparison: 316 Stainless vs. Carbon Steel
| Property | 316 Stainless Steel | Carbon Steel |
|---|---|---|
| Cryogenic Ductility | Excellent | Poor (Brittle) |
| Corrosion Resistance | Excellent | Poor |
| Crystal Structure | FCC (Stable) | BCC (Transitions) |
| Safety Risk | Low | High |
This careful selection process prevents system failures and ensures long-term reliability for your cryogenic application. It’s a core part of our design-for-manufacturing feedback.
Selecting austenitic stainless steels like 304/316 is critical for cryogenic safety. Their unique crystal structure prevents them from becoming brittle at extreme low temperatures, ensuring the integrity and reliability of the fittings and the entire system.
Discover Precision Stainless Steel Fittings with PTSMAKE Today
Ready to solve your toughest stainless steel fittings challenges? Trust PTSMAKE for custom, high-quality solutions—backed by decades of CNC expertise. Send us your inquiry now for a fast quote and experience why leading innovators rely on PTSMAKE for precision and reliability, from prototype to production!

Learn about this crucial quality test for verifying the integrity of pressure-containing components. ↩
Learn how the internal alignment of metal crystals impacts component strength and fatigue resistance. ↩
Understand the critical micro-level characteristics that define a material’s performance and durability. ↩
Learn more about what causes galling and how to prevent it in stainless steel connections. ↩
Discover how fluid behavior and pressure change within complex piping systems. ↩
Explore how this key engineering principle creates secure, leak-proof connections in mechanical assemblies. ↩
Learn the key material property that dictates how a fitting resists permanent deformation under stress. ↩
Explore a technical breakdown of how this critical surface measurement is calculated. ↩
Learn how seal materials react with different fluids to prevent costly leaks and system failures. ↩
Understand this common failure mode in threaded fasteners to prevent costly damage. ↩
Learn the technical standards for creating a truly airtight and leak-proof seal. ↩
Learn more about the science behind how metal surfaces can bond together under pressure and motion. ↩
Learn how this critical pressure rating is determined and why it is vital for system safety. ↩
Click to understand why this temperature is the most critical factor for material failure in cold environments. ↩