Many manufacturers struggle with black anodized aluminum finishes that fade, appear inconsistent, or fail to meet their exact specifications. You’ve likely experienced the frustration of receiving parts with uneven coloring, poor durability, or finishes that simply don’t match your design intent.
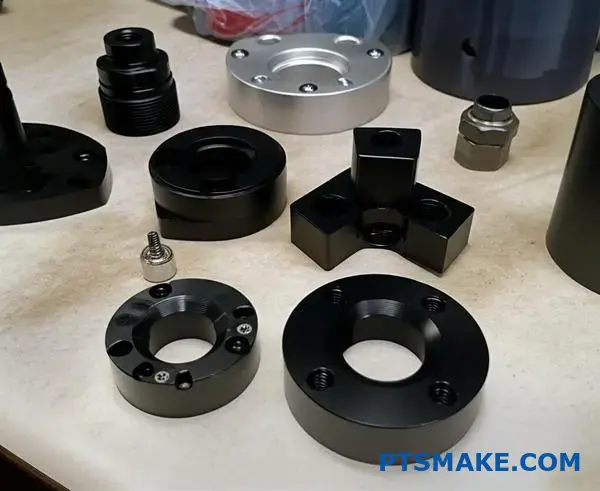
Black anodized aluminum is an electrochemical process that transforms the metal’s surface into a durable, corrosion-resistant oxide layer that’s permanently dyed black, offering superior hardness and longevity compared to paint or powder coating.
Getting the right black anodized finish requires understanding multiple variables – from alloy selection to dye chemistry to pre-treatment methods. This guide covers the technical details that matter for your next project, helping you specify exactly what you need and communicate effectively with your manufacturing partner.
Which aluminum alloys are best for a deep black finish?
Achieving a true, deep black finish on aluminum is a common goal. However, the specific alloy you choose is the most critical factor. It directly impacts the quality and consistency of the final color.
Some alloys simply anodize better than others. The right choice ensures a uniform, rich black appearance for your parts.
Quick Alloy Comparison
Below is a quick guide. It shows which alloy series work best for a deep black finish.
| Alloy Series | Suitability for Deep Black |
|---|---|
| 5xxx, 6xxx, 7xxx | Excellent |
| 2xxx, 3xxx | Poor to Fair |
This is a crucial first step in designing parts requiring a high-quality black anodized aluminum finish.
Why Alloying Elements Matter
The secret to a perfect black anodized finish lies in the chemistry of the alloy. The elements mixed with the aluminum determine the outcome. It’s not just about the process; it’s about starting with the right material.
The Problem with 2xxx and 3xxx Series
Alloys in the 2xxx series contain high levels of copper. Similarly, the 3xxx series is high in manganese. During anodizing, these elements can create issues.
These elements can form intermetallic particles1 that don’t anodize properly. This often results in a smutty, uneven, or cloudy appearance instead of a true, deep black. At PTSMAKE, we often advise clients to avoid these for cosmetic black finishes.
The Superiority of 5xxx, 6xxx, and 7xxx Series
These series are the best choice for black anodized aluminum. Their primary alloying elements are magnesium (5xxx), magnesium and silicon (6xxx), or zinc and magnesium (7xxx).
These elements create a more uniform and porous anodic oxide layer. This structure readily and evenly absorbs the black dye. The result is a consistent, rich, and durable black finish that meets high cosmetic standards.
| Alloy Series | Primary Alloying Element(s) | Anodizing Result (Black) |
|---|---|---|
| 2xxx | Copper (Cu) | Often results in a smutty, inconsistent finish. |
| 3xxx | Manganese (Mn) | Can appear grayish or uneven. |
| 5xxx | Magnesium (Mg) | Good, consistent black finish. |
| 6xxx | Magnesium (Mg) & Silicon (Si) | Excellent, deep black. A top choice. |
| 7xxx | Zinc (Zn) & Magnesium (Mg) | Excellent, very dark black finish. |
For a flawless black finish, alloy selection is paramount. The 5xxx, 6xxx, and 7xxx series are ideal due to their alloying elements, which form a uniform oxide layer. This structure ensures deep, consistent absorption of black dye, unlike the problematic 2xxx and 3xxx series.
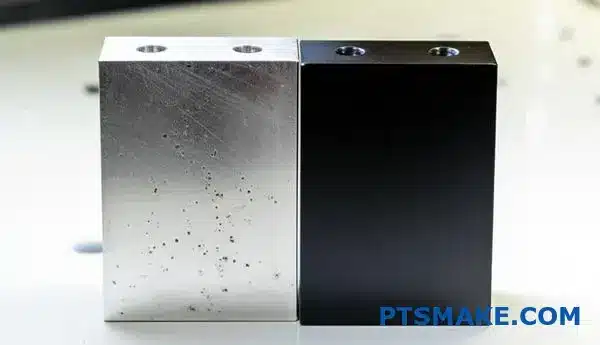
How does anodizing change the aluminum’s surface properties?
Anodizing is much more than a color treatment. It fundamentally re-engineers the aluminum’s surface. The process creates a hard, protective oxide layer. This new surface is integral to the part.
This layer dramatically boosts durability. It’s not a coating that can chip or peel. It is a controlled oxidation that enhances the metal’s natural strengths.
Key Property Enhancements
The transformation is significant. We see major improvements in several key areas of performance.
| Property | Raw Aluminum | Anodized Aluminum |
|---|---|---|
| Hardness | Soft, easily scratched | Approaches hardened steel |
| Corrosion | Vulnerable to oxidation | Highly resistant |
| Abrasion | Wears down quickly | Excellent wear resistance |
Beyond the Basics: Functional Upgrades
The functional benefits are where anodizing truly shines for engineers. Increased surface hardness is a primary advantage. This anodic film is exceptionally tough. It provides robust protection against scratches and wear.
In past projects at PTSMAKE, this has been critical. For components in high-wear mechanical assemblies, this extra toughness extends the product’s life significantly.
Corrosion and Electrical Properties
Corrosion resistance is also vastly improved. The non-porous barrier created by anodizing seals the base aluminum from environmental factors. This prevents rust and degradation over time. A part like a housing for outdoor electronics, often specified as black anodized aluminum2, depends on this protection.
Another key change is electrical insulation. The aluminum oxide layer is a poor electrical conductor. This property is vital for electronic enclosures. It prevents short circuits and protects sensitive components. Based on our tests, the layer’s insulating capacity is reliable.
| Feature | Benefit for Engineers |
|---|---|
| Increased Hardness | Protects against scratches and dents |
| Wear Resistance | Extends part lifespan in moving assemblies |
| Electrical Insulation | Prevents short-circuiting in enclosures |
| Consistent Finish | Ensures high-quality appearance |
Anodizing fundamentally transforms aluminum’s surface, creating a hard, corrosion-resistant layer. This process provides crucial functional benefits like wear resistance and electrical insulation, making it ideal for demanding engineering applications beyond just aesthetics.
What are the common types of black dyes used?
When choosing a black dye, we generally look at two main types: organic and inorganic. Their chemical makeup is completely different. This difference greatly affects performance.
Making the right choice is crucial. It ensures the final parts meet the required specifications for both appearance and long-term durability.
Organic vs. Inorganic Dyes
Organic dyes are based on carbon compounds. Inorganic dyes are created from metal salts. This basic distinction guides our selection process for customer projects.
| Dye Type | Primary Base |
|---|---|
| Organic | Carbon Compounds |
| Inorganic | Metal Salts |
Understanding these basics helps us select the perfect finish. It’s the first step in achieving the desired outcome.

Diving Deeper: Advantages and Disadvantages
The right dye is not just about color. It’s about performance in the part’s final environment. We have to consider factors like sunlight exposure, heat, and overall wear. This is a conversation I have with clients daily.
Organic Dyes: Vibrant but Vulnerable
Organic dyes often produce a deeper, richer black. This visual appeal is a major advantage. They are also frequently a more cost-effective option for many projects.
However, they don’t perform as well under UV light or high heat. This means they can fade over time if used outdoors. They are best for indoor products where aesthetics are the top priority.
Inorganic Dyes: The Durable Choice
When durability is non-negotiable, we turn to inorganic dyes. They offer superior lightfastness3 and can withstand much higher temperatures without degrading.
This makes them the go-to choice for black anodized aluminum parts in automotive, aerospace, or outdoor equipment. The color might be slightly less intense, but the performance is unmatched for demanding applications.
| Feature | Organic Dyes | Inorganic Dyes |
|---|---|---|
| UV Stability | Lower | Excellent |
| Heat Resistance | Moderate | Excellent |
| Cost | Generally Lower | Generally Higher |
| Best For | Indoor, cosmetic parts | Outdoor, high-wear parts |
Choosing the right dye is a critical step in the manufacturing journey. The choice depends entirely on the part’s intended use and the environment it will face. It’s a balance of aesthetics, performance, and cost.
What distinguishes Type II from Type III black anodizing?
Choosing between Type II and Type III black anodizing is a critical decision. It directly impacts your part’s performance and appearance. Think of it as choosing between aesthetics and pure durability.
Type II is your standard for cosmetic appeal. It provides a beautiful, consistent black finish. It also offers moderate corrosion and wear resistance.
Type III, or hardcoat, is engineered for toughness. It creates a much thicker, harder layer. This makes it ideal for high-wear industrial applications.
Here’s a quick comparison:
| Feature | Type II (Standard) | Type III (Hardcoat) |
|---|---|---|
| Primary Goal | Cosmetic Appearance | Wear Resistance |
| Layer Thickness | Thinner (up to 25 µm) | Thicker (25-150 µm) |
| Hardness | Moderate | Very High (Rockwell 60-70C) |
| Common Use | Enclosures, panels | Pistons, gears, machinery |
The choice goes deeper than just looks versus strength. In our projects at PTSMAKE, we guide clients through the specific engineering trade-offs for their black anodized aluminum components.
Type II: The Aesthetic Choice
Type II anodizing is perfect for parts where a pristine visual finish is paramount. Think of consumer electronics housings, architectural elements, or automotive trim. The porous oxide layer readily accepts black dye, resulting in a deep, rich, and uniform color that is difficult to match.
However, its thinner layer offers only moderate protection against scratches and abrasion. It’s suitable for everyday handling but not for harsh mechanical environments.
Type III: The Functional Powerhouse
Type III hardcoat is created using a different electrolytic process4. Our tests show it produces a much denser and thicker aluminum oxide layer. This makes it incredibly resistant to wear, abrasion, and corrosion.
It’s the go-to for aerospace components, military hardware, and high-performance machinery parts. The main trade-off? Achieving a deep, true black is more challenging. The dense layer absorbs dye less uniformly, sometimes resulting in a charcoal gray or bronze-black finish.
| Parameter | Type II Anodizing | Type III Hardcoat Anodizing |
|---|---|---|
| Process Temperature | ~21°C (70°F) | ~0°C (32°F) |
| Current Density | Lower | Higher |
| Dye Absorption | Excellent | Fair to Good |
| Primary Benefit | Superior Aesthetics | Maximum Durability |
In short, Type II black anodizing prioritizes a superior cosmetic finish for most parts. Type III provides unmatched hardness and wear resistance, making it essential for demanding engineering applications where function is more important than achieving a perfect jet-black color.
How are black anodized finishes classified by industry standards?
When you need a reliable finish, industry standards are key. The most important one is MIL-A-8625. It’s a military specification, but it is now used across many industries.
This standard provides a clear framework. It helps us define exactly what a black anodized finish should be. This ensures consistency and quality for every part. Let’s look at the main classifications.
Types and Classes Explained
The standard uses "Types" and "Classes." A Type refers to the anodizing method. A Class refers to the color or lack thereof.
| Specification | Description |
|---|---|
| Type II | Sulfuric Acid Anodizing |
| Type III | Hardcoat Anodizing |
| Class 2 | Dyed Finish (e.g., black) |
Understanding these is crucial for procurement. It guarantees you get the finish you expect.
MIL-A-8625 is the playbook for anodizing. It removes guesswork. It also ensures everyone, from the designer to the manufacturer, is on the same page. At PTSMAKE, we reference this spec daily to guarantee results for our clients.
Type II: The All-Rounder
Type II anodizing uses a sulfuric acid bath. It creates a protective layer perfect for most applications. The anodizing process is an electrolytic passivation5 technique. It increases the thickness of the natural oxide layer on the surface of metal parts.
Its porous structure is excellent for absorbing dyes. This makes it ideal for a deep, consistent black finish. It offers good corrosion resistance and a great cosmetic appearance. It works well for parts that don’t face extreme wear.
Type III: The Heavy-Duty Hardcoat
Type III, or hardcoat, is different. It uses a more intense process, often at colder temperatures. The result is a much thicker and harder anodic layer.
This makes the surface incredibly durable and wear-resistant. We often use it for high-performance parts in aerospace or robotics. The denser coating is still dyeable, but the process needs more control for a uniform black.
Key Differences at a Glance
| Feature | Type II (Sulfuric) | Type III (Hardcoat) |
|---|---|---|
| Thickness | Typically 0.0002" – 0.001" | Typically 0.001" – 0.004" |
| Hardness | 300-400 Vickers | 600-700 Vickers |
| Primary Use | Aesthetics, Corrosion | Wear Resistance, Durability |
Class 2: Adding the Color
Class 2 simply means the part is dyed after anodizing. For a black anodized aluminum part, this means immersion in a black organic dye bath. The final step is sealing, which locks the color in and closes the pores.
MIL-A-8625 is the essential standard for anodizing. Type II is best for cosmetic finishes, while Type III offers superior durability. Class 2 designation simply means the part is dyed to achieve that classic black anodized aluminum look.
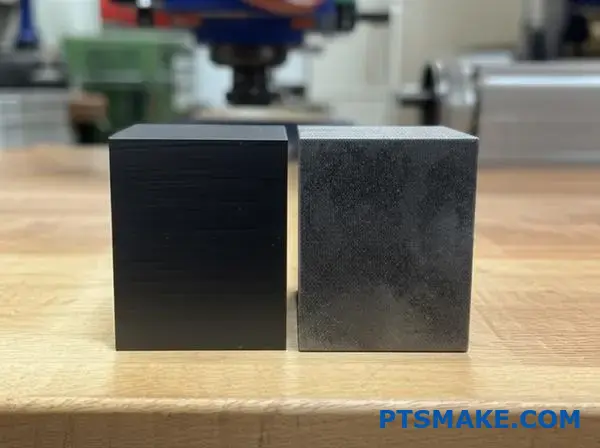
What are the visual differences between matte and glossy finishes?
A common myth is that anodizing creates the finish. This isn’t quite right. The real key is the pre-treatment process applied to the aluminum.
The surface texture is set before the part enters the anodizing tank.
The Foundation of the Finish
A part’s final appearance is decided early. Whether you want a matte or glossy black anodized aluminum part, it all starts with surface preparation.
| Pre-Treatment | Resulting Finish |
|---|---|
| Caustic Etch | Matte / Non-Reflective |
| Polishing | Glossy / Reflective |
This initial step dictates how light will interact with the final anodized surface.
How Pre-Treatment Creates the Look
The anodizing layer itself is transparent. It simply follows the contours of the aluminum surface underneath it. This means the pre-treatment step is what truly defines the final aesthetic.
Achieving a Matte Surface
For a non-reflective matte finish, we use a process called caustic etching. This chemical bath microscopically roughens the aluminum surface, creating a diffuse texture.
When light hits this uneven surface, it scatters in many directions instead of reflecting back. This eliminates glare and gives the part its soft, matte look, which is excellent for hiding fingerprints.
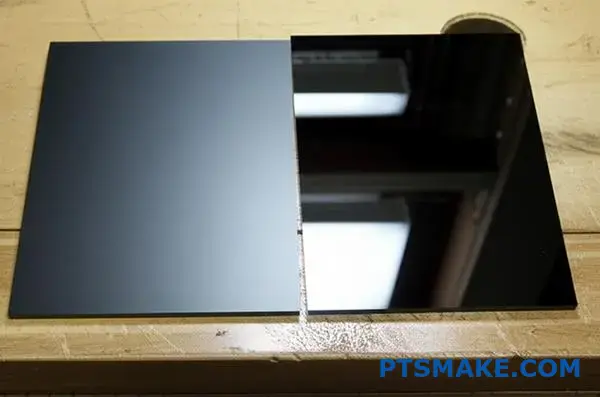
Creating a Glossy Surface
For a glossy finish, we need the surface to be as smooth as possible before anodizing. This is typically done through mechanical polishing or a chemical bright dip.
Mechanical polishing uses abrasives to physically smooth the part. A bright dip is a chemical process that smooths the aluminum at a microscopic level, creating a mirror-like finish. Both methods reduce the surface topography6 to ensure direct light reflection.
This smooth base allows the transparent anodized layer to appear deep and reflective.
| Method | Process | Visual Outcome |
|---|---|---|
| Caustic Etch | Chemical roughening | Diffuse, non-glare |
| Mechanical Polish | Abrasive smoothing | Reflective, shiny |
| Bright Dip | Chemical smoothing | Highly reflective, mirror-like |
So, the same anodizing process can yield vastly different looks based entirely on this crucial preparation stage.
The final gloss level of an anodized part is not from the anodizing itself. It is determined by the pre-treatment. A caustic etch creates a matte surface, while mechanical or chemical polishing results in a glossy, reflective finish.
What are pros and cons of different black dye systems?
Choosing the right black dye is critical. It determines the final look, performance, and lifespan of your parts. This is especially true for high-spec black anodized aluminum components.
You need to match the dye system to the application. An outdoor part needs different properties than an indoor one.
Let’s break down three common dye types. We’ll compare their performance to help you make an informed decision for your next project.
A Head-to-Head Comparison
The best choice always depends on the application. A part used indoors has different needs than one exposed to sunlight daily. Cost is also a major factor in production.
Here is a quick comparison table we often use at PTSMAKE. It helps guide our clients toward the right finish for their parts.
| Feature | High Lightfastness Organic | General-Purpose Organic | Inorganic Metal Salt |
|---|---|---|---|
| UV Resistance | Excellent | Poor to Fair | Superior |
| Heat Stability | Good | Fair to Good | Excellent |
| Ease of Use | High | High | Moderate |
| Cost | High | Low | Moderate |
| Color Depth | Excellent (Deep Black) | Good (Varies) | Good (Jet Black) |
Understanding the Trade-offs
High lightfastness dyes are great for automotive or architectural parts. They resist fading from sunlight but come at a higher cost. These are a worthwhile investment for products that need to look good for years outdoors.
General-purpose organic dyes are perfect for consumer electronics. These parts aren’t usually exposed to harsh UV or high heat. They offer a very cost-effective solution for indoor applications.
Inorganic dyes are incredibly durable. The color is created through electrolytic coloring7, making it part of the oxide layer itself. This method is common for military and aerospace parts where performance is the top priority. The process is more complex than simple dipping but ensures maximum durability.
Ultimately, the ideal black dye balances performance with cost. Evaluate your product’s end-use environment carefully. This choice directly impacts the quality and longevity of your final black anodized aluminum parts. Choose wisely for long-term success.
How does aluminum alloy choice affect the final black color?
Choosing the right aluminum alloy is crucial. It directly impacts the final black color and finish. Not all alloys are created equal for this process.
The secret lies in the alloying elements. These elements, like silicon or copper, react differently during anodizing. This affects how the black dye is absorbed.
Common Alloys and Black Anodizing Results
| Alloy Series | Primary Element | Typical Black Finish |
|---|---|---|
| 2xxx | Copper (Cu) | Muted, sometimes uneven |
| 4xxx | Silicon (Si) | Smutty, dark gray |
| 6xxx | Magnesium/Silicon | Consistent, rich black |
| 7xxx | Zinc (Zn) | Deep, rich black |
This simple guide helps in selecting the best material. It ensures you get the desired finish for your black anodized aluminum parts.
The choice of alloy fundamentally changes the outcome. It’s a common issue we help clients navigate at PTSMAKE. Certain elements interfere with the anodizing process, preventing a true, deep black.
The Impact of Specific Alloying Elements
The Problem with Silicon and Copper
4xxx series alloys, rich in silicon, are a prime example. The silicon particles don’t anodize properly. This results in a non-uniform, smutty gray finish instead of a clean black.
Similarly, 2xxx series alloys contain high levels of copper. During the anodizing process, copper can cause issues. These intermetallic compounds8 can lead to an uneven or muted black finish. The final color often lacks the depth and richness expected.
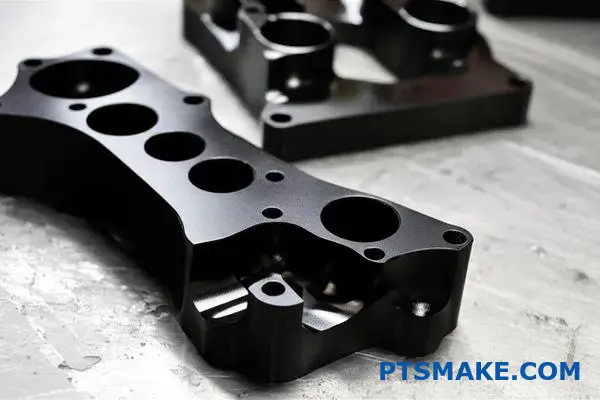
The Go-To Alloys for Black
Based on our testing, 6061 alloy is the benchmark. It consistently produces a high-quality, rich black finish. Its balanced composition makes it ideal for cosmetic anodizing.
7075 is another excellent choice. It often yields a slightly different, even deeper shade of black. This is due to its zinc content. The choice between 6061 and 7075 can depend on the specific aesthetic you want to achieve.
| Alloy | Key Alloying Element | Effect on Black Anodizing |
|---|---|---|
| 2024 | Copper | Uneven dye absorption, muted color |
| 4043 | Silicon | Creates a "smutty" dark gray finish |
| 6061 | Magnesium, Silicon | Excellent. Consistent, rich black. The industry standard. |
| 7075 | Zinc | Excellent. Very deep, sometimes slightly different black shade. |
Your alloy choice dictates the final look. Silicon and copper alloys often produce a gray or muted color. For a true, deep black finish, 6061 is the standard, while 7075 can provide an even deeper shade for your black anodized aluminum parts.
What is the relationship between film thickness and color depth?
The thickness of the anodic film directly impacts the final color depth. This is especially true for dyed finishes like black. A thicker film has more porous space.
This extra space allows the material to absorb more dye pigment. The result is a much deeper and richer color saturation.
For a true, deep black anodized aluminum finish, a thicker coating within the Type II classification is almost always preferred. We aim for a specific range to achieve this.
| Film Type | Ideal Thickness for Black | Resulting Color |
|---|---|---|
| Type II | 18-25 microns | Deep, Rich Black |
| Type II | < 15 microns | Lighter, Less Saturated |
While a thicker film is ideal for Type II dyed finishes, the situation is different for Type III anodizing, also known as hardcoat. It’s a common point of confusion for our clients.
The Challenge with Type III Hardcoat
Hardcoat anodizing creates a significantly denser and harder oxide layer. This density is excellent for wear resistance but creates a challenge for dyeing. The pores are smaller and less uniform.
This compact structure makes it very difficult for large dye particles to penetrate the film effectively and evenly.
Dyeing Limitations and Trade-offs
If a Type III hardcoat is too thick, achieving a deep, consistent black becomes nearly impossible. The color can appear faded or blotchy.
It becomes a critical trade-off. You must balance the need for extreme hardness with the desired aesthetic of a rich black finish. The film’s pore morphology9 is the controlling factor in this process. In past projects at PTSMAKE, we’ve helped clients navigate this precise balance.
| Anodizing Type | Porosity | Dye Absorption | Best Use Case for Black |
|---|---|---|---|
| Type II | High / Uniform | Excellent | Decorative, Rich Colors |
| Type III | Low / Dense | Limited / Difficult | High Wear Resistance |
For a rich black anodized aluminum part, a thicker Type II film (18-25 µm) is best. However, with Type III hardcoat, excessive thickness hinders dye absorption, creating a trade-off between hardness and color depth.
What pre-treatments exist and how do they alter the look?
The final appearance of an anodized part is decided long before it enters the anodizing tank. Pre-treatments are the crucial first step.
These processes prepare the aluminum’s surface texture. This stage defines whether your final part will have a matte, satin, or glossy finish.
Mechanical Pre-treatments
These methods physically alter the surface. Think of it as preparing the canvas before painting. They include processes like blasting, tumbling, and polishing. Each one creates a unique starting point for the final look.
Chemical Pre-treatments
These use chemical reactions to modify the surface. They can either etch the surface to create a matte finish or chemically polish it for a high-gloss, reflective look.
| Method | Type | Resulting Finish |
|---|---|---|
| Blasting | Mechanical | Uniform Matte |
| Polishing | Mechanical | Reflective Gloss |
| Alkaline Etching | Chemical | Fine Matte |
| Bright Dipping | Chemical | Mirror-like Gloss |

Let’s break down how these processes work. Understanding the mechanism behind each treatment is key to selecting the perfect finish for your project’s requirements. At its core, it’s about controlling how light reflects off the surface at a microscopic level.
How Mechanical Methods Shape the Surface
Abrasive Techniques for Matte Finishes
Blasting and tumbling use abrasive media to impact the surface. This creates millions of tiny dents that diffuse light rather than reflecting it directly. This results in a very uniform, non-directional matte appearance. It’s an excellent way to hide minor scratches or die lines from extrusion.
Smoothing for Glossy Finishes
Polishing and buffing achieve the opposite. These methods physically smooth out the microscopic peaks and valleys on the part’s surface. This creates a more uniform plane, allowing light to reflect coherently. The result is a bright and glossy finish.
Chemical’s Impact on Texture
Creating Matte with Alkaline Etching
Alkaline etching chemically dissolves a very thin outer layer of the aluminum. This controlled corrosion creates a fine, satin-like texture. In our experience at PTSMAKE, this is a popular choice for achieving a consistent, high-end look on black anodized aluminum parts.
Achieving Brilliance with Acid Bright Dipping
Acid bright dipping is essentially a chemical polishing process. The acid mixture smooths the surface by dissolving the microscopic peaks faster than the valleys. This significantly increases the surface’s specular reflectivity10, producing a brilliant, mirror-like shine before anodizing even begins.
| Pre-treatment | Primary Mechanism | Best For |
|---|---|---|
| Bead Blasting | Physical Abrasion | Hiding defects, uniform matte look |
| Polishing | Physical Smoothing | High-gloss, decorative applications |
| Alkaline Etching | Chemical Dissolution | Satin matte, hiding extrusion lines |
| Acid Bright Dip | Chemical Polishing | Mirror-like, highly reflective finish |
Pre-treatment is fundamental to the final look. Mechanical methods physically abrade or smooth the surface for matte or gloss finishes. Chemical treatments use etching for a satin look or bright dipping for a mirror shine, setting the stage before the anodic film is grown.
How does black anodizing compare to powder coating or painting?
When choosing a finish, the details matter. It’s not just about looks. Anodizing is unique. It becomes part of the aluminum, not just a layer on top.
This creates superior adhesion. It also improves heat transfer significantly.
Painting and powder coating are different. They are applied coatings. They offer a much wider range of colors. They can also hide surface defects much better.
Here is a quick comparison table.
| Feature | Black Anodizing | Powder Coating / Painting |
|---|---|---|
| Adhesion | Integral to metal | Can chip or peel |
| Heat Transfer | Excellent | Poor (Insulator) |
| Color Options | Limited | Virtually unlimited |
| Defect Coverage | Poor | Good to Excellent |
Anodizing uses an electrochemical11 process. This process converts the aluminum surface into a hard, durable oxide layer. This is why a black anodized aluminum part is so resistant to wear and corrosion. The finish is literally part of the component.
Paint and powder coatings are additive. They sit on top of the surface. While modern coatings are tough, they can still chip or flake off under stress. This exposes the base metal underneath.
A critical difference we see at PTSMAKE is heat dissipation. The anodized layer is part of the metal. It maintains excellent thermal conductivity. This is vital for parts like heat sinks or electronic enclosures.
Paint and powder coats act as insulators. They trap heat, which is a major problem for performance-critical components.
However, if a surface has minor cosmetic flaws, paint or powder coating works well. They easily cover small scratches. Anodizing will not hide these imperfections.
Practical Selection Guide
| Application | Recommended Finish | Why? |
|---|---|---|
| Heat Sinks | Black Anodizing | Superior heat dissipation. |
| Exterior Panels | Powder Coating | High color variety and durability. |
| High-Wear Parts | Black Anodizing | Excellent abrasion resistance. |
| Cosmetic Covers | Painting/Powder Coat | Can hide surface imperfections. |
The choice depends entirely on your priorities. Anodizing offers unmatched durability and heat transfer. Paint and powder coating provide cosmetic flexibility, covering flaws and offering endless color options. Your application’s functional requirements will guide the decision.
How do you adjust parameters to achieve a matte vs gloss finish?
Achieving the perfect finish starts long before the anodizing tank. The key is the pre-treatment stage. It’s all about controlling the surface texture of the aluminum part first.
For different visual effects, we use distinct preparation methods. Your choice here directly creates either a matte or a gloss appearance.
Creating a Matte Finish
To get a non-reflective, matte surface, we use an alkaline etch bath. Increasing the time or the chemical concentration in this bath creates a finely textured surface. This diffuses light, resulting in a matte look.
Achieving a Gloss Finish
For a shiny, reflective gloss finish, we skip the etch process. Instead, we use a chemical bright dip or mechanical polishing. This step smooths the surface before it enters the anodizing line.
| Finish Type | Primary Pre-treatment Step | Key Control Parameter |
|---|---|---|
| Matte | Alkaline Etch | Time / Concentration |
| Gloss | Bright Dip / Polishing | Bypass Etch Step |
The pre-treatment is where you truly define the final look. Many think the anodizing itself controls the sheen, but that’s a misconception. The anodizing process builds a transparent oxide layer on the existing surface. So, the texture you create beforehand is what you’ll see in the end.
The Science Behind the Sheen
For Matte Surfaces
The process relies on a controlled chemical reaction. The [alkaline etch]()12 solution microscopically roughens the aluminum surface. This creates tiny peaks and valleys that scatter light instead of reflecting it directly. The result is a soft, non-glare finish. This is very popular for high-end black anodized aluminum electronics housings.
For Glossy Surfaces
To achieve a mirror-like finish, we must make the surface as smooth as possible. We have two primary methods for this before anodizing.
- Chemical Bright Dip: This is an acidic bath. It smooths the aluminum on a microscopic level by dissolving surface imperfections.
- Mechanical Polishing: This involves physically buffing the part. It creates an extremely smooth, reflective surface.
In our experience at PTSMAKE, the choice between these methods depends on the part’s geometry and the required level of gloss.
| Polishing Method | Best For | Outcome |
|---|---|---|
| Chemical Bright Dip | Complex shapes, small features | Uniform, bright, and smooth finish |
| Mechanical Polishing | Flat or simple curved surfaces | Highest possible mirror-like reflectivity |
The final appearance is determined before the part is anodized. A matte finish comes from etching the surface, while a gloss finish requires skipping the etch and instead polishing or bright-dipping the part for maximum smoothness.
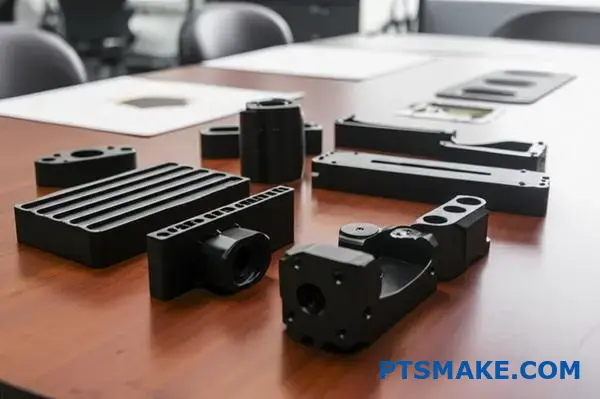
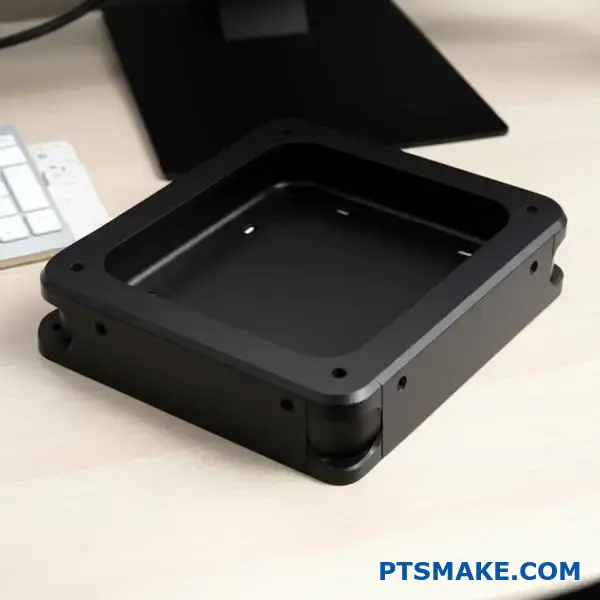
For which applications is black anodized aluminum the ideal choice?
Choosing the right finish is critical. Black anodized aluminum isn’t just for looks. It offers specific functional benefits for demanding applications.
Let’s break down where this material truly shines. It’s about matching its properties to your application’s specific needs.
Key Decision Factors
Consider durability, aesthetics, and electrical properties. Each factor plays a role in the final decision for the right material.
| Application | Key Benefit |
|---|---|
| High-End Electronics | Premium Feel |
| Optical Components | Low Reflectivity |
| Tactical Gear | Durability |
| Architectural Trim | Corrosion Resistance |
This helps ensure the best performance.
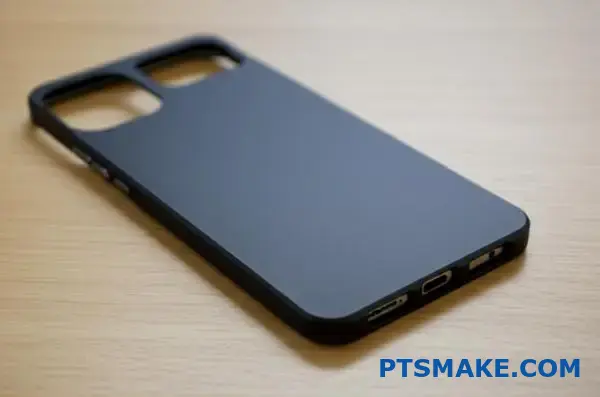
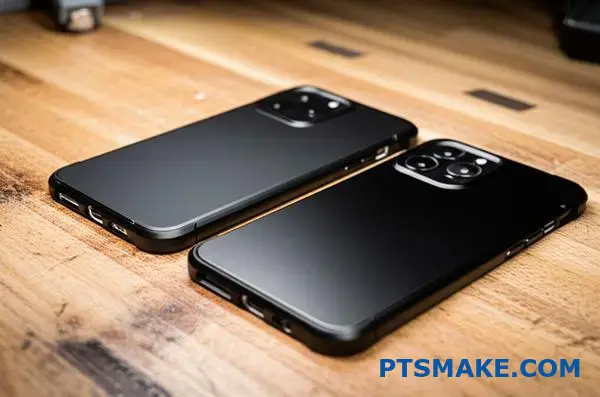
High-End Electronics Enclosures
For consumer electronics, look and feel are crucial. Black anodized aluminum provides a sleek, premium finish that feels great to the touch.
More importantly, the anodic layer is an electrical insulator. This prevents short circuits inside devices like laptops or audio amplifiers. It’s a functional and aesthetic choice.
Optical and Tactical Equipment
In optics, controlling light is everything. The matte black surface has very low reflectivity. This is essential for camera housings and scientific instruments to prevent stray light.
The dye used in the process can significantly affect the material’s thermal emissivity13. This property is crucial for components that need to manage heat radiation effectively.
For tactical gear, durability and stealth are key. The hard, non-reflective surface resists scratches and wear. It won’t glint in the sun, which is vital for military or law enforcement applications.
Architectural Applications
Black anodized aluminum is also excellent for outdoor use. At PTSMAKE, we’ve used it for window frames and decorative trim. The anodic coating protects the aluminum from corrosion and UV degradation.
Here is a quick comparison of its features across applications.
| Feature | Electronics | Optics | Tactical | Architecture |
|---|---|---|---|---|
| Primary Need | Aesthetics & Insulation | Low Reflectivity | Durability & Stealth | Corrosion Resistance |
| Wear Resistance | High | Moderate | Very High | High |
| Cost Impact | Moderate | Low | Low | Moderate |
In summary, black anodized aluminum is a versatile choice. Its selection depends on needs like electrical insulation, low light reflectivity, rugged durability, or corrosion resistance. It’s about function meeting form for optimal performance in your project.
How should a part be designed for successful anodizing?
Successful anodizing starts on the drawing board. It’s not just a finish; it’s an electrochemical process. Design choices directly impact the final quality.
Thinking about "Design for Manufacturing" (DFM) is crucial. A few simple rules can prevent major headaches later. These steps ensure a uniform, durable coating.
Key Design Considerations
Good design avoids common anodizing defects. Focus on geometry, surfaces, and handling points. This is especially true for a flawless black anodized aluminum finish.
| Design Area | Guideline |
|---|---|
| Internal Corners | Use generous radii, avoid sharp angles. |
| Hollow Sections | Add drainage holes for liquids. |
| Large Surfaces | Break them up or add texture. |
| Part Handling | Specify permissible racking locations. |
These small adjustments make a huge difference. They prevent issues like burning, staining, and color inconsistency. At PTSMAKE, we guide clients on these points early.
Diving deeper, let’s explore why these rules matter. Anodizing involves submerging parts in chemical baths and applying electric current. The part’s shape dictates how that current and liquid flows.
Avoiding Sharp Internal Corners
Sharp internal corners are a major problem. They can prevent the electric current from reaching evenly. This creates thin or uncoated spots. This is due to what’s known as the Faraday cage effect14.
Conversely, sharp external corners attract too much current. This can cause the coating to "burn," leading to a brittle, discolored, and oversized build-up. We recommend a minimum radius of 0.5mm.
Designing for Drainage
Hollow parts or deep blind holes can trap process chemicals. If these liquids aren’t drained, they will bleed out later. This causes ugly stains and ruins the finish.
Adding small, strategically placed drainage holes allows these fluids to escape. This simple step ensures a clean, uniform surface after processing.
Managing Large, Flat Surfaces
Large, flat surfaces are challenging for color consistency. They amplify even minor variations in the anodizing process. This can result in a blotchy or streaky appearance.
To avoid this, consider adding subtle textures. Breaking up the surface with grooves or ribs also helps. This scatters light and makes color variations less noticeable.
| Bad Design Practice | Good Design Practice |
|---|---|
| Sharp internal/external corners | Minimum 0.5mm radii |
| Sealed hollow cavities | Small drainage/venting holes |
| Large, smooth, flat faces | Textured or broken-up surfaces |
| No racking point specified | Racking points on non-cosmetic areas |
By designing with anodizing in mind, you avoid common pitfalls. Simple adjustments like adding radii, drainage holes, and specifying racking points ensure a high-quality, consistent finish. This foresight saves time, reduces rework, and lowers overall costs.
How do you ensure consistent color on complex geometry parts?
Current robbing is a major headache. It occurs when electricity takes the easiest path. This leaves recessed areas with a thinner coating.
This results in lighter, inconsistent color. The issue is very noticeable on parts with complex shapes. It’s especially true for deep black anodized aluminum finishes.
We must control the current’s path. Strategic racking and auxiliary cathodes are key to achieving a uniform finish.
| Challenge | Impact on Color |
|---|---|
| Current Robbing | Lighter, uneven shades |
| Complex Geometry | Accentuates inconsistencies |
To defeat current robbing, we need smart tools. These ensure uniform current distribution across the entire part. This is essential for a consistent finish.
Strategic Racking is Your First Defense
At PTSMAKE, we know racking is more than just holding a part. Its orientation dictates current flow. We position parts to minimize shielded areas. This prevents one area from "robbing" current from another. Each part gets a fair share of electricity.
Using Auxiliary Cathodes for Precision
For very complex geometries, racking isn’t always enough. We use what are called auxiliary cathodes15. These are extra conductors placed near recessed areas. They guide the current into hard-to-reach spots. This ensures those deep pockets get the same coating thickness as the outer surfaces.
The Role of Consistent Agitation
Finally, movement is critical. We use consistent agitation in both the anodizing and dye tanks. This keeps chemicals evenly mixed. It prevents localized depletion around the part, which is crucial for uniform color absorption.
| Technique | Primary Function |
|---|---|
| Strategic Racking | Optimize part orientation for even current flow |
| Auxiliary Cathodes | Direct current to difficult-to-reach areas |
| Tank Agitation | Maintain uniform chemical concentration |
Achieving uniform color on complex parts means controlling the electrical current. Through strategic racking, auxiliary cathodes, and constant tank agitation, we overcome current robbing to ensure a flawless and consistent finish every time.
What are emerging technologies in black aluminum finishing?
The future of black aluminum finishing is exciting. We are moving beyond traditional dyeing methods.
New technologies promise greater durability and color stability. This is crucial for high-performance applications.
Key Future Technologies
Two methods stand out: electrolytic coloring and plasma electrolytic oxidation (PEO). Both offer unique advantages for creating robust black finishes. They represent a significant leap forward.
| Technology | Primary Advantage | Resulting Finish |
|---|---|---|
| Electrolytic Coloring | Superior lightfastness | Stable black/bronze |
| PEO | Extreme hardness | Ceramic-like layer |
These advancements are changing how we approach durable surface treatments.

The push for better performance drives innovation in surface finishing. Standard black dye for anodizing can fade over time, especially with UV exposure. This is a problem we’ve helped clients overcome.
Electrolytic Coloring: A Step Up
Electrolytic coloring, or two-step anodizing, solves the fading issue. Instead of organic dye, we deposit stable metallic salts into the anodic pores. This creates a black color that is part of the coating itself. The result is an incredibly lightfast finish.
Plasma Electrolytic Oxidation (PEO)
For the ultimate in hardness, we look to new processes. One of the most promising is plasma electrolytic oxidation16. It transforms the aluminum surface into a hard, ceramic-like layer. In our tests, this finish provides superior wear and corrosion resistance compared to traditional hardcoat anodizing.
This process is ideal for components in harsh mechanical or chemical environments. The resulting black finish is not just a color; it’s a functional, protective layer. We see it as a game-changer for critical parts.
| Feature | Type III Hard Anodizing | Plasma Electrolytic Oxidation (PEO) |
|---|---|---|
| Hardness (HV) | 400-700 | 1200-2000 |
| Wear Resistance | Good | Excellent |
| Process | Standard Electrolysis | High-Voltage Micro-Arc |
| Best For | General wear parts | Extreme wear, high-heat apps |
Emerging technologies are revolutionizing black aluminum finishing. Electrolytic coloring offers unmatched UV stability, while PEO creates an incredibly hard, ceramic-like surface. These methods provide superior durability and performance for demanding applications, moving far beyond traditional dyeing techniques.
Get a Fast Quote on Black Anodized Aluminum | PTSMAKE
Ready to enhance your next project with black anodized aluminum? Contact PTSMAKE today for a quick, detailed quote—from prototype to production. Our expertise guarantees precision, consistency, and reliability for your critical components. Send your inquiry now and experience world-class manufacturing partnership!

Discover how these microscopic particles can impact your product’s final finish and performance. ↩
Discover how color consistency is achieved in black anodized parts for a flawless finish. ↩
Understand how this property impacts the long-term appearance and durability of your dyed parts. ↩
Understand the science behind the anodizing process to better inform your material finishing choices. ↩
Explore how this electrochemical process fundamentally enhances the surface properties of aluminum and other metals. ↩
Understand how microscopic texture impacts the visual and functional properties of your finished parts. ↩
Learn more about this advanced coloring process for superior durability and fade resistance. ↩
Learn how these microscopic alloy structures influence the final surface quality and performance. ↩
Understand the microscopic structure of anodic films and how it affects finishing options. ↩
Learn the physics behind mirror-like finishes and how it affects your part’s visual appeal. ↩
Understand the science behind how this process creates an incredibly hard, protective aluminum oxide layer. ↩
Learn more about the chemical reactions and controls for this essential surface treatment. ↩
Understand how this surface property impacts thermal management in your electronic and optical designs. ↩
Learn how electrical fields affect coating in tight corners and recesses. ↩
Learn how these specialized tools enable precision coating in our advanced anodizing processes. ↩
Understand the micro-arc process that creates this ultra-hard, ceramic-like surface on aluminum. ↩