Many engineers struggle with champagne anodizing projects that fail to meet their exact specifications. You’ve likely experienced the frustration of receiving parts with inconsistent color, poor durability, or finishes that don’t match your design intent.
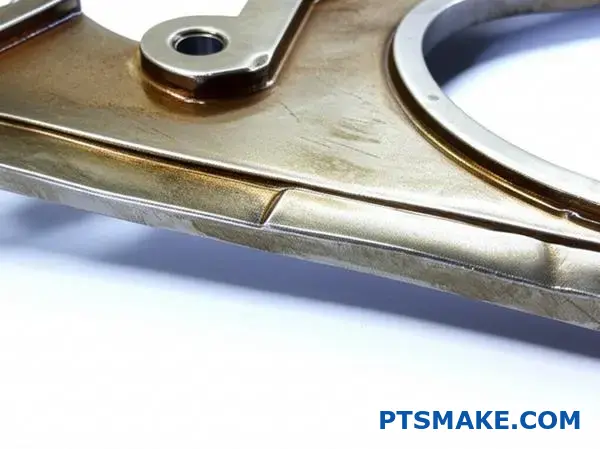
Champagne anodizing is an electrolytic coloring process where metal salts (primarily tin) are deposited into the porous structure of an anodic aluminum oxide layer, creating a warm, golden finish through controlled light scattering and particle distribution.
This guide breaks down the technical fundamentals and practical considerations you need to specify, execute, and troubleshoot champagne anodized finishes successfully. You’ll learn the chemistry behind the color formation, process control variables, and how to avoid common defects that compromise quality.
What is the core mechanism of electrolytic champagne coloring?
The beautiful champagne color on aluminum isn’t a paint or dye. It’s a clever use of physics and chemistry. This process creates a durable, lightfast finish.
The Science of Light
We create this effect by depositing tiny metal particles into a porous surface. The color you see depends on how light interacts with these particles. It’s about light scattering, not pigment. This makes the color extremely stable.
Electrolytic vs. Organic Dyeing
This method is fundamentally different from traditional dyeing.
| Feature | Electrolytic Coloring | Organic Dyeing |
|---|---|---|
| Method | Metal salt deposition | Absorption of dye |
| Durability | High (lightfast) | Low (can fade) |
| Color Source | Light scattering | Pigment |
The result is a premium, long-lasting finish we often recommend at PTSMAKE.
The magic behind the champagne anodized finish lies in a precise, multi-step electrochemical process. It is far more robust than simply applying a layer of color.
Creating the Anodic Layer
First, we create a porous anodic oxide layer on the aluminum. This is done through anodizing in an acid bath. Think of this layer as a honeycomb structure with countless microscopic pores. This structure is essential for the next step.
The Role of AC Current
Next, the part is placed in a solution containing metal salts, often tin sulfate. We apply an alternating current (AC). This current drives the metal ions from the solution into the bottom of those tiny pores. This is a critical deposition1 process. The AC voltage control is key to uniformity.
Particle Control is Everything
The size and distribution of the deposited metal particles determine the final color. It’s all about controlling how light reflects and scatters off these particles.
| Particle Size | Perceived Color |
|---|---|
| Small & Uniform | Light Champagne |
| Larger | Darker Bronze |
| Irregular | Inconsistent Finish |
Through past projects at PTSMAKE, we’ve found that precise control over voltage and immersion time is non-negotiable for achieving a consistent, perfect champagne shade that meets client specifications.
The core mechanism involves depositing metal salts into a porous anodic layer. The size of these particles dictates how light scatters, creating the champagne color. This method provides a durable, fade-resistant finish superior to organic dyes.
How does aluminum alloy composition affect champagne color?
The final champagne color on an aluminum part isn’t just a coating. It begins with the raw material itself. The specific alloy you choose is the foundation for the finish.
Different alloys react uniquely to the anodizing process. The elements mixed into the aluminum change everything.
The Foundation: Your Aluminum Alloy
Key elements dictate the final appearance. These additives influence the clarity and hue of the final champagne anodized finish. Even small variations matter.
| Alloying Element | Primary Influence on Champagne Anodizing |
|---|---|
| Silicon (Si) | Can introduce a grayish hue |
| Copper (Cu) | May create a yellowish or dull tint |
| Magnesium (Mg) | Promotes a clear and bright finish |
Choosing the right alloy is the first step to achieving a perfect, consistent color.
The base metal isn’t just a canvas; it’s an active ingredient. The anodizing process grows a porous aluminum oxide layer directly from the substrate. The color is then electrolytically deposited into these tiny pores. The alloy’s composition directly changes how this layer forms.
Unpacking the Anodic Film Formation
The alloying elements don’t just sit there. They react, or fail to react, during anodizing. This alters the structure of the protective oxide layer, impacting the final look.
Silicon’s Murky Influence
Silicon, common in casting alloys, doesn’t anodize. It remains as microscopic particles embedded within the oxide layer. This scatters light, often resulting in a darker, more grayish champagne tone.
Copper’s Complicating Role
Copper, the primary element in 2000-series alloys, is challenging. It can create non-uniformities in the oxide layer. These intermetallic compounds2 can cause a dull, sometimes brownish or yellowish tint, making a clean champagne color difficult to achieve.
Magnesium for Clarity
Magnesium, found in 5000 and 6000-series alloys, is ideal for cosmetic finishes. It helps form a very clear and uniform anodic film. This provides the perfect base for a bright, consistent champagne anodized color.
At PTSMAKE, we guide clients on alloy selection to ensure the final finish matches their design intent.
| Alloy Series | Common Use | Champagne Anodizing Suitability |
|---|---|---|
| 6061 | Structural Components | Excellent, very consistent and clear |
| 7075 | High-Stress Applications | Good, but can have a slight warm hue |
| 5052 | Sheet Metal | Excellent, produces a bright finish |
Your aluminum alloy choice is not a minor detail. Alloying elements like silicon and copper directly alter the oxide layer during anodizing. This dictates the clarity, hue, and consistency of the final champagne finish, making alloy selection a critical first step for quality results.
What defines the specific ‘champagne’ anodized color standard?
The word "champagne" alone is too subjective. What one person sees as champagne, another might see as light bronze.
That’s why we rely on data. We must quantify color to ensure consistency for every single part.
Using Numbers to Define Color
We use colorimetric systems to translate a subjective color into precise, objective data. This removes all guesswork.
The most common system is CIE Lab*. It maps every color numerically.
| Value | Represents | For Champagne Anodized |
|---|---|---|
| **L*** | Lightness (0=black, 100=white) | Mid-to-high range |
| **a*** | Red-Green axis | Slightly positive (reddish) |
| **b*** | Yellow-Blue axis | Moderately positive (yellowish) |
This system turns a vague idea into a specific manufacturing target.
Beyond the Target: Defining Acceptable Variation
Pinpointing the exact Lab* values is just the start. The real challenge is maintaining that color across an entire production run.
This is where a colorimetric3 approach becomes crucial. We must define an acceptable tolerance.
Understanding Delta E (ΔE)
We use a value called Delta E (ΔE) to measure the distance between two colors. A lower ΔE means a closer match. At PTSMAKE, we agree on a maximum ΔE value with our clients before production begins.
This ensures everyone is aligned on what "acceptable" looks like. It protects the project from costly rework.
| Delta E (ΔE) Value | Perceptual Interpretation | Common Application |
|---|---|---|
| < 1.0 | Not perceptible by human eye | High-end electronics, luxury goods |
| 1.0 – 2.0 | Very small difference, only visible to a trained eye | Automotive panels, brand-specific colors |
| 2.0 – 3.5 | Small, yet noticeable difference | Architectural elements, general products |
Industry-Specific Codes
For certain industries, standards already exist. In architecture, the EURAS standard is common for champagne anodized finishes. Codes like C-31 (light bronze) and C-32 (medium bronze) provide a trusted baseline that designers and manufacturers can reference.
Defining color with data, setting clear tolerances with ΔE, and using established industry codes are essential. This is how we deliver perfect color consistency.
Which metal salts typically create the champagne anodized finish?
The secret to the classic champagne anodized color lies in specific metal salts. The choice of salt is critical for achieving the desired hue, stability, and longevity. It’s what separates a premium finish from a subpar one.
The Modern Standard: Tin Sulfate
Today, tin sulfate (SnSO₄) is the go-to salt. It consistently produces that elegant, light bronze tone we call champagne. This salt is prized for its reliability in the coloring process.
Historical Alternatives
In the past, other salts were common. Cobalt and nickel salts were used to create similar colors. However, they have been largely replaced by tin for several important reasons.
| Metal Salt | Key Advantage | Common Use |
|---|---|---|
| Tin Sulfate | Excellent Lightfastness | Modern Standard |
| Cobalt Sulfate | Rich Color Tones | Historical/Niche |
| Nickel Sulfate | Cost-Effective (Historically) | Less Common Now |

The shift to tin sulfate wasn’t accidental. It represents a significant advancement in anodizing technology, driven by the need for better performance and consistency.
Why Tin Sulfate is Preferred
Tin’s primary advantage is its exceptional lightfastness. This means the color won’t fade or change when exposed to sunlight and UV rays. This is critical for parts used in architecture or automotive exteriors.
Another key factor is process stability. Tin sulfate solutions are easier to control during production. In our work at PTSMAKE, this allows us to deliver consistent color across thousands of parts in a single batch. It eliminates color variation, a major pain point for clients.
The coloring happens through electrolytic deposition4. During this step, tin ions are deposited into the base of the pores in the anodic layer. This process is highly controllable with tin, ensuring uniform color.
Drawbacks of Older Methods
Cobalt and nickel salts, while effective, have fallen out of favor. Their colors can be less stable under UV exposure. They also present greater challenges in maintaining bath chemistry. This can lead to inconsistent results. For precision-focused industries, that unpredictability is not acceptable.
| Feature | Tin Sulfate | Cobalt/Nickel Salts |
|---|---|---|
| UV Resistance | Superior | Moderate to Good |
| Color Consistency | Very High | Variable |
| Process Control | Simpler | More Complex |
| Environmental Impact | Lower Concern | Higher Concern |
In essence, tin sulfate is the modern industry standard for champagne anodized finishes. It offers superior lightfastness and process stability, ensuring a consistent, durable, and high-quality color that meets the stringent demands of our clients at PTSMAKE.
What are the primary electrolytes used in champagne anodizing?
The secret to a perfect champagne anodized finish lies in the chemical bath. It’s all about creating the right foundation. For Type II anodizing, sulfuric acid is the industry standard.
The Power of Sulfuric Acid
This electrolyte is the workhorse. It doesn’t just build a protective layer. It also etches it at the same time. This dual action is essential for the process.
Creating Porous Structures
This process creates a highly porous aluminum oxide layer. These tiny pores are necessary. They are what will hold the champagne-colored dye later.
| Acid Concentration | Effect on Pore Structure |
|---|---|
| Low | Smaller, denser pores |
| High | Larger, more open pores |
This structure is the canvas for the final color.
To achieve the desired finish for a champagne anodized part, we must control the chemical environment precisely. The entire process hinges on a delicate balance within the sulfuric acid bath.
A Balancing Act: Growth vs. Dissolution
The sulfuric acid electrolyte performs two jobs at once. It grows a hard, durable aluminum oxide layer on the part’s surface. Simultaneously, it dissolves some of that oxide.
This controlled dissolution creates the nano-scale pores. The size and depth of these pores are critical. They determine how well the dye is absorbed, which affects the final color’s richness and uniformity. Getting this balance wrong can lead to inconsistent finishes.
Key Process Parameters
In our projects at PTSMAKE, we have found that controlling specific parameters is key to mastering this balance. We closely monitor a few key variables. This ensures the anodic film5 meets the exact specifications for every component.
| Parameter | Impact on Oxide Layer |
|---|---|
| Temperature | Affects dissolution rate |
| Current Density | Influences growth rate and hardness |
| Bath Agitation | Ensures uniform acid contact |
| Time in Bath | Determines final layer thickness |
Adjusting these factors allows us to tailor the oxide layer. We create the ideal porous structure for that beautiful champagne finish.
Sulfuric acid is the key electrolyte for creating the necessary porous oxide layer in Type II anodizing. Its unique ability to simultaneously grow and dissolve the surface is fundamental to preparing aluminum for the beautiful champagne anodized finish that clients desire.
What key properties define a quality champagne anodized finish?
To judge a quality finish, we must use clear metrics. It’s not just about a beautiful color. It’s about measurable performance. A truly successful champagne anodized finish is defined by specific, quantifiable characteristics.
These properties ensure the part looks great and lasts. We rely on standardized tests to guarantee consistency and durability for our clients at PTSMAKE. This removes guesswork from the quality assessment.
Key Performance Metrics
The following characteristics are essential for evaluating any champagne anodized part.
| Performance Metric | Key Indicator |
|---|---|
| Color Uniformity | Visual consistency, no streaks or blotches. |
| Film Thickness | Measured in microns (µm). |
| Seal Quality | Resistance to staining and absorption. |
| Abrasion Resistance | Durability against wear and friction. |
| Corrosion Resistance | Protection from environmental elements. |
Defining success requires a deep dive into how we measure these properties. Each test reveals something crucial about the anodizing process itself. Simply looking at a part isn’t enough.
A finish can appear perfect initially. But it might fail quickly under real-world conditions if the underlying process was flawed. This is why we insist on empirical data.
Evaluating Durability and Longevity
The true quality of a champagne anodized finish is revealed through stress testing. Corrosion resistance, typically evaluated using a salt spray test, is critical for parts exposed to harsh environments. It shows how well the coating protects the aluminum beneath.
Another key metric is hardness and wear resistance. Based on our test results, a finish must withstand daily use. The Taber test6 is a perfect example of how we simulate this wear. A poor result indicates a soft coating that will scratch and degrade prematurely.
At PTSMAKE, we’ve seen that failures in these tests often point back to improper sealing. A poor seal leaves the anodic pores open, compromising the entire finish.
| Test | Purpose | Common Standard |
|---|---|---|
| Salt Spray | Measures corrosion resistance | ASTM B117 |
| Taber Abrasion | Measures wear and abrasion resistance | ASTM D4060 |
| Dye Stain | Checks seal quality | ASTM B136 |
These performance metrics—color uniformity, thickness, sealing, abrasion, and corrosion resistance—are non-negotiable. They are the practical measures that separate a premium, durable champagne anodized finish from a purely cosmetic one.
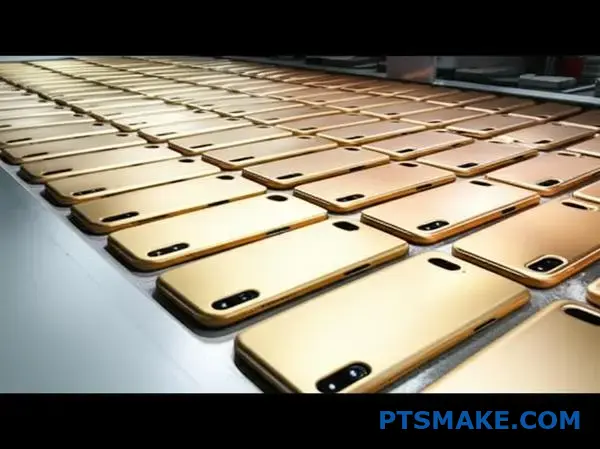
What are the sequential stages of a champagne anodizing line?
Achieving the perfect champagne anodized finish is a precise sequence. It’s not a single action but a journey through multiple stages.
Each step systematically prepares the aluminum for the next. A small error can affect the final result.
This meticulous process ensures a beautiful and durable coating. Let’s map out the entire flow from start to finish.
| Stage Group | Key Steps |
|---|---|
| Preparation | Racking, Cleaning, Degreasing, Rinsing |
| Surface Prep | Etching, De-smutting, Rinsing, Anodizing |
| Coloring | Electrolytic Coloring, Rinsing |
| Finishing | Sealing, Rinsing, De-racking, Drying |
Mapping the Anodizing Journey
The entire process flow is a chain where every link is vital. We can break it down into four main phases: preparation, surface treatment, coloring, and finishing.
Phase 1: Meticulous Preparation
It starts with Racking, where parts are securely fixed to allow electrical current and solution flow. This is followed by intensive Cleaning and Degreasing. Any oil or dirt will cause defects, so this step is critical.
Phase 2: Surface Treatment
Next, Etching uses a caustic solution to create a uniform matte surface. After etching, some alloy elements remain as a black smut. The part then undergoes de-smutting7 to remove this residue. Then comes the main event: Anodizing. The part is submerged in an acid bath, and an electric current builds a durable, porous oxide layer.
Phase 3 & 4: Coloring and Finishing
For that specific champagne anodized look, parts enter the Electrolytic Coloring tank. Metal salts are deposited into the pores of the oxide layer. The duration dictates the color depth. Finally, Sealing closes these pores, locking in the color and maximizing corrosion resistance. The parts are then de-racked and dried.
| Step | Purpose | Why It’s Critical |
|---|---|---|
| Etching | Creates a uniform matte finish. | Affects final appearance and texture. |
| Anodizing | Builds a hard, porous oxide layer. | Provides durability and corrosion resistance. |
| Coloring | Imparts the champagne color. | Controls the aesthetic and color consistency. |
| Sealing | Closes pores in the oxide layer. | Locks in color and prevents future corrosion. |
The champagne anodized process is a multi-stage sequence from cleaning to sealing. Each step is essential to create a visually appealing, uniform, and highly durable finish, demanding strict process control throughout the entire line.
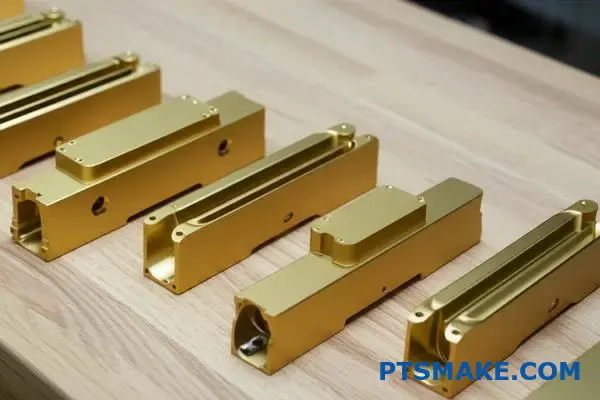
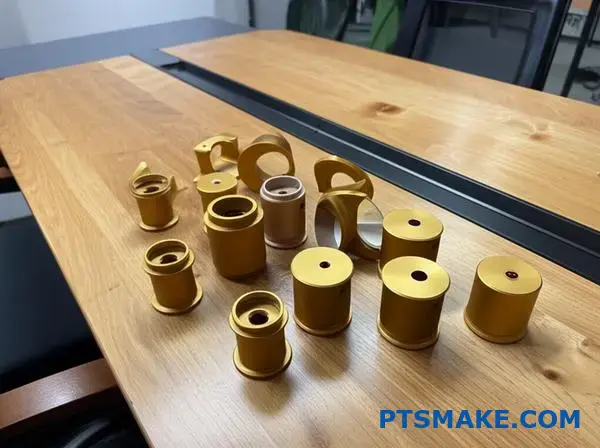
What process variables control the shade of champagne anodized color?
Achieving the perfect champagne anodized shade is a precise science. It is not one single setting, but a balance of several key factors.
These variables directly influence the final color. Each must be carefully controlled to achieve consistency from part to part.
The Core Control Levers
We focus on four primary variables in our process at PTSMAKE. They work together to create the desired shade.
| Variable | Primary Effect on Color |
|---|---|
| Coloring Time | Determines darkness |
| Voltage | Affects deposition speed |
| Bath Temperature | Influences reaction rate |
| Tin Concentration | Controls color intensity |
Understanding these levers is the first step. Mastering them is how we deliver reliable results for our clients.
To truly control the champagne anodized color, we must look at how these variables interact. It’s a delicate dance between chemistry and electricity.
The Impact of Each Variable
Coloring Time
This is the most direct control. Longer immersion time in the coloring tank allows more tin to deposit into the pores of the anodic film. More tin results in a darker, deeper shade.
Voltage
Voltage drives the process. A higher voltage speeds up tin deposition. However, if it’s too high, the coating can become uneven. We find a stable, moderate voltage yields the best uniformity.
Bath Temperature
Temperature affects the speed of the chemical reaction. Based on our tests, a cooler, stable bath temperature slows down the process. This allows for finer control over light champagne shades.
Tin Concentration
The amount of tin salts in the bath is also critical. Higher concentration can create darker shades faster. The process relies on electrolytic deposition8 to embed tin particles. But too much can lead to a poor-quality, powdery finish.
| Variable Adjustment | Expected Shade Change |
|---|---|
| Increase Time | Darker (Bronze-Champagne) |
| Decrease Time | Lighter (Silver-Champagne) |
| Stable Low Temp | Better Control & Consistency |
| Balanced Voltage | Improved Uniformity |
Mastering these four variables—time, voltage, temperature, and tin concentration—is essential. This control ensures we achieve the precise champagne anodized shade specified for each component, delivering consistent quality every time.
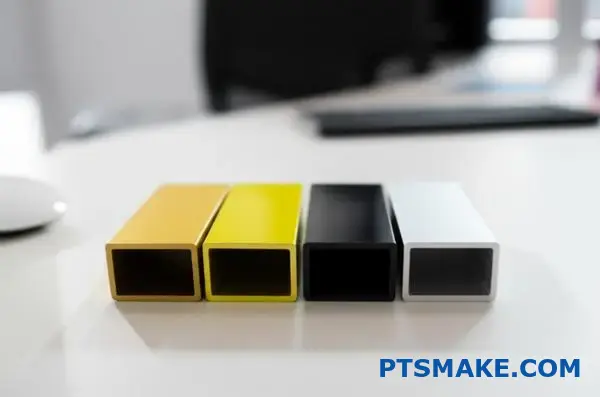
How do you achieve different textures like matte or bright?
The secret to a perfect finish, like a rich champagne anodized surface, isn’t just the dye. It starts with pre-treatment. This crucial step dictates the final texture.
This happens long before the color is applied. We use different etching processes to create either a deep matte or a brilliant bright look. The choice depends entirely on your design goals.
Pre-Treatment’s Role in Texture
Understanding this helps you specify the exact finish you need for your components.
| Etching Type | Resulting Texture | Best For |
|---|---|---|
| Caustic Etching | Deep Matte | Hiding imperfections |
| Acid Etching | Bright/Specular | High-end decorative parts |
The final appearance is truly locked in during pre-treatment. The etching process reshapes the aluminum’s surface on a microscopic level, creating the foundation for the texture.
Caustic (Alkaline) Etching
For a deep matte finish, we use caustic or alkaline etching. This process is more aggressive. It removes a small amount of the surface material, creating microscopic pits.
These pits diffuse light rather than reflecting it directly. This results in a non-reflective, uniform matte appearance. In our experience, this method is excellent for hiding minor die lines or surface imperfections from previous manufacturing steps.
Acid Etching & Bright Dipping
For a bright, mirror-like finish, we turn to acid etching or bright dipping. This is a much finer process. It smooths the surface, leveling out the microscopic peaks and valleys.
This creates a highly reflective, almost mirror-like surface that produces a sharp, specular9 reflection. A bright dip finish on a champagne anodized part gives it a luxurious, jewel-like quality that a matte finish cannot replicate.
| Process | Surface Action | Light Interaction | Final Look |
|---|---|---|---|
| Caustic Etch | Removes material, creates pits | Diffuses light | Deep Matte |
| Acid Etch/Bright Dip | Smoothes surface peaks | Reflects light directly | Bright, Mirror-like |
The key takeaway is that surface texture is not an afterthought. It’s determined by specific pre-treatment etching—caustic for matte and acid for bright—which prepares the aluminum before any color is applied.
What are the common types of champagne anodizing defects?
Diagnosing issues with champagne anodized finishes is much simpler when you categorize them. Each defect tells a story about the process.
Common problems point to specific steps. Burning often means too much current was used. Spotting usually indicates poor rinsing.
Understanding these categories is the first step. It helps us pinpoint the root cause quickly. This ensures we can correct the issue efficiently.
Here is a quick guide to common defects:
| Defect Type | Primary Cause |
|---|---|
| Burning | Excessive electrical current |
| Spotting | Inadequate rinsing |
| Streaking | Alloy or racking issues |
| Color Variation | Process instability |
| Poor Sealing | Incorrect sealing parameters |

Breaking Down Common Anodizing Failures
Let’s look deeper into these common defects. Knowing the cause is essential for prevention. This is a core part of our quality control process at PTSMAKE.
Burning and Spotting
Burning creates a dark, rough surface. It happens when the current density is too high for the part’s alloy or geometry. This can permanently damage the component.
Spotting, or water stains, appears after sealing. This defect is almost always caused by contaminants in the rinse water or an incomplete rinse before the sealing stage.
Streaks and Color Variation
Streaking can be tricky. It might stem from the aluminum alloy itself. Certain intermetallic compounds10 within the metal can react differently during anodizing. It can also be caused by improper racking, which affects current flow.
Color variation is a frustrating defect in champagne anodizing. It often signals instability in the electrolytic coloring bath. This includes temperature, voltage, or immersion time fluctuations. We’ve learned that even minor shifts can cause noticeable differences in shade across a batch.
This table details the visual cues and causes.
| Defect | Visual Appearance | Likely Root Cause |
|---|---|---|
| Streaking | Faint or dark lines on the surface | Alloy segregation or poor racking |
| Color Variation | Inconsistent color across parts | Unstable coloring process parameters |
| Poor Sealing | Chalky, powdery surface that smudges | Incorrect sealing temperature or time |
Categorizing defects like burning, spotting, and color variation is crucial. Understanding their root causes, from current issues to alloy inconsistencies, allows for effective troubleshooting. This ensures consistent quality in your champagne anodized parts.
How does champagne anodizing compare to PVD or powder coating?
Choosing the right finish is a critical decision. It affects durability, aesthetics, and cost. Each option has unique strengths.
Let’s compare champagne anodizing with its main rivals. These include PVD, powder coating, and liquid paint. Understanding their differences is key.
Quick Finish Showdown
Here is a brief overview of these popular choices. We will dive deeper into the specifics later on.
| Finish Type | Primary Benefit | Common Use Case |
|---|---|---|
| Champagne Anodizing | Integral finish, wear-resistant | Architectural aluminum, electronics |
| PVD Coating | Extremely hard, thin layer | Cutting tools, high-end fixtures |
| Powder Coating | Thick, durable, versatile colors | Automotive parts, outdoor furniture |
| Liquid Paint | Cost-effective, endless colors | General industrial, consumer goods |
This table provides a starting point. Now, let’s explore the details that matter for your project.
When we advise clients at PTSMAKE, we go beyond a simple chart. We analyze the specific application to find the perfect match. A finish is not just a color; it is a functional component of the final product. The choice impacts performance significantly.
Durability and Color Stability
Durability is often the top concern. Anodizing creates a hard, integral layer. This means the champagne anodized finish won’t chip or peel. It has excellent UV stability.
PVD is even harder but is a very thin coating. Powder coating provides a thick, protective plastic layer. It is very resistant to impact.
A critical factor here is substrate adhesion11, which varies greatly among these methods. In our tests, anodizing shows superior bonding since it is part of the aluminum itself.
Cost and Environmental Impact
Cost is always a factor. Liquid paint is typically the most affordable option. Powder coating is next, offering great value for its durability.
Champagne anodizing and PVD are generally more expensive. Their specialized processes and equipment contribute to the higher cost.
Environmentally, anodizing is a relatively clean process. The chemicals used can be recycled. Powder coating also has a low environmental impact. It releases nearly zero volatile organic compounds (VOCs).
| Feature | Champagne Anodizing | PVD Coating | Powder Coating | Liquid Paint |
|---|---|---|---|---|
| Durability | Excellent (Hard) | Superior (Hardest) | Very Good (Tough) | Good (Variable) |
| Color Stability | Excellent (UV resistant) | Excellent | Good to Very Good | Fair to Good |
| Relative Cost | Moderate to High | High | Moderate | Low |
| Eco-Impact | Low | Low to Moderate | Low (No VOCs) | High (VOCs) |
| Best For | Metal feel, wear | Extreme hardness | Impact resistance | Low-cost color |
Choosing a finish involves trade-offs. Champagne anodizing offers an integrated, durable finish. PVD provides superior hardness. Powder coating gives tough, colorful protection. Each is suited for different needs, and we help navigate these choices to ensure the best outcome for your parts.
When should you specify champagne anodizing over another coating?
Choosing the right surface finish is a critical decision. It impacts aesthetics, durability, and cost. It’s not just about color. It’s about performance in the real world.
Let’s break down the choice with clear examples. This helps make the right call.
A Tale of Two Parts
Consider two very different components we might encounter at PTSMAKE. A high-end electronic enclosure and a structural steel beam. Their needs are worlds apart.
| Scenario | Primary Requirement | Recommended Coating | Why It’s Chosen |
|---|---|---|---|
| Luxury Audio Amplifier | Premium Feel & Look | Champagne Anodized | Elegant, durable, non-conductive |
| Outdoor Support Beam | Corrosion & Cost | Hot-Dip Galvanizing | Maximum rust protection, cost-effective |
This shows that context is everything. The best finish is always tied to the specific application.

Deciding on a finish requires a systematic approach. As engineers, we must ask the right questions before specifying a coating. This avoids costly mistakes and ensures the part performs as expected.
An Engineer’s Quick Checklist
Before you specify a finish, run through these points:
- What is the base metal?
- What is the part’s main function?
- What environment will it operate in?
- Are there specific electrical properties needed?
Answering these helps narrow the options significantly. For instance, anodizing is a fantastic choice for aluminum but impossible for steel. This simple fact prevents issues like potential galvanic corrosion12 when different materials are mismatched in an assembly.
Comparing Finishes for Aluminum
Let’s assume your part is aluminum. You still have choices. Here’s how a champagne anodized finish stacks up against other common options we manage.
| Coating Type | Best Use Case | Key Limitation |
|---|---|---|
| Champagne Anodizing | Premium consumer electronics, architectural elements | Limited to aluminum and its alloys |
| Powder Coating | Industrial equipment, outdoor furniture | Thicker finish can hide fine details |
| Wet Painting | Wide color-matching, complex shapes | Less durable than anodizing or powder coat |
Each has its place. Your project’s specific needs will guide you to the perfect solution.
A structured framework is your best tool. By analyzing the application, material, and performance needs, you can confidently select the right finish. This ensures a durable and beautiful result for your project.
How do you conduct a root cause analysis of a fading finish?
When a finish fails in the field, we treat it like a crime scene. A systematic, forensic approach is essential. Guesswork just won’t cut it.
The goal is to gather objective evidence. This helps us understand what truly happened.
The Initial Investigation
First, we verify the original specification. Was the correct finish type and class specified for the application?
Then, we move to an on-site inspection. This helps us document the environmental conditions the part was exposed to.
| Investigation Stage | Key Objective |
|---|---|
| Specification Review | Confirm finish requirements were correct. |
| On-Site Inspection | Document environmental factors. |
| Sample Collection | Gather evidence for lab analysis. |
| Process Review | Check original manufacturing records. |
This structured process ensures we don’t miss crucial details.
The real detective work begins with sampling. We take samples of the failed parts. We also try to get a "control" sample, an unused part from the same batch if possible.
These samples head to the lab for detailed analysis.
Laboratory and Process Analysis
In the lab, we perform several key tests. We measure the anodic film thickness. We also check the seal quality, which is critical for durability. In our tests, poor seal quality is a common culprit.
For instance, a client’s faded champagne anodized part showed adequate thickness but failed the seal test.
We also request and review the original anodizer’s process logs. We look for any deviations from the standard procedure. Was the dye concentration correct? Was the sealing time sufficient? Data from spectrophotometry13 can objectively measure the color shift.
| Log Checkpoint | Expected Parameter |
|---|---|
| Dye Tank Temp | Within specified range |
| Sealing Time | Meets or exceeds minimum time |
| Voltage/Amperage | Consistent with process specs |
This deep dive into both the physical part and the process data allows us to pinpoint the exact failure mode. We can then determine if it was poor processing or if the finish was misapplied for its environment.
A successful root cause analysis requires a methodical approach. It combines on-site inspection, lab testing, and a thorough review of process records. This is the only way to find the true source of the failure and prevent it from happening again.
How does champagne anodizing perform in harsh outdoor environments?
When considering champagne anodized aluminum for outdoor use, long-term performance is key. The finish must endure constant environmental attacks. We’re not just talking about rain.
It’s about relentless exposure to sunlight, pollutants, and physical wear.
Key Weathering Factors
Several elements challenge the durability of an anodized surface. These include UV radiation, which can affect color stability over decades. Acid rain and salt spray in coastal areas directly attack the protective layer.
Why Film Thickness is Crucial
For harsh environments, a standard anodized coat isn’t enough. Architectural standards specify thicker films for a reason. They provide superior protection and a much longer service life.
| Anodizing Class | Minimum Thickness | Recommended Use |
|---|---|---|
| Class II | 7-18 microns | Interior / Mild Exterior |
| Class I | >18 microns | Exterior / Harsh |
The long-term value of a champagne anodized finish depends entirely on specifying the correct anodic film thickness from the start. A beautiful finish that fades or corrodes in a few years is a failure. In our projects at PTSMAKE, we emphasize this point early on.
Understanding Environmental Threats
Each outdoor environment presents unique challenges. UV radiation can break down the organic dyes used in some colors, though the champagne hue is quite stable due to its inorganic nature.
Acid rain contains sulfuric and nitric acids. These can slowly etch away the aluminum oxide layer, reducing its protective qualities. Salt spray is even more aggressive, accelerating corrosion. This is especially true if there are scratches or contact with dissimilar metals, which can lead to galvanic corrosion14. Abrasion from windblown sand or regular contact also wears down the finish.
The Class I Architectural Standard
This is why architectural standards demand a Class I anodic film, which is 18 microns (0.7 mils) or thicker. Based on our testing, this thickness provides the necessary barrier to withstand these elements for decades.
It’s a dense, hard layer that significantly slows down degradation. It ensures the champagne anodized aluminum maintains both its appearance and structural integrity over its lifecycle.
| Environment | Required Anodizing Class | Expected Performance |
|---|---|---|
| Coastal / Marine | Class I (>18 microns) | High Resistance |
| Industrial | Class I (>18 microns) | High Resistance |
| Urban / Rural | Class I or II | Moderate-High |
The lifecycle performance of champagne anodized aluminum in harsh environments is excellent, provided a Class I film thickness is used. This thicker layer effectively resists UV radiation, acid rain, salt spray, and abrasion, ensuring long-term durability and color retention.
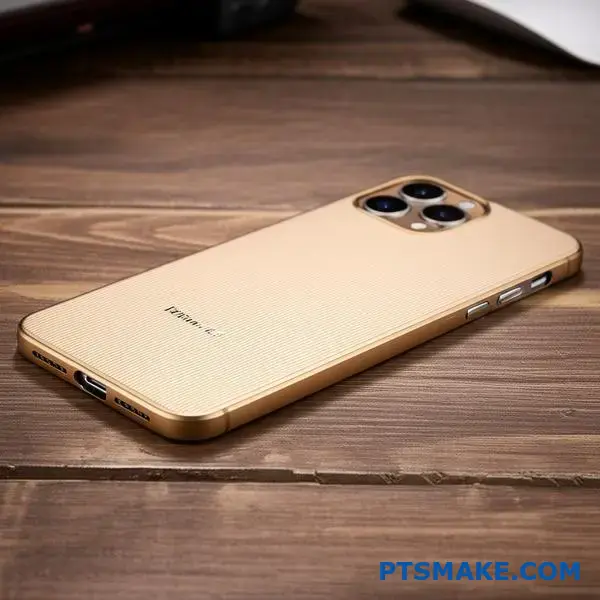
Analyze a successful product using this finish: Why was it chosen?
Let’s look at the Apple MacBook. Its finish is a key part of its success. The choice of a specific color, like champagne, isn’t random. It’s a calculated decision.
The Power of Perception
This finish creates a premium feel. It suggests quality before you even turn it on. The color is subtle yet luxurious.
A Closer Look
The champagne anodized aluminum body is iconic. It feels as good as it looks. It balances elegance with modern technology.
| Attribute | Impact |
|---|---|
| Aesthetic | Sophisticated, premium |
| Tactile Feel | Smooth, cool, solid |
This careful choice helps define the product’s identity.

The decision goes far beyond just color. It’s a masterclass in material engineering and brand strategy. The finish is integral to the user experience. It blends form and function seamlessly.
Engineering Meets Branding
Apple chose champagne anodizing for several key reasons. Durability is a major factor. The process creates a hard, corrosion-resistant surface. This protects the laptop from daily wear and tear. It keeps the product looking new for longer.
This protection is created through a process of electrolytic passivation15. This method is highly controlled. It allows for consistent color and quality across millions of units. We’ve seen in projects at PTSMAKE how vital this consistency is for brand trust.
Balancing Key Product Goals
The lightweight nature of aluminum is also crucial. The finish adds minimal weight while maximizing strength. This aligns with the MacBook’s promise of portability and performance.
| Factor | Benefit |
|---|---|
| Durability | Resists scratches and corrosion |
| Light Weight | Enhances portability |
| Recyclability | Supports environmental goals |
| Brand Image | Conveys premium quality |
Ultimately, the finish reinforces Apple’s premium brand identity. It’s a silent promise of quality.
The MacBook’s champagne anodized finish is a strategic choice. It perfectly balances premium aesthetics with practical engineering demands like durability and light weight, reinforcing the product’s high-quality brand image and user experience.
How can you manage customer expectations for color consistency?
Managing color expectations isn’t just a technical challenge. It’s a communication and business strategy. Success depends on setting clear, agreed-upon standards before production ever begins. This prevents disputes later.
We focus on a three-part strategy. This ensures everyone is on the same page. It aligns expectations with the realities of the anodizing process from the very start.
The Proactive Approach
Educating the client is the first step. We explain why minor variations can occur. This builds trust and understanding.
| Old Method (Reactive) | Our Method (Proactive) |
|---|---|
| Assume client understands | Educate on process variables |
| Hope for the best | Define clear boundary samples |
| Address issues after production | Specify criteria in the contract |
This upfront work is crucial for a smooth project.
Clear communication is the foundation of any successful manufacturing partnership. Technical expertise alone is not enough if the client’s vision isn’t fully understood and documented. Misunderstandings about color can lead to costly rework and delays.
Educating The Client
We start by explaining the anodizing process. We detail how factors like alloy composition, dye concentration, and tank time can cause slight shifts in color. For a finish like champagne anodized, even small changes are noticeable. This education isn’t about making excuses; it’s about setting realistic expectations.
Establishing Boundary Samples
Next, we establish physical boundary samples. These are not just single "golden samples." We provide a range, showing the lightest and darkest acceptable shades. The client signs off on these samples. They become the physical standard for quality control, removing all subjectivity.
Defining Criteria in Contracts
Finally, we formalize everything in the contract. This includes the approved boundary samples and specific inspection criteria. We define factors like lighting conditions (e.g., D65 lighting) and viewing angles. We might also use tools for objective measurement, as the results of spectrophotometry16 can be included as a measurable standard.
| Contract Clause | Purpose |
|---|---|
| Boundary Sample Approval | Confirms client acceptance of color range. |
| Inspection Lighting | Ensures consistent evaluation environment. |
| Viewing Geometry | Defines how the part should be held and viewed. |
| Acceptance Criteria | Sets clear pass/fail conditions. |
This process transforms a subjective issue into an objective, manageable one.
Proactive communication, clear boundary samples, and detailed contractual agreements are essential. They turn potential conflicts over color consistency into a straightforward quality control process, ensuring client satisfaction and project success from the start.
Get a Custom Champagne Anodized Solution from PTSMAKE!
Ready to elevate your next project with premium champagne anodized finishes? Contact PTSMAKE for expert consultation, fast quoting, and high-precision manufacturing you can trust. Send your RFQ today and discover why industry leaders choose us for superior quality and reliability!

Discover the technical details of the metal deposition process and its industrial applications. ↩
Learn how these microscopic particles impact your material’s final finish and performance. ↩
Explore the science behind how we measure and perceive color in manufacturing. ↩
Click to learn more about the science of how metal ions create color in anodized aluminum. ↩
Understand how this layer’s properties impact durability and appearance. ↩
Learn how this standardized test quantifies the abrasion resistance of your parts. ↩
Understand this chemical step and its importance for achieving a flawless, uniform anodized appearance. ↩
Learn the science behind how metal ions are deposited onto a surface for coloring. ↩
Understand the science behind specular finishes and why it is crucial for a mirror-like appearance. ↩
Learn how these microscopic alloy elements can impact the final finish of your anodized parts. ↩
Learn how coating adhesion affects product performance and reliability. ↩
Learn how dissimilar metals can cause accelerated corrosion and how to prevent it in your designs. ↩
Learn how this technique precisely measures color to objectively quantify fading issues on finished parts. ↩
Learn how this electrochemical process can cause premature failure in multi-metal assemblies. ↩
Learn the science behind anodizing and how it creates durable, beautiful finishes for your parts. ↩
Learn about the scientific method used to objectively measure and quantify color. ↩