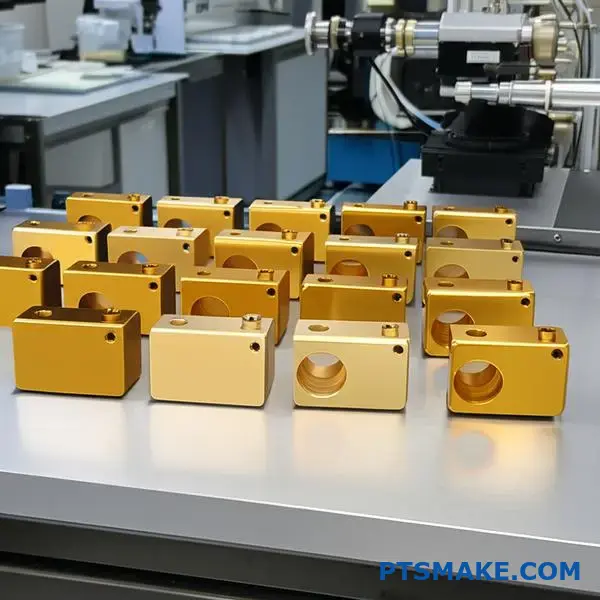
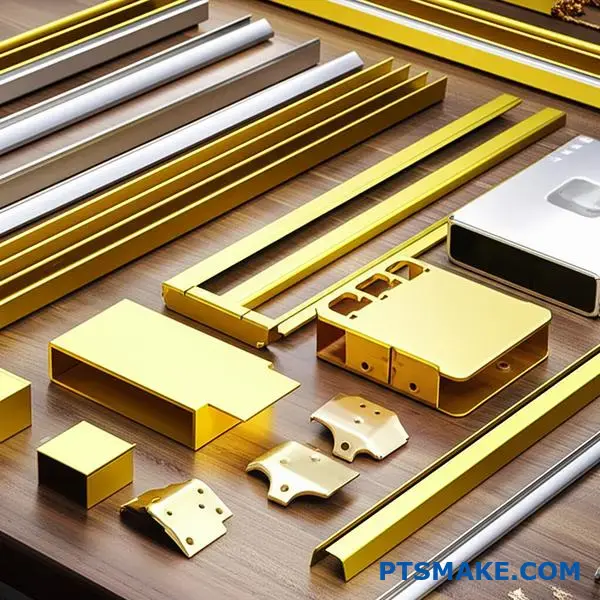
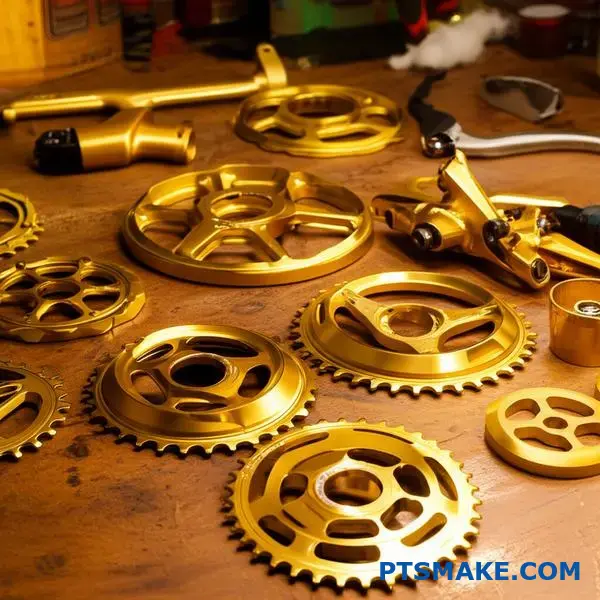
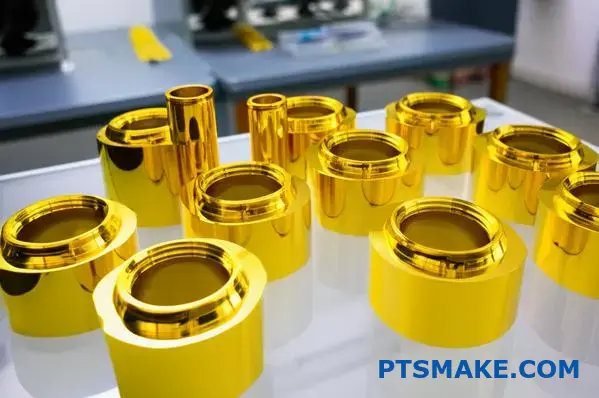
Working in precision manufacturing, I see companies struggling with gold anodizing projects that fail to meet their quality expectations. The worst part? Most issues stem from not understanding the fundamental electrochemistry and process variables that control the final result.
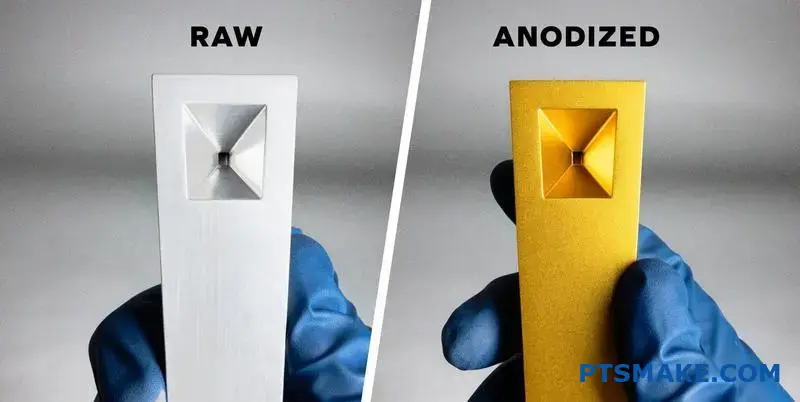
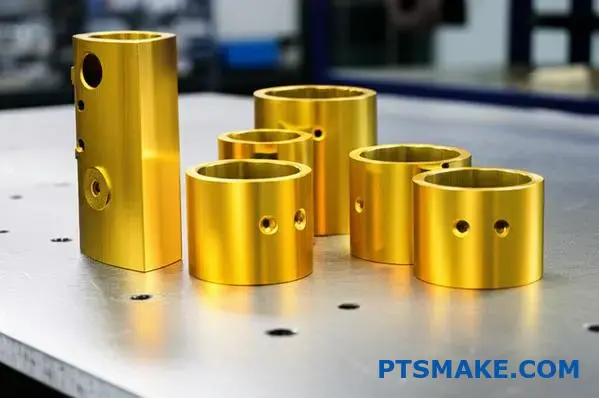
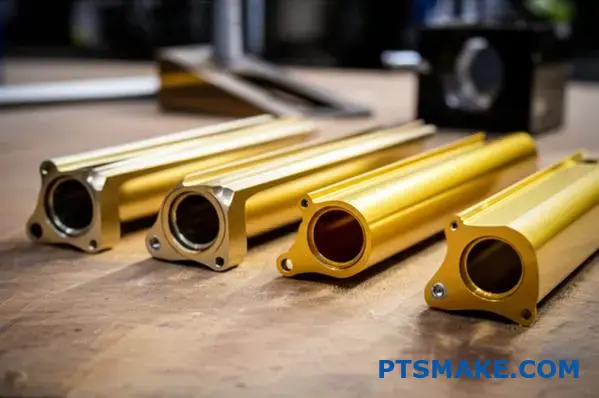
Gold anodizing is an electrochemical process that creates a porous aluminum oxide layer, which is then filled with colorants or metallic deposits to achieve various gold hues. Unlike gold plating, this conversion coating becomes integral to the aluminum part, offering superior durability and adhesion.
This comprehensive guide addresses 40+ critical questions I encounter from engineers and procurement managers. From selecting the right aluminum alloy to controlling color consistency across production batches, you’ll get practical insights that prevent costly mistakes and project delays.
What is the electrochemistry behind gold anodizing?
Have you ever wondered about the science behind that beautiful, durable finish on gold anodized aluminum? It’s not just a coating. It’s an electrochemical transformation of the aluminum surface itself.
At its core, anodizing is a process of controlled oxidation. We immerse the aluminum part in an electrolyte bath and pass an electric current through it. The aluminum part acts as the anode, or positive electrode.
This setup forces the surface to form a tough layer of aluminum oxide. This layer is the perfect foundation for the gold color.
| Component | Role in Anodizing |
|---|---|
| Aluminum Part | The Anode (+) |
| Electrolyte | Conducts Current |
| Power Supply | Drives the Reaction |
This controlled process is what makes the final finish so robust.
To truly understand the process, we must look at the reactions happening at the anode. It’s a fascinating balance of chemistry and physics.
The Anode Reaction
When voltage is applied, the aluminum (Al) at the surface gives up electrons. It becomes positively charged aluminum ions (Al³⁺).
Simultaneously, water (H₂O) from the acid electrolyte splits. This provides negatively charged oxygen ions (O²⁻). These ions are drawn to the positively charged aluminum surface. They combine to form aluminum oxide (Al₂O₃), the very layer we want to build.
The Role of the Electrolyte
The electrolyte, typically sulfuric acid, does more than just conduct electricity. Its acidic nature slowly dissolves some of the newly formed oxide.
This dissolution is key. It creates microscopic pores in the oxide layer. These pores are what will later hold the gold dye, giving us the final gold anodized aluminum appearance. Without these pores, coloring would be impossible.
Controlling the process variables is where skill comes in. Parameters like voltage and current density1 are critical. They determine the thickness, hardness, and porosity of the oxide layer.
In our work at PTSMAKE, we precisely manage these factors to meet exact specifications.
| Variable | Impact on Oxide Layer |
|---|---|
| Voltage | Affects layer hardness and growth rate. |
| Electrolyte Temp. | Influences pore size and layer density. |
| Current Density | Controls the speed of the reaction. |
The foundation of a great finish lies in mastering this electrochemical stage.
The electrochemistry of anodizing transforms a simple aluminum part into a component with a durable, porous oxide layer. This layer is essential for the subsequent dyeing process that creates the final gold finish. Mastering this process requires precise control over electrical and chemical parameters.
How is the ‘gold’ color actually created in the process?
Creating a gold finish isn’t magic. It’s precise science. The key lies in the porous layer made during anodizing. We have two main ways to add color.
One method is dyeing. Here, we dip the part into a dye solution. The color simply fills the empty pores. It’s a straightforward process.
The other is electrolytic coloring. This method is more complex but offers superior results. It involves depositing metal salts deep inside the pores. This creates color differently.
| Coloring Method | How it Works | Common Use |
|---|---|---|
| Dyeing | Pores are filled with organic/inorganic dyes. | Decorative parts, less harsh environments. |
| Electrolytic | Metallic salts deposited at the pore base. | Architectural, high-durability applications. |
Let’s dig deeper into these methods. Understanding them is crucial for choosing the right finish for your project.
The Dyeing Approach
Dyeing is like staining wood. After anodizing, the part is submerged in a tank of dissolved dye. The porous oxide layer absorbs the colorant. This method offers a wide range of color options. However, many organic dyes can fade over time with UV exposure.
The Electrolytic Coloring Advantage
For a true, durable gold anodized aluminum finish, we often prefer electrolytic coloring. This is a two-step process. First, we anodize the aluminum. Then, we immerse it in a second bath containing metallic salts, like tin.
An AC voltage deposits these salts at the bottom of the pores. The color isn’t a dye. It’s created by an optical effect. The size and distribution of these metal particles influence how they interact with light. This process creates very lightfast colors.
The resulting color depends on the metal salt used and the processing time. This precise control is how we create consistent gold tones. The color comes from light scattering2 off the tiny metal deposits.
| Step | Process | Purpose |
|---|---|---|
| Step 1 | Standard Anodizing | Create a clear, porous oxide layer. |
| Step 2 | Electrolytic Deposition | Deposit metallic salts into the pore base. |
| Step 3 | Sealing | Close the pores to lock in the color. |
This method is why architectural aluminum retains its color for decades. At PTSMAKE, we use this for parts needing maximum durability and color stability.
Color creation in anodizing involves either filling pores with dye or depositing metal salts. Electrolytic coloring uses metal salts and light physics to create extremely durable and stable colors, like the popular gold finish, which is ideal for high-performance applications.
How does aluminum alloy choice impact the gold finish?
The alloy you choose is not just a structural decision; it’s a cosmetic one. The "secret ingredients"—the alloying elements—directly control the final appearance of a gold finish.
Elements like copper, silicon, and zinc are crucial. They determine how the surface reacts during anodizing. This reaction dictates the clarity and consistency of the color. For a perfect gold anodized aluminum part, the base material is everything.
| Alloy Series | Primary Elements | Gold Anodizing Outcome |
|---|---|---|
| 6000 Series | Magnesium, Silicon | Bright, Clear, Consistent |
| 7000 Series | Zinc, Copper | Muted, Often Muddy |
Understanding the metallurgy is key to predicting the final outcome. Different alloys have unique chemical compositions that behave differently in the anodizing tank.
Why 6000 Series Excels for Decorative Finishes
Alloys like 6061 and 6063 are favorites for a reason. Their main alloying elements, magnesium and silicon, form a compound that dissolves uniformly during the anodizing process.
This creates a highly porous and clear anodic layer. This clear structure is the perfect canvas. It allows the gold dye to penetrate evenly, resulting in a vibrant, consistent, and brilliant finish. In our projects at PTSMAKE, we consistently recommend the 6000 series for premium cosmetic parts.
The Challenge with 7000 Series Alloys
Conversely, 7000 series alloys, known for their exceptional strength, are tricky for decorative finishes. Their high zinc content, often paired with copper, creates non-uniform intermetallic compounds3.
These compounds react differently to the anodizing process than the surrounding aluminum. This leads to an inconsistent oxide layer that can appear cloudy or muted. The result is often a dull, sometimes muddy gold color, lacking the desired brightness.
| Alloying Element | Impact on Gold Anodizing |
|---|---|
| Copper (Cu) | Can cause cloudiness or a dull finish. |
| Silicon (Si) | In high amounts, can create a gray or smutty appearance. |
| Zinc (Zn) | High levels interfere with color clarity, leading to muddy tones. |
| Magnesium (Mg) | Generally positive, helping to create a clear oxide layer. |
Alloying elements are the deciding factor in the final color. For a bright, decorative gold finish, 6000 series alloys are superior. The strength of 7000 series alloys comes at the cost of cosmetic clarity due to their zinc and copper content.
What are the key performance properties of a gold anodized surface?
Gold anodizing offers more than just a beautiful finish. It creates a surface with significant functional enhancements. This process transforms aluminum’s outer layer. It becomes much harder and more durable.
This isn’t just a coating; it’s an integral part of the metal. The performance gains are substantial. They are crucial for demanding applications in many industries.
Key Functional Benefits
A gold anodized surface provides excellent protection. It shields the underlying aluminum from wear and environmental factors.
| Property | Enhancement |
|---|---|
| Hardness | Significantly Increased |
| Corrosion Resistance | Excellent |
| Wear Resistance | Greatly Improved |
| Electrical Insulation | High |
This finish is a top choice for high-performance parts. It ensures reliability and a longer service life for components.
The visual appeal of gold anodizing is undeniable. However, its true value lies in measurable performance improvements. These properties are not just qualitative; we can quantify them with specific industry-standard tests. This data helps engineers make informed decisions.
Quantifying Hardness
Hardness is a primary benefit. A typical Type II anodized layer can reach a hardness of 60-70 on the Rockwell C scale. This is much harder than untreated aluminum alloys. This makes the surface highly resistant to scratches and abrasion.
Corrosion Resistance Metrics
For corrosion resistance, we often use salt spray tests. A properly sealed gold anodized aluminum part can withstand over 336 hours of salt spray exposure (per ASTM B117) with no signs of corrosion. This is a crucial factor for parts used in harsh environments. At PTSMAKE, our testing confirms these excellent results.
| Property | Typical Value/Standard | Application Benefit |
|---|---|---|
| Hardness | 60-70 Rockwell C | Scratch & Wear Resistance |
| Corrosion | 336+ Hours (ASTM B117) | Durability in Harsh Conditions |
| Dielectric Strength | ~30-40 V/µm | Electrical Insulation |
Electrical and Wear Properties
The anodic layer is an excellent electrical insulator. Its dielectric strength4 is a key property for electronics housings and components. It prevents short circuits. Furthermore, the abrasion resistance is remarkable, protecting parts from friction and mechanical wear over long periods.
A gold anodized finish offers quantifiable improvements in hardness, corrosion resistance, and electrical insulation. Understanding these key metrics is vital for specifying the right surface treatment to ensure component reliability and longevity in its intended application.
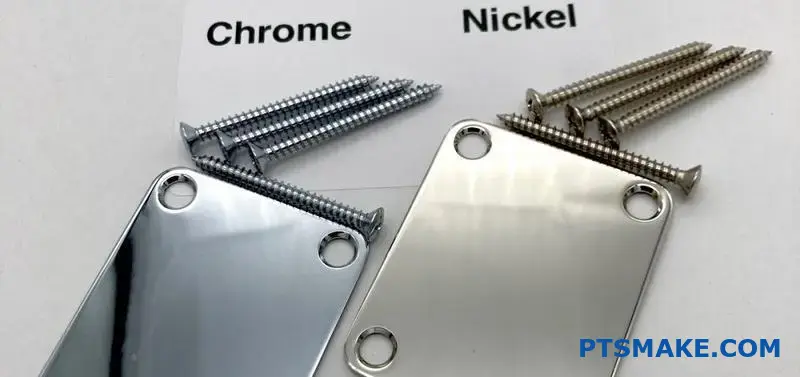
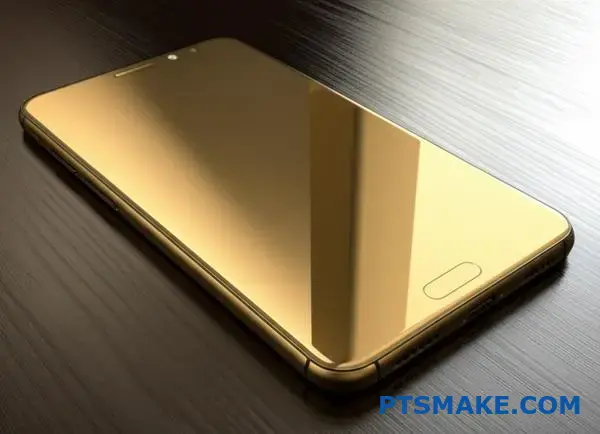
How does gold anodizing differ from gold plating?
Choosing between gold anodizing and gold plating is not just about looks. It’s a critical engineering decision. These two processes create a gold finish in very different ways.
One process becomes part of the metal. The other sits on top. This affects everything from durability to cost. Understanding this core difference is key.
Quick Comparison
| Feature | Gold Anodizing | Gold Plating |
|---|---|---|
| Process | Conversion Coating | Additive Layer |
| Adhesion | Integral Part | Mechanical Bond |
| Best For | Aluminum Parts | Various Metals |
| Durability | High | Moderate |
When clients ask for a "gold finish," my first question is always about the application. The underlying process matters more than the color.
Mechanism: Integral vs. Additive
Gold anodizing is an electrochemical process. It converts the aluminum surface into a durable, porous aluminum oxide layer. Gold dye is then sealed into these pores. The finish is grown from the base material.
Gold plating, however, is an additive process. A layer of real gold is deposited onto the surface of the part. It creates a new, separate layer on top of the substrate.
Durability and Adhesion
Because the anodized layer is part of the aluminum, it won’t chip, flake, or peel. This makes gold anodized aluminum extremely durable and corrosion-resistant.
Plating relies on a strong bond to the surface. While good, this bond can fail under stress or impact. The excellent substrate adhesion5 of anodizing is one of its biggest advantages in demanding applications.
Cost and Appearance
| Factor | Gold Anodizing | Gold Plating |
|---|---|---|
| Material Cost | Lower (dyes) | Higher (real gold) |
| Process Cost | Generally lower | Can be higher |
| Appearance | Rich, matte/satin | Bright, metallic luster |
| Conductivity | Non-conductive | Conductive |
At PTSMAKE, we often recommend anodizing for aluminum parts that need a durable, cost-effective cosmetic finish. Plating is reserved for when electrical conductivity or a specific metallic sheen is required.
Ultimately, gold anodizing creates an integral, durable layer by converting the metal’s surface. Gold plating adds a distinct, separate layer on top. Your choice depends on whether you prioritize durability, cost, or specific properties like conductivity.
What variables control the specific hue and depth of gold?
Achieving the perfect gold anodized aluminum finish is a science. It’s not about luck. It is about precise control over several key factors. Every parameter must be carefully managed.
This ensures the final color meets exact specifications for every part.
Key Anodizing Dye Parameters
Dye Concentration
The amount of dye in the bath directly impacts color saturation. Higher concentrations typically yield deeper, richer gold tones.
Immersion Time
Longer immersion times allow more dye to be absorbed into the porous oxide layer, resulting in a darker shade.
| Parameter | Effect on Color |
|---|---|
| Low Concentration | Lighter, pale gold |
| High Concentration | Deeper, rich gold |
| Short Immersion | Lighter hue |
| Long Immersion | Darker hue |
Controlling the hue and depth of gold anodized aluminum goes beyond just dye and time. In our projects at PTSMAKE, we’ve found that temperature and pH are equally critical for achieving consistent, high-quality results.
The Role of Bath Conditions
Temperature Control
The temperature of the dye bath affects the rate of dye absorption. A warmer bath can speed up the process. But, if it’s too warm, it can compromise the seal quality later on.
pH Level of the Dye Bath
The pH level must be maintained within a very narrow range specified by the dye manufacturer. Drifting outside this range can alter the shade of gold. It can even prevent the dye from setting correctly.
For Electrolytic Coloring
This method uses metal salts instead of organic dyes. The color comes from metal particles deposited into the pores.
The control variables here are different.
| Electrolytic Parameter | Primary Effect |
|---|---|
| Voltage | Controls particle size and color |
| Time in Salt Bath | Affects the depth and darkness |
| Waveform Type | Influences final hue and finish |
This process often produces more lightfast colors. These are ideal for architectural applications. At PTSMAKE, we often recommend this method for parts requiring extreme durability. The precise galvanostatic6 control allows for exceptional color matching across different production batches, which is crucial for our clients.
Mastering gold anodizing requires precise control over dye concentration, immersion time, bath temperature, and pH. For electrolytic methods, voltage and time are key. These variables work together to produce the exact color specified, ensuring consistency and quality in every finished part.
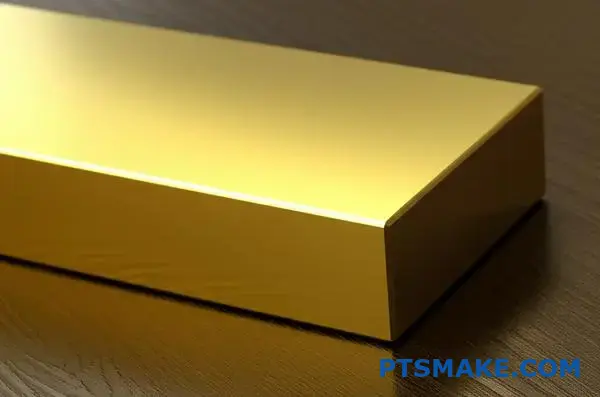
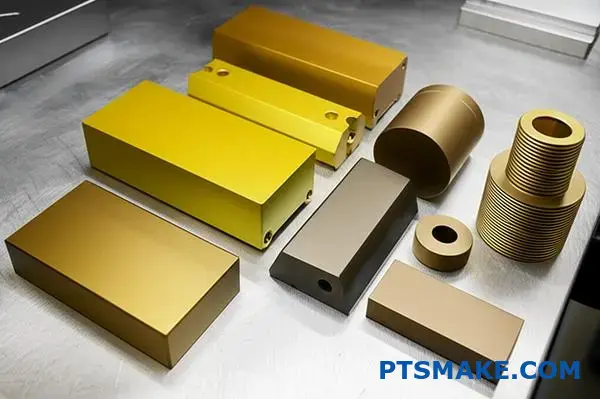
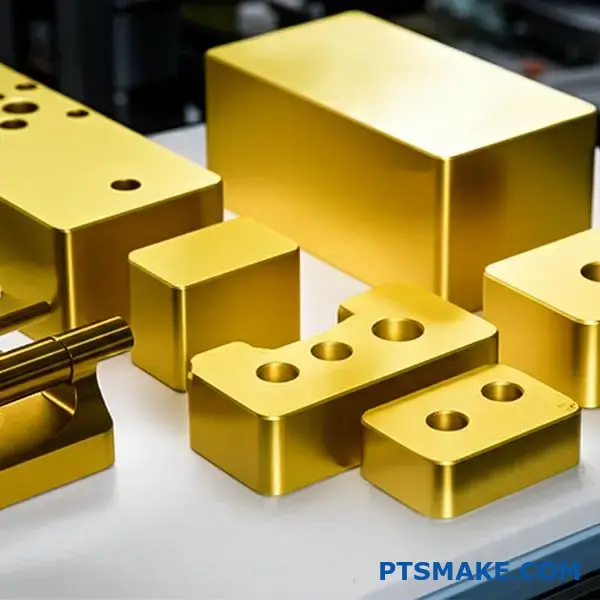
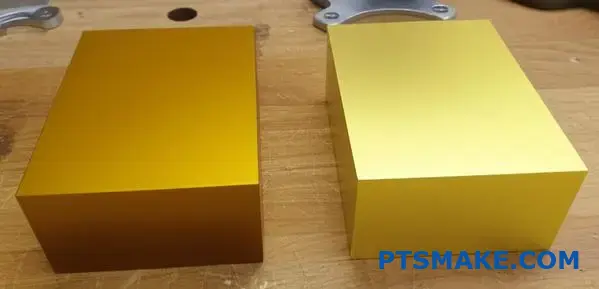
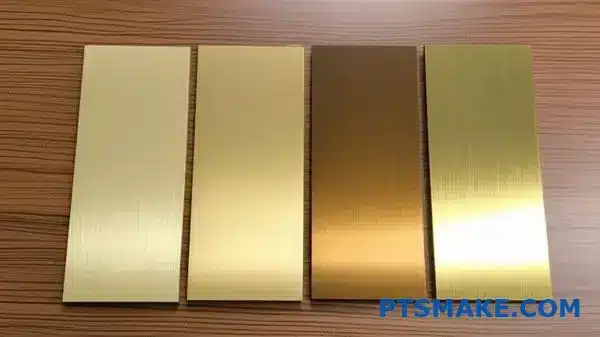
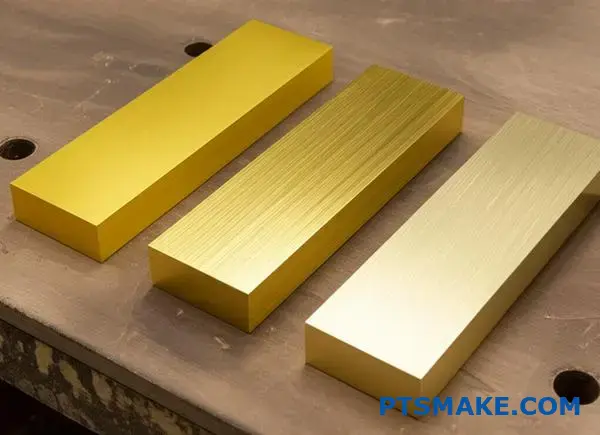
What are the common shades of gold anodizing?
When clients request "gold anodized aluminum," my first question is often, "Which gold?" The spectrum is much wider than most people assume. It is not just a single color.
The shades range from light champagne to a deep, rich bronze. Each tone offers a distinct character for your product. This variation allows for precise aesthetic matching.
Understanding these options is key to achieving your design intent. Let’s explore some of the most common shades we see in projects.
| Shade Name | Common Description |
|---|---|
| Champagne Gold | A very light, subtle gold with silver undertones. |
| Pale Gold (Light Gold) | A soft, classic yellow gold color. |
| Brass | A deeper, more antique yellow with brown tones. |
| Bronze | A dark, rich gold with significant brown hues. |
How Are Different Gold Shades Achieved?
Achieving a specific shade of gold is all about process control. The final color depends heavily on the dye concentration in the anodizing bath. The immersion time of the part is also critical.
Longer immersion or higher dye concentration typically results in a deeper, darker color. In past projects at PTSMAKE, we’ve learned to meticulously document these parameters. This ensures we can replicate the exact shade for future production runs.
The quality of the organic dye itself is also very important. Key properties like the dye’s lightfastness7 determine how well the color will resist fading when exposed to UV light over time. We select dyes based on the part’s end-use environment.
Using Color Codes for Consistency
To eliminate guesswork, we rely on color codes. Most suppliers have their own designation systems. Some may cross-reference standards like Pantone to give you a familiar starting point.
However, the best practice is always to approve a physical color sample. This step guarantees that what you see is what you get. The table below shows how process variables affect the final look.
| Process Variable | Effect on Color | Control Importance |
|---|---|---|
| Dye Concentration | Higher = Darker | High |
| Immersion Time | Longer = Darker | High |
| Bath Temperature | Affects dye uptake rate | Medium |
| Anodic Film Thickness | Influences color depth | High |
The spectrum of gold anodizing shades is vast, from champagne to bronze. Achieving a specific color requires precise control over dye concentration and immersion time. Using color codes and physical samples is crucial for ensuring perfect, repeatable consistency for your parts.
What are the main process types for achieving gold color?
Choosing the right method for a gold finish is crucial. It affects durability, appearance, and cost. There are three primary industrial methods we often consider.
Each has distinct advantages for specific applications. Understanding them helps in making an informed decision for your project.
Quick Comparison of Gold Coloring Methods
| Method | UV Resistance | Cost | Complexity |
|---|---|---|---|
| Organic Dyeing | Low | Low | Low |
| Inorganic Dyeing | Medium | Medium | Medium |
| Electrolytic Coloring | High | High | High |
This table provides a simple overview. The best choice always depends on the product’s final use and environment.
When we create a gold finish, we’re not just adding a color. We’re choosing a process that defines the part’s long-term performance and look. Let’s break down the options.
Organic Dyeing
This method is the most common and cost-effective. It works by dipping the anodized part into a hot organic dye solution. The color is absorbed into the porous anodic layer.
However, its main weakness is poor UV resistance. The colors can fade over time with sun exposure. This makes it ideal for indoor products but not for outdoor applications.
Inorganic Dyeing
Inorganic dyeing offers a step up in durability. Instead of organic molecules, it uses metallic salts that precipitate within the pores. This process provides better lightfastness than organic dyes.
The color range is more limited, but the stability is significantly better, making it a solid middle-ground choice.
Electrolytic Coloring
This is the premium choice for durability. Also known as two-step coloring, metal salts are deposited at the base of the pores through an AC electrical process. This method creates exceptionally lightfast colors.
The color is not a dye but an integral part of the finish. This makes electrolytic coloring, used to create high-quality gold anodized aluminum, perfect for architectural and automotive exterior parts. This process requires precise control and specialized equipment, reflecting its higher cost. The impregnation8 of metal salts ensures the color is deeply embedded and protected.
| Feature | Organic Dyeing | Inorganic Dyeing | Electrolytic Coloring |
|---|---|---|---|
| Principle | Absorption of dye molecules | Precipitation of metal salts | Electro-deposition of metals |
| UV Stability | Poor to Fair | Good | Excellent |
| Best For | Indoor, consumer products | General use, some outdoor | Architectural, outdoor |
| Color Range | Very Wide | Limited | Limited (bronze, gold, black) |
Selecting the right gold coloring process involves balancing cost, complexity, and required durability. The application dictates the best method, whether it’s a simple indoor component or a durable architectural panel exposed to the elements for decades.
How do surface textures interact with gold anodizing?
The final look of a gold anodized part is not just from the dye. It truly begins with the raw aluminum’s surface texture. Different pre-treatment finishes create unique starting points for the color.
These finishes change how light reflects off the surface. This dramatically alters the appearance of the gold color. A smooth, polished surface will look very different from a rough, matte one.
| Pre-Treatment | Resulting Texture | Gold Anodized Look |
|---|---|---|
| Polishing | Smooth, Reflective | Bright, Lustrous |
| Bead Blasting | Matte, Uniform | Soft, Satin |
| Brushing | Lined, Directional | Streaked, Textured |
Let’s explore how these finishes create distinct looks. Mechanical polishing smooths the surface for a mirror-like sheen. This results in a bright, rich gold finish. It allows for high specular reflection9, making the color appear deep and vibrant.
Brushing creates a linear grain on the aluminum. This gives the gold anodized aluminum a unique directional appearance. The color and sheen can shift as you change your viewing angle. It adds a sense of depth and visual texture.
Bead blasting uses fine media to create a uniform, non-reflective matte finish. This is excellent for achieving a subtle, satin gold appearance. It is also very practical for hiding fingerprints and minor surface imperfections.
Chemical treatments also play a huge role. Etching uses a caustic solution to create a clean, matte surface. This is the opposite of chemical polishing, which smooths and brightens the aluminum before anodizing.
| Treatment | Surface Effect | Final Gold Look |
|---|---|---|
| Chemical Polish | Brightens & Smooths | High-Gloss, Vibrant |
| Etching | Mattifies & Cleans | Diffused, Low-Sheen |
So, an etched part will have a soft, muted gold tone. A chemically polished part will be brilliant and shiny. In past projects at PTSMAKE, we guide clients to select the perfect pre-treatment for their desired aesthetic.
In short, the initial surface finish is key. It dictates the final look of your gold anodized aluminum part. Whether you choose a polished, brushed, or matte texture will fundamentally change the color’s depth, sheen, and overall character.
How are gold finishes classified for different applications?
Not all gold finishes are created equal. The right choice depends entirely on the application. A system classifying them by end-use helps. It prevents costly mistakes.
We group them into categories. This ensures the finish meets specific performance needs. Think about durability, exposure, and aesthetics.
Common Classification Tiers
Here’s a simple breakdown of the main classes. This structure helps guide material selection from the start.
| Class | Primary Application |
|---|---|
| Architectural Class I | Outdoor, high-exposure structures |
| Architectural Class II | Indoor decorative elements |
| Automotive Trim | Exterior and interior car parts |
| Consumer Electronics | Device casings and components |
| Decorative Jewelry | Aesthetic and cosmetic items |
This systematic approach is key.
Let’s dive deeper into what these classes mean for performance. It’s more than just a label. It’s a promise of durability and function. Each class links to specific technical standards.
Performance Standards by Class
The real difference lies in the specs. For instance, outdoor architectural finishes need to withstand harsh weather. In contrast, electronics focus on look and feel.
At PTSMAKE, we guide clients through these choices. This ensures the final product, like a gold anodized aluminum casing, performs perfectly. The key is matching the finish properties to the environment.
| Class | Min. Coating Thickness (μm) | Key Performance Standards |
|---|---|---|
| Architectural I | 18+ | High UV resistance, >3000 hrs salt spray |
| Architectural II | 10-18 | Moderate wear resistance, color stability |
| Automotive | 12-25 | High scratch and chemical resistance |
| Electronics | 5-12 | Aesthetic consistency, moderate wear |
| Jewelry | 1-5 | Luster, specific color matching |
Understanding these details is critical. We often use advanced tools to verify color and gloss. For example, consistent color is often measured using spectrophotometry10. This guarantees that every part in a production run looks identical. Choosing the wrong class can lead to premature failure. A thin decorative finish won’t last on an outdoor building.
Classifying gold finishes by end-use is essential. This system ties applications, from architecture to electronics, to clear performance standards like coating thickness and durability. It ensures the chosen finish is fit for purpose and will last.
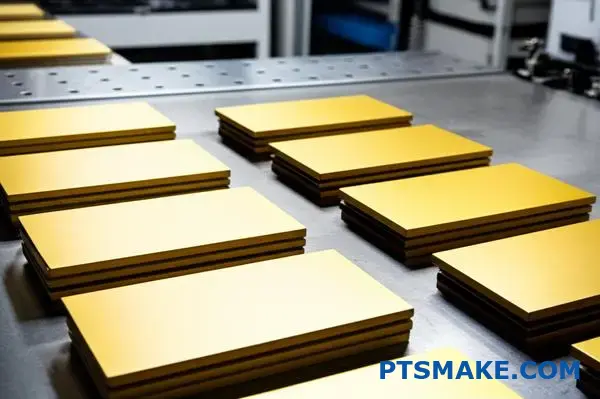
What is the typical cost structure for gold anodizing?
Understanding the cost of gold anodizing isn’t about a single price. It’s a mix of factors. Each part is unique. Its size, shape, and complexity directly influence the final cost.
The type of aluminum alloy also plays a big role. Some alloys are harder to anodize. This requires more time and resources.
Key Cost Drivers
Part Size and Complexity
Larger parts need more tank space. Complex parts with deep pockets or holes are challenging to handle. This increases labor and processing time.
Batch Size
Larger batches often lower the per-unit cost. This is due to efficiencies in setup and processing. Small, custom runs will carry a higher individual price.
Here’s a quick look at how factors influence price.
| Factor | Lower Cost | Higher Cost |
|---|---|---|
| Complexity | Simple, flat surfaces | Complex geometries |
| Batch Size | Large volume | Single prototype |
| Alloy Type | 6061 Aluminum | 2000 or 7000 series |
| Thickness | Standard coating | Thick, protective layers |
To accurately budget for a gold anodized aluminum project, you need a clear framework. The variables we discussed are just the start. At PTSMAKE, we guide our clients through this process. We ensure there are no surprises.
A Framework for Cost Estimation
Think of the total cost as a sum of several key areas. Labor is often the largest component. It includes racking parts, monitoring the process, and quality checks.
Materials are next. This covers chemicals, dyes, and electricity. The cost of these can fluctuate. For instance, maintaining the correct Electrolyte concentration11 is crucial for quality but requires careful resource management.
Racking and Tooling
How a part is held in the anodizing tank matters. Custom racking might be needed for unusual shapes. This adds a one-time tooling cost. We always discuss this upfront.
Quality Specifications
Tighter color consistency or thickness tolerances require more control. This means more intensive quality assurance steps. These steps add to the overall project cost.
Here is a typical cost breakdown percentage we see in past projects.
| Cost Component | Typical Percentage |
|---|---|
| Labor & Setup | 40% – 50% |
| Materials (Chemicals, Dye) | 20% – 30% |
| Utilities (Electricity) | 10% – 15% |
| Tooling & Racking | 5% – 10% |
| Quality Control | 5% – 10% |
The cost of gold anodizing is a puzzle of many pieces. Part complexity, alloy type, batch size, and quality needs are the main drivers. A clear understanding helps in creating a realistic budget and avoiding unexpected expenses.
Which aluminum alloys are best for gold anodizing?
Choosing the right aluminum alloy is critical. It is the most important step for a beautiful gold anodized finish. Not all alloys are created equal for this process.
The final color and quality depend heavily on the alloy’s composition. Some alloys produce a brilliant, consistent gold. Others can result in a dull or uneven appearance.
Here is a quick compatibility guide we use at PTSMAKE.
| Alloy Series | Suitability for Gold Anodizing |
|---|---|
| 6xxx (e.g., 6061) | Excellent |
| 5xxx (e.g., 5052) | Excellent |
| 1xxx (e.g., 1100) | Good |
| 7xxx (e.g., 7075) | Good (with care) |
| 2xxx / 3xxx | Poor |
This table provides a starting point. The best choice always depends on your specific application and cosmetic requirements.
The secret to a perfect gold anodized aluminum part lies in the metal’s chemistry. The specific elements mixed into the aluminum directly affect the outcome.
Why Purer Alloys Excel
Alloys like the 5xxx and 6xxx series are ideal. They primarily contain magnesium and silicon. These elements anodize cleanly.
They form a clear, porous anodic layer. This structure readily accepts the gold dye. The result is a consistent, vibrant, and decorative finish. This is what most of our clients want for their high-end products.
The Challenge with Other Elements
In contrast, alloys with high copper content, like the 2xxx series, are problematic. The copper does not anodize uniformly with the aluminum.
This creates microscopic intermetallic compounds12 on the surface. These can lead to black specks or a muddy, inconsistent color. It ruins the cosmetic appeal. High-silicon casting alloys face similar issues, often producing a grayish undertone.
Based on our tests, here’s how main elements affect the finish.
| Element | Impact on Gold Anodizing | Resulting Appearance |
|---|---|---|
| Magnesium (Mg) | Excellent dye absorption | Bright, consistent gold |
| Silicon (Si) | Good (low %), Poor (high %) | Clear (low Si), Grayish/muddy (high Si) |
| Copper (Cu) | Poor dye absorption | Dark specks, uneven color |
| Zinc (Zn) | Fair, can cause yellow tint | Can alter gold shade |
For a flawless decorative gold finish, alloy selection is paramount. Alloys like 6061 and 5052 are top choices due to their clean composition, which allows for uniform and vibrant dye absorption. Avoid alloys with high copper content to prevent cosmetic defects.
What are the most common defects in gold anodizing?
Gold anodizing offers a stunning and protective finish. However, achieving perfection requires strict process control. When things go wrong, defects can appear.
These flaws affect both the look and function. They can range from slight color changes to serious surface damage.
Common Visual Flaws
The most frequent issues are visual ones. These are easy to spot but can be tricky to solve.
| Defect | Common Appearance |
|---|---|
| Color Inconsistency | Different shades of gold between batches |
| Powdery Surface | A dull, chalky feel instead of a smooth finish |
Beyond the obvious visual problems, several process-related defects can occur. These can compromise the integrity of the protective layer on your gold anodized aluminum parts.
Process-Induced Defects
These flaws often point to specific issues within the anodizing sequence.
Racking marks are small, uncoated areas. They are left by the fixtures holding the part during treatment. At PTSMAKE, we focus on smart fixture design to make these marks as small and inconspicuous as possible.
Pitting and burning are more severe. Pitting appears as tiny cavities on the surface. Burning creates a dark, rough area where the coating is damaged. This is often caused by excessive current density13 in certain spots.
The Importance of Proper Sealing
After coloring, the coating’s pores are sealed. If this step is incomplete, it leads to poor sealing. This can cause the color to bleed or fade and reduces corrosion resistance.
| Defect | Primary Cause | Main Area of Focus |
|---|---|---|
| Racking Marks | Part holding fixture | Racking design and placement |
| Pitting | Chemical imbalance | Bath solution monitoring |
| Burning | High electrical current | Power supply control |
| Poor Sealing | Incorrect temperature or time | Sealing bath parameters |
Achieving a flawless gold anodized finish requires preventing both visual and process-related defects. Issues like color variation, burning, and poor sealing all point to a need for tighter control over the anodizing process, from start to finish.
What applications use different gold anodizing classes?
Gold anodizing isn’t a one-size-fits-all solution. The right class depends entirely on the product’s final use. A cosmetic part needs a different finish than an industrial component.
We often guide clients to the best choice. This ensures both visual appeal and long-term performance for their gold anodized aluminum parts.
Decorative vs. Functional Needs
For purely aesthetic parts, a thinner coating works well. This includes items like cosmetic packaging or award plaques.
Functional parts demand more. They need thicker, harder coatings for wear and corrosion resistance. Think about high-performance bicycle components.
Here’s a quick guide:
| Application | Primary Need | Typical Class |
|---|---|---|
| Cosmetic Packaging | Visual Appeal | Class II |
| Architectural Trim | UV Resistance | Class I or II |
| Audio Faceplates | Durability & Look | Class II |
| Bicycle Components | Wear Resistance | Class I |
Choosing the correct anodizing class is crucial. It directly impacts a product’s lifespan, appearance, and performance. In our work at PTSMAKE, we match the finish properties to the application’s real-world demands.
Matching the Finish to the Function
Let’s look at some specific examples. High-end audio equipment faceplates need a durable, scratch-resistant finish that also looks premium. A Class II gold anodize is perfect here. It offers a great balance.
Architectural window frames face constant sun and rain. They need a Class I or a thick Class II finish. This provides excellent UV stability and corrosion protection. The focus is on longevity, not just initial appearance. This process creates a protective layer through electrolytic passivation14.
Smartphones are handled daily. Their bodies require a finish that resists fingerprints, scratches, and minor impacts. A tailored Class II finish provides this durability without adding significant weight or thickness.
Application-Driven Specifications
The decision always comes back to the end use. We evaluate each project’s unique environment and stress factors. This ensures the selected finish performs as expected for years to come.
| Product Example | Key Requirement | Why This Class? |
|---|---|---|
| Smartphone Body | Scratch Resistance | Daily handling requires a durable surface |
| Window Frame | UV/Corrosion Resistance | Must withstand outdoor weather conditions |
| High-Performance Hub | Abrasion Resistance | Endures friction and mechanical stress |
Choosing the right gold anodizing class is a balance. It involves considering the product’s environment, its use, and its desired look. From decorative trim to high-wear components, each application dictates the ideal finish for performance and longevity.
How do gold anodizing processes compare environmentally?
Choosing the right gold anodizing process involves more than just aesthetics. The environmental impact is a huge factor. Different methods have unique chemical and energy demands.
Key Environmental Factors
Every process leaves a footprint. We must consider the chemicals used, the waste produced, and the energy consumed. This helps us make responsible choices.
Process Chemistry Matters
The type of acid and coloring agent used is critical. Sulfuric acid is common, but its disposal needs careful management. This directly impacts the overall sustainability of creating a beautiful gold anodized aluminum finish.
| Anodizing Method | Primary Chemical | Key Environmental Concern |
|---|---|---|
| Sulfuric Acid (Type II) | Sulfuric Acid | Acid neutralization in wastewater |
| Electrolytic Coloring | Metal Salts (e.g., Tin) | Heavy metals in effluent |
| Organic Dyeing | Organic Dyes | Varies by dye; some are hazardous |
Let’s dive deeper into the specific impacts of coloring chemistries. The choice between electrolytic coloring and organic dyes presents a significant environmental trade-off. It’s a conversation we often have with clients at PTSMAKE.
Electrolytic Coloring: Durability vs. Waste
Electrolytic coloring uses inorganic metal salts. This method deposits metals like tin into the anodic pores. The result is an extremely durable, UV-resistant finish.
However, the process introduces heavy metals into the rinse water. This effluent15 requires extensive and costly wastewater treatment. Proper handling is non-negotiable to prevent environmental contamination.
Organic Dyes: Simplicity vs. Stability
Organic dyeing is simpler. It involves immersing the part in a hot dye solution. This method offers a wide range of colors.
The main concern is the nature of the dyes. Some are benign, while others may contain pollutants or volatile organic compounds (VOCs). The stability and biodegradability of these dyes vary greatly.
Energy Consumption
All anodizing is energy-intensive. It requires significant electricity for the rectifier and for chilling the acid bath. Based on our tests, longer anodizing times for thicker coatings directly increase energy use.
| Coloring Method | Wastewater Complexity | Energy Consumption | Health/Safety Risk |
|---|---|---|---|
| Electrolytic | High (Heavy Metals) | Moderate to High | Moderate (Metal Salts) |
| Organic Dye | Low to Moderate | Low to Moderate | Varies (Dye Chemistry) |
Choosing a gold anodizing process requires balancing durability with environmental responsibility. Key factors are the chemical waste, especially heavy metals from electrolytic coloring, and overall energy consumption. Each method presents a unique footprint that must be carefully managed.
How is the gold anodizing supply chain structured?
Ever wonder how a design becomes a finished gold anodized part? It is a highly structured journey. A clear workflow is key.
This process ensures the final product meets every specification. It involves several key players, each with a critical role from start to finish. Let’s map out the typical flow.
The Initial Workflow Stages
Understanding the first steps helps prevent costly errors down the line. It all begins with a clear plan.
| Stage | Key Player | Primary Action |
|---|---|---|
| 1. Design & Specification | OEM / Designer | Create drawings, define color & specs |
| 2. Part Fabrication | Machining Shop | Machine raw aluminum to spec |
This structured approach is fundamental for success.
A Deeper Look at Each Role
A successful outcome depends on every link in the supply chain. Clear communication and defined responsibilities are essential for creating high-quality gold anodized aluminum parts. Each stage builds directly upon the previous one.
The OEM/Designer: The Architect
The journey starts with the Original Equipment Manufacturer (OEM) or designer. They create the blueprint. This includes part dimensions, tolerances, and the exact specifications for the anodized finish. They define the color, coating thickness, and any performance requirements like corrosion resistance.
The Fabrication Shop: The Builder
This is where partners like us at PTSMAKE play our part. We take the raw aluminum stock and machine the component to the precise specifications from the designer. The quality of the surface finish at this stage is crucial. A poor finish cannot be hidden by anodizing.
The Anodizing Shop: The Finisher
The machined part then goes to a specialized anodizing job shop. They perform the electrolytic passivation16 process to create a durable oxide layer. They then apply the specific gold dye to meet the OEM’s color standard. Their expertise is purely in surface finishing.
Quality Control: The Guardian
Quality control is not just one step; it’s a continuous process. We perform checks before parts are sent for anodizing. The anodizer verifies their own work. Finally, a comprehensive inspection ensures the part meets all specifications before it reaches the end user.
| Player | Key Responsibility | Verification Point |
|---|---|---|
| OEM/Designer | Setting clear specifications | Final product review |
| Fabrication Shop | Precision machining, surface prep | Pre-anodizing inspection |
| Anodizing Shop | Applying the finish per spec | Post-anodizing checks |
| QC Labs | Independent verification | Throughout the process |
The journey from a digital design to a physical part involves distinct, crucial stages. Each player, from the OEM setting specifications to the QC team performing final checks, is responsible for the project’s success and the quality of the final product.
Outline the step-by-step process for gold anodizing a part.
Creating a consistent gold anodized aluminum finish requires a precise, repeatable process. At PTSMAKE, we rely on a detailed flowchart. This ensures every part meets specification.
The journey from a raw part to a finished product is systematic. Each stage builds upon the last one.
The Anodizing Workflow
This workflow is our roadmap for quality. It guarantees uniformity and durability for every component we produce.
| Stage | Primary Purpose |
|---|---|
| Cleaning & Degreasing | Remove all oils and contaminants. |
| Etching | Create a uniform, matte surface. |
| De-smutting | Remove alloy residue after etching. |
| Anodizing | Build the anodic oxide layer. |
| Dyeing | Impart the desired gold color. |
| Sealing & Drying | Close the pores and cure the finish. |
This structured approach is non-negotiable for success.
A process flowchart is more than a to-do list. It’s our primary quality control document. Each step has specific parameters that we monitor closely. Any deviation can compromise the final finish.
Critical Control Points
Think of cleaning as the foundation. If oils or dirt remain, the anodizing layer will be uneven. This causes blotchy spots in the final gold color. We learned this early on in our projects.
The anodizing tank is the heart of the operation. We control voltage, temperature, and [electrolyte]()17 concentration with extreme precision. These variables directly influence the oxide layer’s thickness and hardness.
From Process to Perfection
Even the de-smutting stage is critical. Skipping it or doing it improperly leaves a metallic residue. This "smut" will prevent the dye from penetrating the pores evenly.
Here’s how small process errors can lead to big problems.
| Issue | Potential Cause Stage |
|---|---|
| Poor Dye Adhesion | Incomplete De-smutting |
| White or Powdery Spots | Improper Sealing |
| Thin Coating | Incorrect Anodizing Time/Voltage |
| Inconsistent Color | Contaminated Dye Bath |
Finally, the sealing step locks in the color. It also provides crucial corrosion resistance for the gold anodized aluminum part. A poor seal means a short service life. It’s a simple, but vital, final step.
A detailed flowchart is the blueprint for quality gold anodizing. Each step, from initial cleaning to final sealing, is a critical control point. Following this process ensures a durable and visually perfect finish on every single part.
Which parameters must be controlled for consistent color?
A Process Control Plan (PCP) is your roadmap. It ensures every part looks the same. Without one, you’re just guessing.
For finishes like gold anodized aluminum, this is crucial. You must define and monitor every variable. The plan breaks down into three core stages.
The Three Pillars of Color Control
Each stage has a specific job. Anodizing builds the foundation. Coloring adds the hue. Sealing protects the final finish.
| Stage | Primary Goal |
|---|---|
| Anodizing | Create a porous oxide layer |
| Coloring | Deposit dye into the pores |
| Sealing | Close the pores to lock in color |
Controlling these steps is the only way to achieve true color consistency.
To achieve a specific gold shade, a detailed PCP is non-negotiable. It moves quality control from a final inspection to a proactive, in-process system. At PTSMAKE, we build these plans with our clients. It ensures the first part matches the last.
Anodizing Process Parameters
This initial step creates the porous anodic film. The structure of this film directly impacts how it accepts dye. Controlling Current Density18 is particularly important for layer uniformity.
| Parameter | Acceptable Window (Example Gold) |
|---|---|
| Temperature | 18-22°C (64-72°F) |
| Voltage / Current | 12-18 V / 12-15 A/ft² |
| Sulfuric Acid | 180-200 g/L |
| Anodizing Time | 30-45 minutes |
Coloring (Dyeing) Parameters
Here, the dye fills the pores created during anodizing. Even small changes can cause significant color shifts. Based on our tests, time and temperature are the most sensitive variables for gold dyes.
| Parameter | Acceptable Window (Example Gold) |
|---|---|
| Dye Concentration | 5-10 g/L |
| pH Level | 5.0 – 6.0 |
| Temperature | 55-65°C (131-149°F) |
| Immersion Time | 5-10 minutes |
Sealing Parameters
Sealing closes the pores, locking in the color and providing corrosion resistance. Improper sealing can lead to color bleeding or fading.
| Parameter | Acceptable Window (Example Gold) |
|---|---|
| Seal Type | Mid-temperature Hydrothermal |
| Temperature | 85-95°C (185-203°F) |
| pH Level | 5.5 – 6.5 |
| Sealing Time | 15-20 minutes |
A detailed Process Control Plan is essential. It defines precise operating windows for anodizing, coloring, and sealing. This methodical approach transforms color consistency from an art into a repeatable science, ensuring predictable outcomes for every production run.
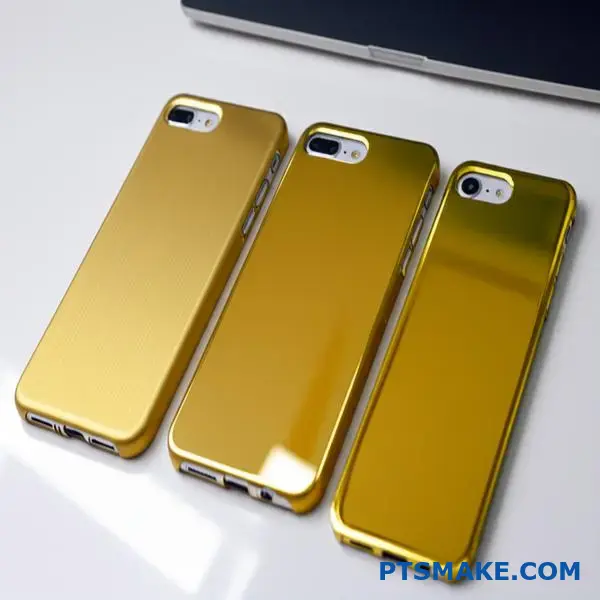
Specify the full process for a high-end electronic device.
Creating a flawless gold finish on a flagship smartphone is not magic. It is pure engineering precision. It demands a detailed specification from the very start.
This document acts as our blueprint. It guides every step to achieve that perfect cosmetic appearance. This process ensures consistency across millions of units.
Key Specification Stages
The process starts with material selection. It moves to surface preparation and finally to anodizing and coloring. Rigorous quality control is essential throughout.
| Stage | Key Consideration |
|---|---|
| Alloy Selection | Anodizing response and final color |
| Pre-Finish | Surface texture and cleanliness |
| Anodizing | Layer thickness and durability |
| Quality Control | Cosmetic and physical perfection |
Alloy and Surface Preparation
The choice of aluminum alloy is the foundation. For a premium gold anodized aluminum finish, I typically recommend the 6000 series, specifically 6063. Its composition allows for a bright, consistent color uptake.
The 7000 series, while stronger, can result in a duller, yellowish tint. This is due to its higher zinc content. This is not ideal for a luxury product.
Surface preparation is just as critical. A specific sequence creates the desired tactile feel and look. It also ensures the surface is perfectly clean for anodizing. In one of our past projects, we found that a fine bead blast followed by a light chemical etch gives a premium matte finish. This minimizes light reflection and hides fingerprints.
Anodizing and Coloring Parameters
The anodizing process builds a durable, porous oxide layer. This layer is then infused with organic dye to create the gold color. Precise control is vital here. We rely on strict galvanostatic control19 to maintain a constant current density.
This ensures uniform layer growth across complex geometries. Any deviation can cause visible color differences.
| Parameter | Specification | Tolerance |
|---|---|---|
| Sulfuric Acid Conc. | 180 g/L | ±10 g/L |
| Bath Temperature | 20°C | ±1°C |
| Current Density | 1.5 A/dm² | ±0.1 A/dm² |
| Dye Concentration | 5 g/L | ±0.5 g/L |
| Sealing Time | 30 minutes | ±2 minutes |
This strict control is how we guarantee that every single part looks and feels identical. It is a non-negotiable part of high-end manufacturing.
A perfect gold anodized aluminum finish is the result of a meticulously planned process. From the specific alloy choice to precise surface preparation and tightly controlled anodizing parameters, every detail matters. The specification document is the key to achieving this repeatable perfection.
The Non-Negotiable QC Plan
A strong specification is useless without a rigorous Quality Control plan to enforce it. For a premium device, QC is not just a final check. It happens at every single stage of the process.
Our QC plan focuses on both cosmetic and performance metrics. We leave no room for error.
Cosmetic Inspection
Visual perfection is paramount. We use both automated and human inspection under controlled lighting conditions to check for any flaws.
- Color Uniformity: We use a spectrophotometer to measure color against a master sample. The Delta E value must be less than 1.0.
- Surface Defects: We inspect for scratches, pits, or any blemishes. Our standard is zero visible defects from a distance of 30 cm.
Physical Testing
The finish must also be durable. It needs to withstand daily use.
- Coating Thickness: We use eddy current testing to verify the anodic layer is within the 12-15 micron specification.
- Abrasion Resistance: A Taber test ensures the surface can resist wear and tear, simulating long-term use.
This multi-faceted approach to QC ensures every smartphone body meets the luxury standard expected by consumers.
Frequently Asked Questions
Why is 6063 aluminum alloy preferred for a gold finish?
The 6063 alloy has a lower content of elements like copper and zinc compared to other series like 7000. These elements can interfere with the anodizing process, often causing a muddy or inconsistent color. 6063 provides a clearer, brighter base for dyeing.
Can surface texture affect the final gold color?
Absolutely. A rougher texture, like from a heavy bead blast, diffuses light more. This can make the gold color appear lighter and more matte. A smoother, polished surface will result in a more reflective, deeper gold. The pre-finish must be consistent.
From Specification to Reality
A detailed specification is the essential blueprint for achieving a world-class gold anodized aluminum finish. However, the true challenge lies in executing that plan with absolute precision and consistency, part after part.
At PTSMAKE, we excel at turning these demanding specifications into tangible, flawless components. With our deep expertise in precision CNC machining and finishing, we help our partners bring their high-end electronic devices to life, ensuring every product meets the highest standards of quality and cosmetic perfection.
When would you choose anodizing over gold PVD or paint?
Choosing the right gold finish is crucial. It impacts look, feel, and performance. Anodizing, PVD, and paint each offer unique benefits. This decision can feel complex.
My goal is to simplify this for you. We’ll use a clear decision matrix. It helps you pick the best option for your specific product needs. Let’s break down the key factors to consider.
| Finish | Best For | Key Trait |
|---|---|---|
| Anodizing | Aluminum Parts | Metallic Feel |
| Gold PVD | High-Wear Items | Durability |
| Paint | Low-Cost Items | Color Variety |
This framework helps guide your choice. It ensures your product not only looks great but also functions perfectly.
Making the right call requires a deeper look. At PTSMAKE, we guide clients through this process daily. The choice isn’t just about color; it’s about matching the finish to the application’s demands.
A detailed comparison is the best tool. We developed this matrix based on project data. It weighs the most critical factors you’ll face. The process for gold anodized aluminum, for example, involves electrolytic passivation20 which fundamentally changes the surface.
| Criterion | Gold Anodizing | Gold PVD | Gold Paint |
|---|---|---|---|
| Durability | High (Integral) | Very High | Low to Medium |
| Cost | Medium | High | Low |
| Color Match | Good | Excellent | Excellent |
| Metallic Feel | Retained | Retained | Lost |
| Conductivity | Low (Insulator) | High | None |
| Environment | Moderate | Low | High (VOCs) |
Justification for Specific Products
Case 1: High-End Audio Knobs
For a premium audio knob, gold anodizing is perfect. It preserves the crisp, metallic feel of machined aluminum. The finish is durable enough for frequent handling, offering a superior user experience.
Case 2: Luxury Watch Cases
Here, Gold PVD is the winner. It provides exceptional scratch and wear resistance. This is vital for an item worn daily. It also delivers a consistent, rich gold color that signifies quality.
Case 3: Single-Use Promotional Trophies
For low-cost promotional items, gold paint is the most practical choice. It’s inexpensive and offers quick production. Durability is not a primary concern for these applications.
This decision matrix provides a clear path. By evaluating durability, cost, feel, and other factors, you can confidently select the ideal gold finish. The best choice always aligns with your product’s specific function and market position.
How can you ensure color consistency across production batches?
A robust color control strategy is your best defense against batch-to-batch variation. It’s not about guesswork; it’s about creating a repeatable, data-driven process.
This begins with a "master sample." This is your perfect-color reference.
The Foundation: Your Master Sample
The master sample becomes the benchmark for all future production runs. It’s the one piece that everyone agrees is correct. All other parts must match it.
Why Lighting is Crucial
Color can look different under various lights. That’s why we always evaluate the master sample and production parts under controlled, consistent lighting conditions to avoid errors.
| Light Condition | Color Appearance | Consistency Risk |
|---|---|---|
| Controlled D65 Lightbox | True, consistent color | Low |
| Office Fluorescent | May appear skewed green/blue | High |
| Sunlight (Variable) | Changes throughout the day | High |
Quantifying Color with Technology
Relying on the human eye alone is a recipe for inconsistency. We use precise tools to turn color into objective data, removing subjectivity from the equation. This is critical for materials like gold anodized aluminum, where slight shifts can be very noticeable.
A spectrophotometer21 is a key instrument in this process. It measures the color of a surface and provides precise data. We use this data to establish an acceptable color window.
This window is often defined by a CIELAB ΔE value. This value represents the total color difference between a production part and the master sample. At PTSMAKE, we work with clients to define an acceptable ΔE threshold.
Implementing Strict Process Controls
Once the standard is set, maintaining it is all about process control. For any finishing process, we lock down all critical parameters. This ensures the result is repeatable month after month.
| Parameter to Control | Why It Matters for Color |
|---|---|
| Dye Concentration | Directly impacts color saturation |
| Immersion Time | Affects color depth and shade |
| Bath Temperature | Influences the rate of dye uptake |
| Voltage/Current (Anodizing) | Affects the porous layer thickness |
By documenting and controlling these variables, we ensure that batch 20 looks identical to batch 1.
A successful strategy relies on a physical master sample, objective data from tools like a spectrophotometer to define a color window (ΔE), and rigorous process controls to ensure every batch meets that standard without deviation.
Unlock Expert Gold Anodizing Solutions With PTSMAKE
Ready to achieve flawless gold anodized aluminum parts for your next project? Contact PTSMAKE now for a fast, expert quote. Let our team deliver precision, quality, and on-time results you can trust—no matter your industry or complexity. Send your inquiry today!

Learn how this critical parameter impacts the quality and consistency of the final anodized layer. ↩
Learn how the physics of light creates stable, vibrant colors that won’t fade over time. ↩
Discover how these microscopic alloy structures impact material properties and final surface finish. ↩
Learn what this electrical property means and why it’s crucial for your electronic components. ↩
Learn how surface bonding impacts the long-term performance and reliability of your machined parts. ↩
Understand how this electrical control method provides superior color consistency in production. ↩
Discover how this property affects the long-term durability and appearance of your anodized components. ↩
Understand the microscopic process of how color fills the pores in anodized aluminum. ↩
Learn how light reflection types affect the appearance of finished metal surfaces. ↩
Discover how this tool ensures precise color consistency across thousands of manufactured parts. ↩
Explore how the chemical bath’s balance affects your anodizing finish, quality, and overall project cost. ↩
Discover how these microscopic particles can affect the final look and durability of your anodized parts. ↩
Discover how electrical current concentration affects the final quality and appearance of an anodized surface. ↩
Discover the science behind how anodizing creates a durable, corrosion-resistant surface. ↩
Learn about industrial wastewater challenges and the critical role of treatment in manufacturing. ↩
Learn the science behind how this electrochemical process creates a strong, decorative layer on aluminum. ↩
Understand the chemical solution that makes the anodizing process possible and controls key coating properties. ↩
Learn how this electrical parameter directly influences the coating’s thickness, hardness, and final appearance. ↩
Understand how controlling electric current is crucial for achieving consistent color and coating thickness. ↩
Understand the science behind how this process enhances aluminum’s surface properties. ↩
Discover how this instrument quantifies color far beyond human eye capabilities. ↩