Many engineers discover their stainless steel components fail prematurely despite using high-grade materials. The root cause often traces back to inadequate or missing passivation processes that leave microscopic contaminants and compromised surface layers.
Stainless steel passivation is a chemical treatment that removes surface contaminants and enhances the natural oxide layer, providing superior corrosion resistance and extended component life for critical applications.
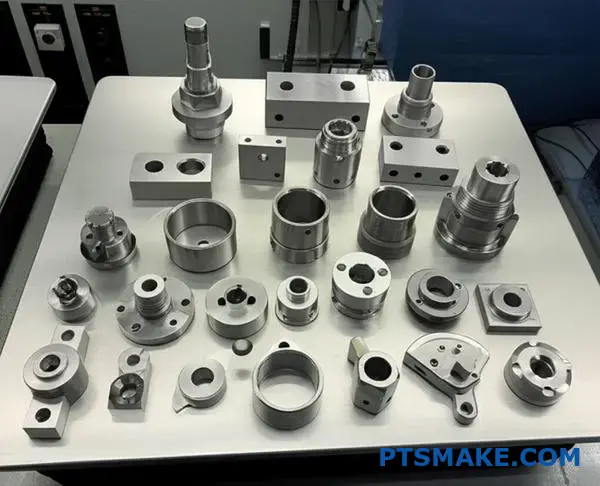
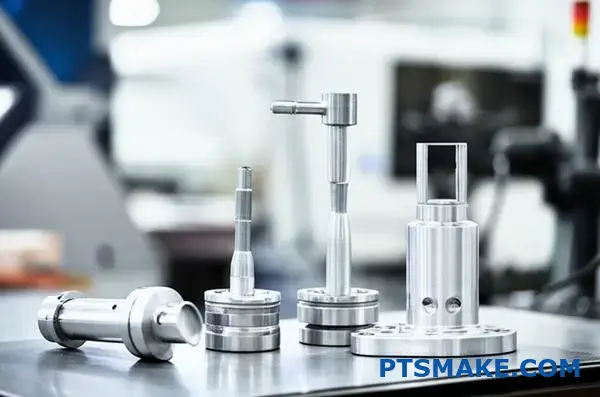
This comprehensive guide covers everything from basic passivation principles to advanced techniques used in medical, aerospace, and precision manufacturing. You’ll learn when to choose passivation over electropolishing, how to maintain tight tolerances during treatment, and industry-specific requirements that ensure your components meet stringent quality standards.
The Ultimate Reason Engineers Rely On Passivation For Stainless Steel
Engineers choose stainless steel for its strength. But its true potential is unlocked through passivation. This is a critical final step.
This metal surface treatment is essential. It significantly boosts corrosion resistance.
Without it, stainless steel components can fail prematurely. Passivation ensures reliability and extends the product’s life. It creates a pure, clean, and durable surface, ready for demanding applications.
| Feature | Unpassivated Steel | Passivated Steel |
|---|---|---|
| Surface | Free iron contaminants | Contaminant-free |
| Resistance | Vulnerable to rust | High corrosion resistance |
| Lifespan | Shorter | Extended |

Why Passivation is Non-Negotiable
Many think stainless steel is naturally immune to rust. This isn’t entirely true. During machining, microscopic iron particles can contaminate the surface. These particles are the primary sites for rust formation.
Passivation for stainless steel is a chemical process. It removes these free iron contaminants. It doesn’t coat the part. Instead, it enhances the natural protective layer.
The Science Behind the Shield
The process uses a mild oxidant, like citric or nitric acid. This treatment dissolves the surface iron. It also helps the chromium on the surface react with oxygen. This forms a robust, passive chromium-oxide layer1. This layer is what gives the steel its superior corrosion resistance.
At PTSMAKE, we’ve seen the difference firsthand. A properly passivated part withstands harsh environments far better. This is critical for medical, aerospace, and automotive components where failure is not an option.
Key Benefits of Passivation
| Benefit | Description | Impact |
|---|---|---|
| Enhanced Durability | Strengthens the passive oxide layer. | Parts last longer in corrosive settings. |
| Improved Purity | Removes surface contaminants from machining. | Ideal for medical and food-grade uses. |
| Better Performance | Prevents localized corrosion like pitting. | Ensures consistent and reliable operation. |
This treatment is a small investment that pays huge dividends in product longevity and reliability.
In summary, passivation is a vital metal surface treatment. It removes surface contaminants and chemically enhances the material’s natural protective layer. This results in superior corrosion resistance and a longer lifespan for stainless steel components.
Advanced Passivation Techniques That Extend Component Lifespan
A truly effective passivation finish begins long before the acid bath. The secret lies in meticulous surface preparation. I always stress that you can’t passivate a dirty or stressed part and expect top-tier results.
This is where an advanced passivation process comes into play. It incorporates crucial pre-treatment steps. These steps ensure the surface is perfectly clean and ready.
Key Pre-Passivation Methods
We often use several techniques depending on the part’s application. Each has a specific purpose in achieving the best possible outcome.
| Method | Primary Goal | Best For |
|---|---|---|
| Ultrasonic Cleaning | Deep Decontamination | Complex geometries |
| Thermal Cycling | Stress Relief | Parts under high stress |
| Electropolishing | Surface Smoothing | High-purity applications |
These methods elevate standard industrial surface cleansing to a science. They prepare the metal for a superior passive layer.
To achieve superior corrosion resistance, simply dipping a part in an acid bath is not enough. We must address underlying surface issues first. At PTSMAKE, we integrate these advanced preparation stages to guarantee performance.
The Power of Ultrasonic Cleaning
Ultrasonic passivation isn’t just a buzzword. It starts with superior cleaning. Ultrasonic cleaners use high-frequency sound waves. These waves create tiny bubbles that implode, dislodging contaminants from even the smallest crevices. This ensures the passivating acid reaches every part of the surface uniformly.
Enhancing with Thermal Cycling
Some components, especially those heavily machined, retain internal stresses. Thermal cycling involves heating and cooling the part in a controlled manner. This process relieves these stresses. A stress-relieved part is less susceptible to cracking and corrosion later on.
The Ultimate Preparation: Electropolishing
For the most critical applications, we use electropolishing. This electrochemical process is the opposite of plating. Instead of adding material, it removes a microscopic layer from the surface. This process smooths out the surface at a microscopic level. It effectively removes microscopic peaks and valleys, also known as micro-asperities2, from the metal surface. This creates an ultra-smooth, clean, and featureless surface, perfect for forming a flawless passive layer.
Meticulous pre-passivation is non-negotiable for extending component life. Methods like ultrasonic cleaning, thermal cycling, and electropolishing create an ideal surface. This ensures the passivation layer is uniform, durable, and highly effective against corrosion, a core part of an advanced passivation process.
Why Medical Device Procurement Demands Stringent Passivation
When a device is intended for patient contact, its surface is not just a surface. It’s a bio-interface. Any contaminants can lead to severe complications.
This is why medical device passivation is so critical. It ensures surfaces are clean and non-reactive.
The Importance of Biocompatibility
For implants and surgical tools, biocompatibility is paramount. The material must not harm the patient’s body.
Proper passivation removes free iron and contaminants. This creates a passive, chromium-oxide layer that minimizes rejection or allergic reactions. It’s a fundamental step for safety.
| Surface Condition | Patient Risk Level | Common Cause |
|---|---|---|
| Properly Passivated | Low | Controlled chemical treatment |
| Non-Passivated | High | Free iron, contaminants |
| Improperly Cleaned | High | Residual oils, particulates |
This process is more than just cleaning. It’s a precise chemical treatment. It ensures the device performs safely as designed.
True biomedical component cleaning goes beyond visual inspection. We are dealing with microscopic threats that can compromise patient safety and device function. The goal is a truly inert, particle-free surface that will not cause issues inside the body.
Adhering to Industry Standards
Standards provide a clear benchmark for quality. For medical devices, following them is not optional. It’s a requirement for regulatory approval and patient safety.
ASTM F86: A Critical Practice
ASTM F86 is a standard practice for surface preparation. It covers the cleaning of metallic materials before a procedure. It ensures devices are free from contaminants that could cause harm. This includes oils, greases, and other residues from manufacturing.
This standard ensures a baseline level of cleanliness. It’s the first step before any further treatment, like passivation, is even considered.
| Standard Focus | Objective | Relevance to Passivation |
|---|---|---|
| ASTM F86 | Remove manufacturing soils | Prepares surface for effective treatment |
| Passivation | Remove free iron, create oxide layer | Prevents corrosion and ensures biocompatibility |
After working with our clients, we’ve found that a multi-stage cleaning process is essential. This process removes not just visible dirt but also microscopic pyrogens3 and other endotoxins. This meticulous approach is what separates medical-grade components from standard industrial parts. At PTSMAKE, we integrate these protocols directly into our production workflow.
Effective medical device passivation creates biocompatible, particle-free surfaces essential for patient safety. Adhering to standards like ASTM F86 is not just best practice; it is a fundamental requirement for manufacturing reliable implants and tools, preventing adverse reactions and ensuring device integrity.
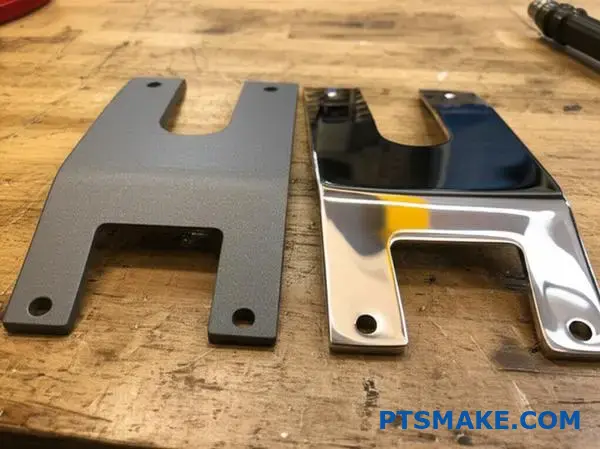
Passivation vs Electropolishing: Which One Fits Your Metal Needs?
Choosing between passivation vs electropolishing depends on your goals. We will compare three key areas. These are surface finish, corrosion protection, and compliance.
Each process offers unique benefits. The right chemical treatment options depend entirely on your application’s specific needs.
Key Comparison Points
Let’s look at a quick overview. This table highlights the main differences you should consider for your surface finish metal needs.
| Feature | Passivation | Electropolishing |
|---|---|---|
| Primary Goal | Remove free iron, prevent rust | Create a smooth, bright finish |
| Appearance | No change, matte finish | Bright, reflective, smooth |
| Corrosion Protection | Good | Excellent |
| Deburring | No | Yes (micro-level) |
When we dive deeper, the choice becomes clearer. It’s not just about looks. It’s about performance and meeting standards. The fundamental difference lies in how they treat the surface.
Surface Finish and Material Removal
Passivation is a non-destructive process. It cleans the surface and encourages the formation of a protective oxide layer. It does not change the part’s dimensions or appearance.
Electropolishing is an electrochemical process. It acts like reverse plating. It removes a microscopic outer layer of metal. This smooths out peaks and valleys, creating an ultra-clean, mirror-like finish. This process can slightly alter dimensions.
Corrosion Protection and Cleanliness
Both methods boost corrosion resistance. Passivation removes free iron contaminants from the surface. These are common initiation sites for rust.
Electropolishing goes a step further. By removing the outer skin, it leaves a surface with a higher chromium-to-iron ratio4. This passive layer is more robust. The ultra-smooth surface also makes it harder for contaminants to stick. This is critical for medical and food-grade applications.
| Aspect | Passivation | Electropolishing |
|---|---|---|
| Dimensional Change | None | Minor, controllable removal |
| Surface Roughness (Ra) | Unchanged | Significantly reduced |
| Best For | General corrosion resistance | High-purity, sterile needs |
| Use Case | Industrial parts, fasteners | Medical implants, food processing |
At PTSMAKE, we help clients decide. The choice impacts function, cost, and lead time. A non-critical internal part may only need passivation. A sterile medical device often requires electropolishing.
Passivation is a functional treatment that improves corrosion resistance without altering the finish. Electropolishing offers superior protection and a bright, smooth surface by removing material, making it ideal for high-purity needs.
The Role Of Passivation In Preventing Rust On Stainless Steel
Stainless steel’s secret weapon against rust is a microscopic layer. This is not a coating we add, but a natural shield the material forms itself. This process is key for rust prevention stainless steel.
The Science of the Oxide Layer
The magic ingredient is chromium. When exposed to oxygen, chromium in the steel reacts. It forms a thin, tough, and invisible layer of chromium oxide on the surface.
How It Protects
This passive layer is inert. It acts as a barrier, preventing oxygen and moisture from reaching the iron in the steel. This stops rust before it can even start.
| Feature | Non-Passivated Steel | Passivated Steel |
|---|---|---|
| Surface | Free iron contaminants | Clean, chromium-rich |
| Protection | Vulnerable to rust | Highly corrosion-resistant |
| Layer | Inconsistent oxide layer | Stable, uniform oxide layer |
The passivation process doesn’t create the layer—it optimizes it. The stainless steel passivation effect is really about providing the ideal conditions for this natural shield to form perfectly.
Enhancing Natural Protection
The main goal is removing contaminants. Specifically, we target free iron particles left from the machining process. These particles are weak points where rust can begin.
At PTSMAKE, our process is precise. We use a chemical bath, typically nitric or citric acid, to dissolve this surface iron. This leaves a clean, chromium-rich surface. When this surface is exposed to air, it forms a superior passive layer. This is fundamental for effective metal oxidation control.
The Protective Mechanism
The resulting chromium oxide film is self-healing. If scratched or damaged, the exposed chromium will react with oxygen. It instantly reforms the protective barrier. This dynamic protection is why passivated parts are so durable. The process alters the surface’s electrochemical potential5, making it much less reactive.
| Process Step | Purpose | Outcome |
|---|---|---|
| 1. Degreasing/Cleaning | Remove oils and dirt | A clean surface for acid to work |
| 2. Acid Bath | Dissolve free iron | Expose chromium-rich surface |
| 3. Rinsing | Neutralize and remove acid | Stop chemical reaction |
| 4. Testing | Verify passivation | Quality assurance |
This controlled process ensures that every part we deliver has the highest level of corrosion resistance built right in.
The passive oxide layer is stainless steel’s natural defense. The passivation process enhances this by cleaning the surface of contaminants like free iron. This creates a more robust, uniform barrier, ensuring superior rust prevention and part longevity.
Why Passivation Isn’t Optional For High-Frequency Electrical Housings
High-frequency electrical housings demand pristine surfaces. Without proper treatment, you face significant performance issues. EMI interference can disrupt sensitive signals.
The Unseen Enemies: Oxidation and Resistance
Oxidation is a primary concern. This electrical metal oxidation increases surface resistance over time. It degrades the enclosure’s shielding effectiveness.
This makes passivation for RF enclosures essential. It is a critical step in conductive part finishing.
| Feature | Non-Passivated Surface | Passivated Surface |
|---|---|---|
| Conductivity | Decreases over time | Stable and High |
| EMI Shielding | Degrades | Consistent |
| Reliability | Low | High |
In high-frequency applications, every surface detail matters. An untreated metal housing isn’t just a box. It’s an active component in your electrical system. Ignoring its surface condition invites performance failures down the line.
The Silent Threat of EMI in RF Enclosures
Electromagnetic Interference (EMI) can cripple sensitive electronics. An effective RF enclosure acts as a Faraday cage. It blocks external noise and contains internal emissions.
However, oxidation on the surface compromises this vital shield. A corroded layer can’t conduct electrical currents effectively. This weakens the housing’s ability to ground stray signals. Proper passivation for RF enclosures is crucial to prevent this degradation.
Surface Resistance and Its Impact on Performance
Low surface resistance is non-negotiable for grounding and shielding. It ensures a clear, reliable path for electrical currents to dissipate safely. The electrical metal oxidation process creates an insulating barrier on the metal.
This barrier increases the material’s surface resistivity6. Even a microscopic layer can raise resistance significantly. This can lead to unpredictable signal behavior and even system failure.
Why Conductive Part Finishing is Crucial
This is where a specialized conductive part finishing process like passivation excels. It removes free iron and forms a passive oxide layer. This layer is incredibly thin and doesn’t impede conductivity. It protects the part without compromising its essential electrical purpose.
| Issue | Cause | Consequence |
|---|---|---|
| Signal Loss | Increased Surface Resistance | Weaker circuit performance |
| EMI Leakage | Poor Grounding Contact | Interference with other devices |
| Data Corruption | Unstable Electrical Path | Unreliable system operation |
Untreated metal housings suffer from oxidation, which raises surface resistance and degrades EMI shielding. Passivation is an essential process to ensure the electrical conductivity, signal integrity, and long-term reliability required in high-frequency applications.
Passivation Best Practices For Custom-Machined Medical Prototypes
Achieving successful medical prototype passivation requires more than just the chemical process. It demands careful planning and strict controls from the very beginning. Early preparation is key.
You must consider the entire lifecycle of the component. This ensures the final part is not only corrosion-resistant but also safe for patient contact. Neglecting these steps can lead to costly rework or failed validation.
Early Planning and Material Selection
Proper planning starts with material choice. Select alloys known for good passivation results and biocompatibility. At PTSMAKE, we guide clients through this selection process early.
| Planning Stage | Key Consideration | Impact on Passivation |
|---|---|---|
| Concept | Material Selection | Determines which passivation method is suitable. |
| Design | Surface Finish | A smoother finish passivates more effectively. |
| Prototyping | Cleaning Protocol | Prevents contaminants from interfering with the process. |
Testing for Biocompatibility
After passivation, you must verify the part is safe. This involves specific biocompatibility tests. These tests confirm no harmful materials will leach from the surface. This step is non-negotiable for passivation for healthcare.
Contamination Control
Finally, maintaining a clean environment is critical. Contamination can ruin the passive layer. Implement strict handling and packaging protocols to protect the parts.
Effective passivation for biocompatible CNC parts is a systematic effort. It integrates seamlessly into the manufacturing workflow from the initial design phase. This proactive approach prevents future complications.
Strategic Considerations for Passivation
It’s vital to define the passivation specification alongside the part design. Don’t treat it as an afterthought. Factors like the intended medical application and sterilization methods influence the type of passivation needed. For example, a surgical tool requires a different approach than an implantable device.
We’ve found that documenting every step is crucial. This includes cleaning procedures, acid concentrations, exposure times, and rinsing methods. This documentation is essential for validation and regulatory compliance. It provides a clear record that ensures repeatability for future production runs.
Validating the Process
Validation is about proof. How do you know the surface is truly passive? We use tests like copper sulfate testing to confirm the removal of free iron. Salt spray testing is another method to check for corrosion resistance over time. These tests provide quantitative data.
Testing for cytotoxicity7 is also a critical validation step for any parts that will have cell or tissue contact. It confirms that the surface treatment does not produce a toxic response. Based on our collaborative testing with clients, passing this test is a major milestone.
| Validation Method | Purpose | Industry Standard |
|---|---|---|
| Copper Sulfate Test | Detects free iron on the surface. | ASTM A380 |
| Salt Spray Test | Evaluates corrosion resistance. | ASTM B117 |
| Biocompatibility Test | Ensures patient safety. | ISO 10993 |
Proper planning, thorough biocompatibility testing, and strict contamination control are essential for medical prototype passivation. These steps ensure your custom-machined parts are not only corrosion-resistant but also safe and compliant with stringent healthcare standards. This integrated approach minimizes risks and ensures successful outcomes.
Emergency Surface Protection: Passivation In Rapid Prototyping
In rapid prototyping, speed is everything. But speed cannot come at the cost of quality. Integrating passivation seems like it would add delays.
However, this isn’t the case with modern processes. Effective ‘fast passivation’ is achievable.
Streamlined Workflows
The key is a streamlined workflow. We integrate cleaning, passivation, and rinsing into a single, efficient line. This minimizes part handling and transfer time, which are major sources of delay in traditional setups. This approach is a core part of our rapid CNC finish options.
| Process Stage | Standard Time | Rapid Turnaround |
|---|---|---|
| Pre-Cleaning | 30-60 min | 15-20 min |
| Passivation Bath | 30-90 min | 20-30 min |
| Rinsing & Drying | 20-40 min | 10-15 min |

The Mechanics of Accelerated Passivation
Achieving fast and reliable passivation comes down to process control. It’s not about cutting corners; it’s about optimizing variables. We focus on chemistry, temperature, and concentration to accelerate the process safely.
For many prototyping surface treatments, citric acid is preferred over nitric acid. It’s less hazardous and can be just as effective when conditions are right.
By precisely controlling the bath temperature and acid concentration, we can speed up the reaction that forms the passive layer. This removes free iron from the surface much faster. This ensures the correct chromium-to-iron ratio8 is achieved without lengthy dwell times.
Validating Fast Passivation
How do we confirm success in a quick-turn environment? Validation is integrated directly into the workflow. Simple, rapid tests provide immediate feedback.
Quick Validation Methods
We rely on tests that deliver results in minutes, not hours. This avoids creating a bottleneck while still ensuring the passivation meets specifications.
| Test Method | Purpose | Turnaround |
|---|---|---|
| Water Immersion Test | Checks for free iron | < 2 hours |
| Copper Sulfate Test | Detects iron contamination | < 10 minutes |
| Humidity Test | Assesses corrosion resistance | ~24 hours (for critical parts) |
These methods ensure every prototype part leaves with a validated protective layer, aligning with tight project deadlines.
Quick-turn environments successfully integrate passivation by optimizing workflows, not skipping steps. Using controlled chemistry and rapid validation methods, ‘fast passivation’ becomes a standard, reliable part of prototyping without causing delays. This ensures functional integrity from the very first part.
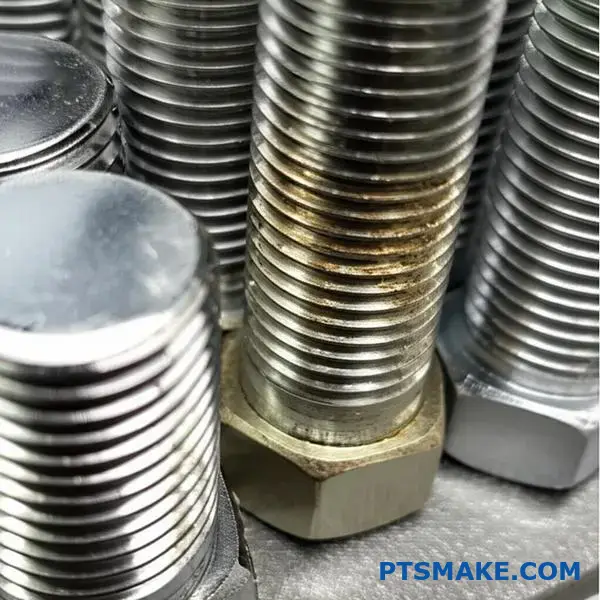
The Impact Of Passivation On Threaded And Tapped Features
Improper cleaning before passivation is a critical misstep. It directly impacts the success of thread corrosion prevention. Any residue left on the surface can block the chemical reaction.
This oversight is not minor. It leads to serious functional problems down the line.
Why Pre-Cleaning is Non-Negotiable
Contaminants like oils or metal fines create a barrier. This barrier prevents the passivating acid from reaching the stainless steel surface uniformly. The result is an incomplete protective layer.
The Immediate Consequences
An uneven passive film means weak spots. These areas are highly susceptible to corrosion, defeating the entire purpose of the passivation of threads.
| Cleaning Status | Passivation Outcome | Final Part Performance |
|---|---|---|
| Properly Cleaned | Uniform Passive Layer | High Corrosion Resistance |
| Contaminated | Incomplete/Weak Layer | Prone to Rust and Seizing |
This simple process step is crucial for reliable tapped hole passivation.
Unmasking the Culprits: Common Contaminants
During manufacturing, especially CNC machining, parts collect various residues. Cutting fluids, machine oils, and microscopic metal shavings are common. These must be removed completely.
A multi-stage cleaning process is often necessary. At PTSMAKE, we use ultrasonic baths and specific degreasing agents. This ensures the surface is pristine before entering the passivation bath. A water-break-free surface is a good indicator of cleanliness.
How Contamination Leads to Binding
When passivation of threads is incomplete, corrosion can begin. Even minor surface rust increases friction between mating parts. This can lead to a severe issue where threads seize during assembly. This phenomenon, known as galling9, can destroy both the fastener and the tapped hole.
Proper tapped hole passivation is essential for parts requiring frequent assembly and disassembly. Any dimensional change from corrosion or debris will cause fitment issues.
| Contaminant Type | Impact on Passivation | Resulting Thread Issue |
|---|---|---|
| Machining Oil | Blocks acid, causes uneven film | Increased friction, potential binding |
| Metal Fines | Embeds iron, creates rust initiation sites | Pitting corrosion, thread damage |
| Handling Residues | Creates weak spots in passive layer | Reduced part lifespan |
We have found that a rigorous, documented cleaning protocol is the only way to guarantee consistent results and prevent these failures.
Improper pre-cleaning sabotages passivation. Contaminants left on threaded or tapped features create a weak, non-uniform protective layer. This oversight directly leads to corrosion, thread binding, and critical dimensional failures, compromising the part’s integrity and performance in its application.
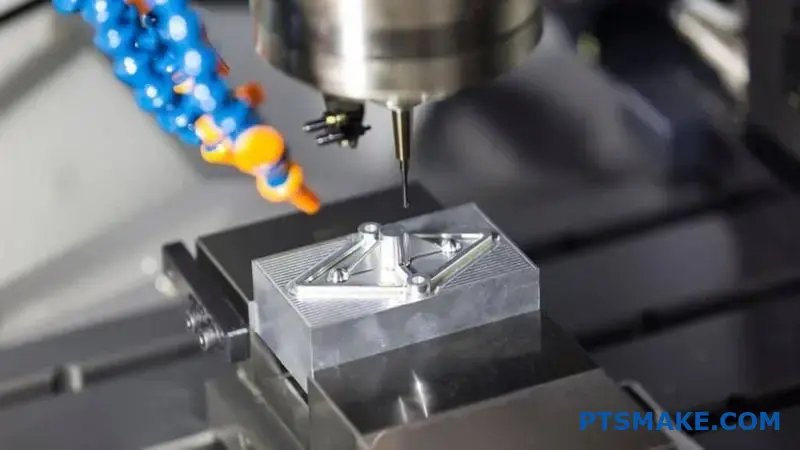
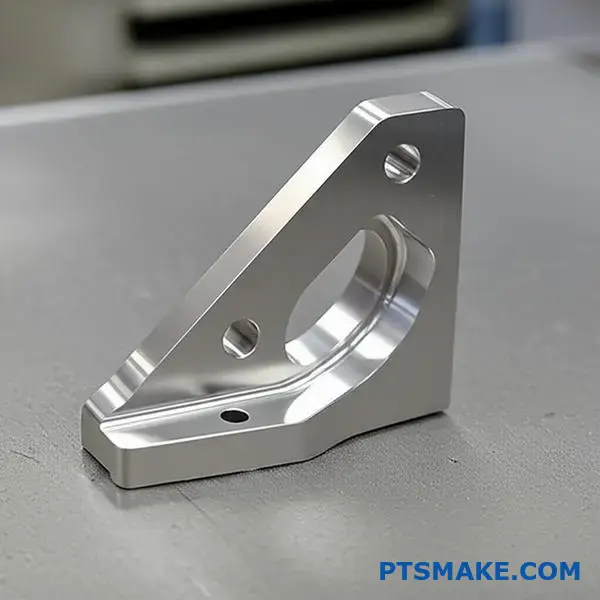
Passivation For High-Precision CNC Parts With Tight Tolerances
Preserving tight tolerances during passivation is a major challenge. The goal is to enhance corrosion resistance without altering critical dimensions. This requires precise control over the entire process.
High-precision surface finishing is not just about looks. It’s about maintaining the part’s functional integrity. Every micron matters.
Tight tolerance passivation ensures that the protective layer forms correctly. This layer adds minimal thickness while maximizing protection, ensuring dimensional stability.
Key Factors in Tolerance Preservation
Controlling the passivation process is everything. We focus on specific variables to protect the final dimensions of the part.
| Variable | Impact on Tolerance | Control Method |
|---|---|---|
| Acid Type | Can cause minor material removal | Select acid based on alloy (e.g., citric) |
| Temperature | Affects reaction rate | Maintain strict temperature range |
| Time | Directly impacts layer thickness | Use precise immersion timers |
| Cleaning | Residue can cause unevenness | Employ multi-stage ultrasonic cleaning |
This careful management is how we deliver parts that meet exact specifications.
Mastering the Passivation Process
Achieving dimensional stability during passivation is a science. It’s more than just dipping a part in an acid bath. It involves a deep understanding of metallurgy and chemistry.
At PTSMAKE, we focus on controlling the chemical reaction at a microscopic level. The process must be aggressive enough to form a passive layer but gentle enough to not etch the surface.
The Role of Bath Chemistry
The composition of the passivation bath is critical. We primarily use citric acid for most stainless steels. It’s effective and less aggressive than nitric acid, reducing the risk of material removal.
The bath’s oxidizing potential10 is carefully monitored. This ensures the chromium oxide layer forms uniformly without affecting the underlying material. Based on our internal testing, controlling this potential is the key to consistent results.
Process Parameters and Their Effects
We have refined our process to balance protection and precision. Tiny adjustments can have a big impact on the final part.
| Parameter | Standard Process | High-Tolerance Process |
|---|---|---|
| Immersion Time | 30-60 minutes | 20-30 minutes, monitored |
| Temperature | 120-150°F (49-65°C) | 120-130°F (49-54°C), stable |
| Rinsing | Standard water rinse | Multi-stage DI water rinse |
| Drying | Air dry | Controlled warm air, spotless |
This level of control prevents any unwanted dimensional changes. It guarantees that a part machined to a tolerance of ±0.0002 inches remains within that tolerance after passivation. This is our commitment to high-precision surface finishing.
Maintaining tight tolerances during passivation is critical for high-precision parts. It requires meticulous control over variables like acid choice, temperature, and time. This ensures the part’s dimensional stability and functional integrity are preserved while enhancing corrosion resistance.
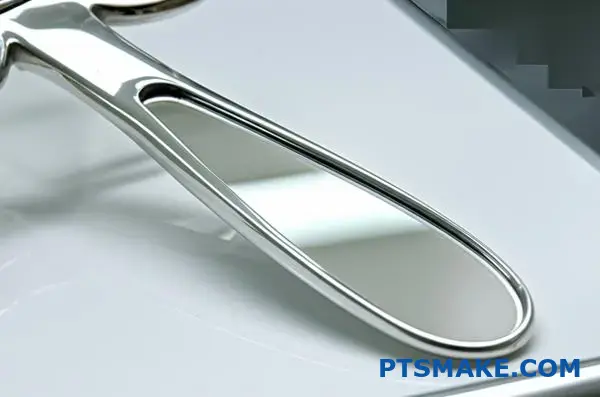
Surface Gloss, Texture And Color: How Passivation Actually Affects Appearance
Managing the final look of a part is critical. This is especially true for consumer-facing products or medical devices.
The passivation surface finish must protect the part. But it also has to meet visual standards. A poor finish can ruin the metal cosmetic appearance.
Balancing Protection and Aesthetics
For cleanroom polished parts, the challenge is even greater. The surface must be both pristine and passive. We need a perfect balance.
Here’s how we approach different finish requirements.
| Finish Goal | Key Consideration | Passivation Impact |
|---|---|---|
| High Gloss | Maintaining reflectivity | Can slightly dull a mirror polish |
| Matte Texture | Uniform, non-reflective look | Enhances uniformity |
| Cleanroom | Smooth, crevice-free | Critical for sterility |
This balance requires careful process control.
Passivation is a chemical process. It inherently interacts with the top layer of the metal. For most industrial parts, any slight change in appearance is insignificant. But for high-end aesthetic or functional surfaces, this interaction is key.
A mirror-polished part, for instance, relies on a perfectly smooth surface for its look. Passivation, while removing free iron, can minutely etch the surface. This can reduce the specular reflection11 and make the part seem less glossy. It’s a subtle effect, but one that our clients in medical and consumer electronics notice immediately.
Managing for Specific Outcomes
At PTSMAKE, we manage this by carefully selecting the passivation method. We also control variables like temperature and acid concentration. This ensures the part meets both its corrosion resistance and cosmetic requirements.
For cleanroom polished parts, the primary goal shifts slightly. A smooth, passive surface is vital for cleanability and preventing contamination.
Here’s a simplified view of our control strategy:
| Application | Primary Goal | Control Method |
|---|---|---|
| Aesthetic | Maximize gloss | Nitric acid, Type 2, low temp |
| Cleanroom | Maximize smoothness | Citric acid, controlled immersion |
| General | Maximize protection | Standard ASTM A967 methods |
This level of control ensures the metal cosmetic appearance is exactly what our clients specify. It’s about understanding the trade-offs and mastering the process.
Passivation is essential for protecting metal but requires expert management to preserve specific aesthetic and functional surface finishes, especially for high-polish and cleanroom applications.
Critical Passivation Requirements In Defense And Tactical Equipment
Military-grade gear operates in harsh environments. This makes proper surface treatment essential. Mil-spec passivation is not just a final step; it’s a critical process. It ensures rugged component protection.
The Role of Military Specifications
These specs define every detail. They cover chemical baths, temperatures, and exposure times. Adherence is mandatory for defense contracts. This guarantees performance and reliability.
Common Passivation Standards
We often encounter specific standards. These guide our defense surface treatment processes.
| Standard | Description | Application |
|---|---|---|
| AMS-2700 | Nitric Acid Passivation of Corrosion-Resistant Steels | Aerospace and Defense Components |
| ASTM A967 | Chemical Passivation for Stainless Steel Parts | General Military & Industrial Use |
Following these ensures components meet strict defense requirements.
Beyond the Written Specification
Meeting a mil-spec goes beyond following a checklist. It requires a deep understanding of materials science. The goal is to maximize corrosion resistance. This is vital for equipment longevity.
Poor passivation can lead to catastrophic failure. Imagine a fastener corroding on a critical piece of equipment. The consequences could be severe. This is why rugged component protection is paramount.
Material and Process Compatibility
The choice of passivation method depends on the alloy. Treating an austenitic12 stainless steel requires a different approach than a martensitic one. Using the wrong process can damage the part.
At our facility, we match the process to the material. This ensures the component’s integrity is never compromised. We focus on creating a passive layer that is robust and durable.
Verification Is Key
Testing is a fundamental part of mil-spec passivation. It validates that the treatment was successful. Without proper verification, you’re just guessing.
| Test Type | Objective |
|---|---|
| Humidity Test | Assesses performance in moist conditions |
| Salt Spray Test | Simulates exposure to corrosive saline environments |
| Copper Sulfate Test | Detects residual free iron on the surface |
These tests provide the confidence needed for defense applications.
Adhering to mil-spec passivation standards is non-negotiable for defense and tactical equipment. These rigorous protocols ensure components resist corrosion, function reliably, and maintain safety in the most demanding environments. Proper defense surface treatment is the foundation of rugged component protection.
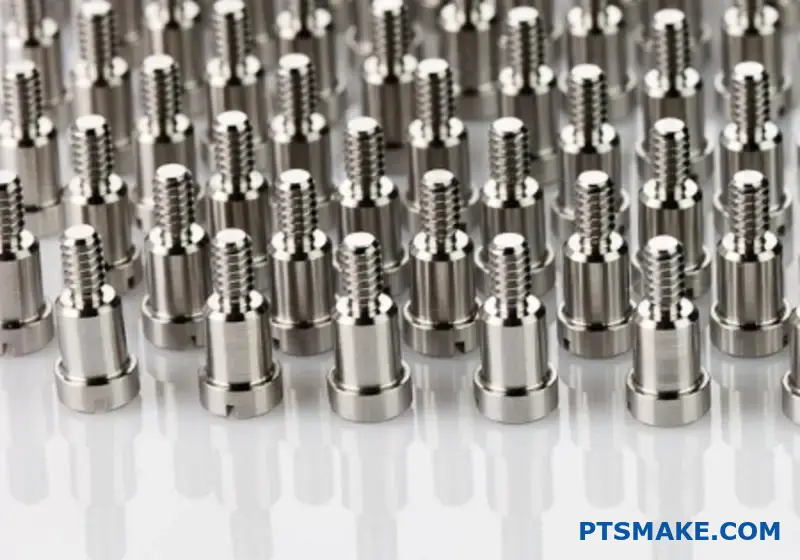
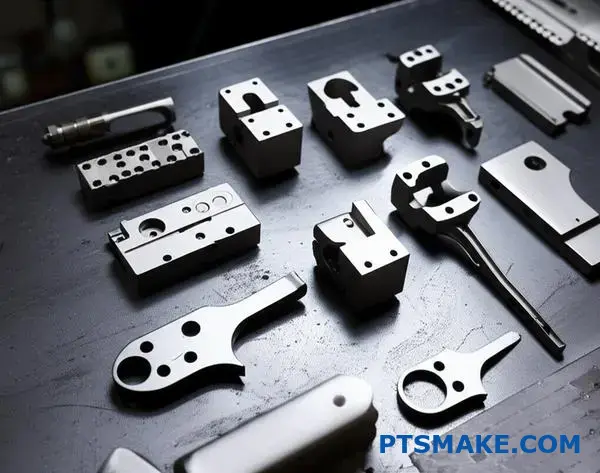
How To Integrate Passivation Into High-Mix Low-Volume Production
High-mix low-volume (HMLV) production creates unique passivation challenges. Standard large-batch processing simply doesn’t work. It leads to scheduling nightmares and inconsistent quality across different parts.
The Custom Lot Size Advantage
The key is flexible surface processing. This means tailoring batch sizes to fit immediate production needs. This approach avoids long delays waiting for a "full" batch to assemble.
It also ensures that every part, regardless of the quantity, receives consistent and optimal treatment. This is essential for successful high-mix low-volume passivation.
| Challenge | Standard Approach | Custom Batch Solution |
|---|---|---|
| Scheduling | Wait for large batches | Process smaller lots immediately |
| Consistency | Risk of process drift | Tightly controlled parameters |
| Lead Time | Increased waiting time | Reduced production delays |
This custom batch finishing method directly addresses the core issues of HMLV surface treatment.
Let’s be direct. The old model of "one size fits all" passivation is inefficient for HMLV operations. Many suppliers force you to wait until they have enough parts to fill a large tank. This practice saves them chemical costs but costs you critical lead time.
Why Standard Batching Fails HMLV
This approach introduces dangerous variability. Your high-precision parts might be processed with others that have different cleaning needs or material compositions. This can compromise the integrity of the passivation layer. It leads to inconsistent corrosion resistance.
At PTSMAKE, we recognized this problem early on. We utilize smaller, dedicated setups for custom batch finishing. This allows for precise control over the passivation environment for each unique job, ensuring optimal results every time.
| Factor | Large Batch Risk | Flexible Processing Benefit |
|---|---|---|
| Chemical Purity | Cross-contamination from other parts | Dedicated chemistry per job |
| Process Control | Generalized, non-optimal parameters | Optimized for specific alloys |
| Traceability | Difficult to track individual lots | Lot-specific documentation and control |
Implementing this strategy effectively requires rigorous process validation13 to guarantee every custom run meets the same high standards. The result is superior consistency and reliability. It’s about adapting the process to the parts, not forcing the parts to fit an outdated process.
Integrating passivation into HMLV production demands a shift from large, inefficient batches to flexible, custom lot sizes. This approach tackles scheduling delays and ensures consistent quality. This is the core of modern, effective flexible surface processing and what we practice at PTSMAKE.
Future Of Metal Passivation: Trends Engineering Teams Should Know
The world of metal passivation is changing fast. We’re moving beyond traditional methods. This shift is driven by a need for greater precision. It is also pushed by stricter environmental rules.
The future of passivation is cleaner and smarter.
Key Innovations in Passivation
We are seeing new chemistries emerge. These are safer for people and the planet. At the same time, automation is boosting quality. It also improves process control.
| Aspect | Traditional Method | Future Trend |
|---|---|---|
| Chemistry | Nitric/Citric Acid | Bio-based, eco-friendly agents |
| Process Control | Manual monitoring | Automated, sensor-driven |
| Labor | High manual involvement | Robotic handling, minimal staff |
This evolution is critical for any engineering team. It ensures parts meet higher standards of performance and sustainability.
The future of passivation is not just an idea. It’s happening now. At PTSMAKE, we see clients demanding more sustainable and reliable surface treatments. This pushes us to adopt these new trends.
The Rise of Smarter and Greener Processes
Environmental regulations are a major driver. Rules like REACH and RoHS limit hazardous substances. This has sparked significant metal cleaning innovation. Companies are now developing passivation agents derived from biological sources. These are not only safer but also highly effective.
Some advanced coatings use biocompatible polymers14. These enhance the protective layer. This is especially vital for medical and food-grade applications. It guarantees safety and longevity.
Automation and Data-Driven Quality
Automated surface treatment is more than just robots. It involves a network of sensors and software. These systems monitor every variable in real-time. They track acid concentration, temperature, and exposure time.
| Automation Benefit | Description |
|---|---|
| Consistency | Every part receives the exact same treatment, eliminating human error. |
| Traceability | A complete digital record is created for each batch, crucial for quality control. |
| Safety | Reduces operator exposure to chemicals and hazardous environments. |
Based on our internal studies, data analytics can predict when a chemical bath needs changing. This prevents inconsistent results. It also reduces chemical waste. This level of control was impossible just a decade ago.
The future of passivation lies in cleaner chemistries and intelligent automation. These trends enhance part quality, ensure regulatory compliance, and improve operational safety. Adopting them is key for engineering teams looking to stay ahead.
Unlock Superior Results With PTSMAKE Passivation Expertise
Ready to achieve flawless, rust-free stainless steel components with reliable passivation? Connect with PTSMAKE’s experts for fast, accurate quotes on advanced surface treatments. Trust our experience—get custom solutions from prototype to production. Send your inquiry today and take the first step toward premium-quality manufacturing!

Learn the detailed chemistry behind this passive, protective film and how it forms. ↩
Learn how these microscopic surface features can impact component corrosion and performance. ↩
Learn about these fever-inducing substances and why their complete removal from medical devices is absolutely critical. ↩
Learn how this key metric determines the corrosion resistance of your stainless steel parts. ↩
Understand the science behind why certain metals corrode and how passivation changes this fundamental property. ↩
Learn how surface resistivity is measured and its role in EMI shielding effectiveness. ↩
Learn more about this key biocompatibility test and why it’s vital for patient safety. ↩
Understand the key surface metric that determines the effectiveness and quality of the passivation layer. ↩
Understand this adhesive wear mechanism to prevent component seizure and failure. ↩
Explore the electrochemical principles that govern the formation of passive layers. ↩
Discover how light reflection is measured to technically define surface gloss and finish quality. ↩
Understand this common stainless steel structure and its importance in passivation. ↩
Understand the steps to verify that your passivation process consistently produces the intended, high-quality results. ↩
Discover how these advanced materials are revolutionizing surface treatments for sensitive applications. ↩