Need fast, accurate prototypes but worried about delays and quality issues? Many engineers face the challenge of finding reliable CNC machining partners who can deliver precision prototypes on tight schedules without compromising specifications.
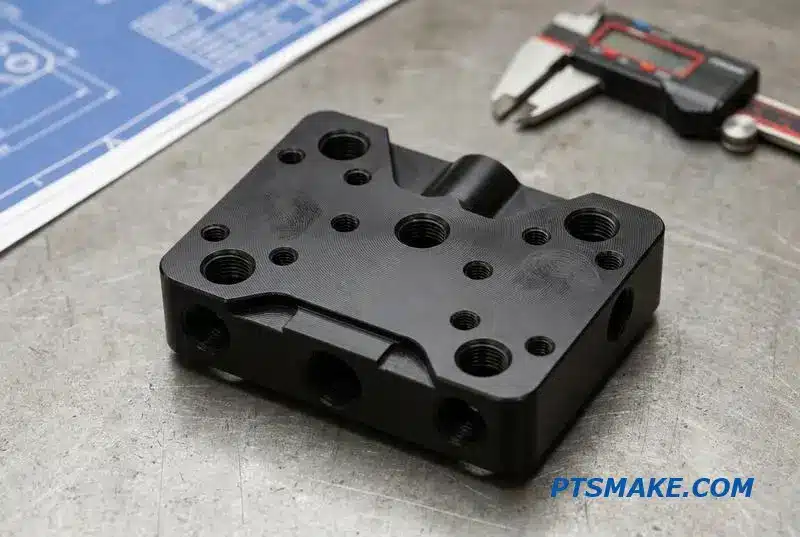
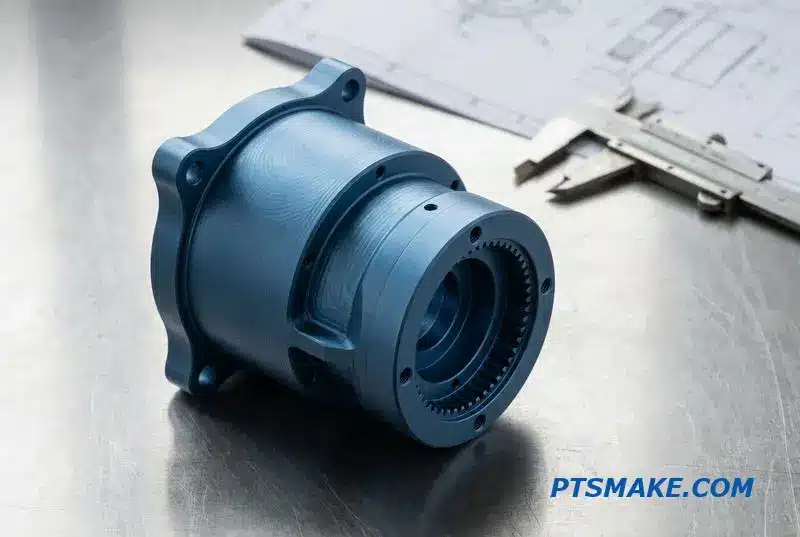
Prototype CNC machining uses computer-controlled machines to create precise functional prototypes directly from CAD designs, enabling rapid iteration and testing before full production. This process delivers tight tolerances and complex geometries essential for validating design concepts.
At PTSMAKE, I work with engineers who need to move from concept to tested prototype quickly. The right CNC prototyping approach can cut your development timeline significantly while ensuring parts meet your exact specifications. This guide covers everything from material selection to quality control, helping you make informed decisions that keep your projects on track and within budget.
What Is Prototype CNC Machining?
Have you ever held a prototype that looked right but failed during real-world testing? That critical gap between a CAD file and a truly functional part can derail an entire project.
Prototype CNC machining is a precision manufacturing process that uses computer-controlled machines to carve functional prototypes directly from a solid block of production-grade material. It’s the go-to method for validating form, fit, and function with unparalleled accuracy before committing to mass production.
From Digital Blueprint to Physical Reality
At its core, prototype CNC machining is about translation—turning a digital design into a tangible object you can hold, test, and validate. The entire process begins not in the workshop, but on a computer screen. Your 3D CAD (Computer-Aided Design) model serves as the definitive blueprint. This digital file contains every dimension, curve, and feature of your intended part.
Once the design is finalized, it’s processed through CAM (Computer-Aided Manufacturing) software. This software acts as the interpreter, converting the 3D geometry of your model into a detailed set of instructions for the CNC machine. These instructions, known as G-code, dictate every movement the cutting tool makes—its path, speed, and depth of cut. The machine then executes this code with robotic precision, carving away material from a solid block to reveal the final part. This process of material removal is a core principle of subtractive manufacturing1, ensuring the final part has the monolithic strength of the original material block. This direct path from digital to physical eliminates the ambiguity that can creep in with manual processes, ensuring the prototype is a true representation of your design intent.
Prototype vs. Production: A Tale of Two Goals
It’s crucial to understand that the goal of prototyping is fundamentally different from that of full-scale production, and this distinction shapes the entire approach. Prototyping is about learning and validation. You need to answer critical questions: Does the part fit? Does it function correctly? Can it withstand operational stress? Speed and accuracy are the priorities. In contrast, mass production is about efficiency and repeatability at the lowest possible cost per unit.
Here’s a simple breakdown of the key differences:
| Feature | Prototype CNC Machining | Production CNC Machining |
|---|---|---|
| Primary Goal | Design validation, functional testing | Cost efficiency, repeatability at scale |
| Quantity | 1 to 100+ units | Thousands to millions of units |
| Speed | High priority; rapid turnaround | Optimized for cycle time over months |
| Tooling | Standard tooling, minimal setup | Custom fixtures and jigs for speed |
| Cost Per Unit | Higher | Significantly lower |
Understanding this difference is key to managing project expectations and budgets. The investment in a high-fidelity CNC prototype pays for itself by preventing costly design flaws from ever reaching the production stage.

The Strategic Edge: Speed and Material Versatility
One of the greatest advantages of using CNC machining for prototypes is the sheer speed of iteration. In product development, time is a resource you can never get back. Waiting weeks for a prototype kills momentum and delays critical feedback. Because CNC machining requires minimal custom tooling, we can often move from a finalized CAD file to a physical part in a matter of days. In past projects at PTSMAKE, this rapid turnaround has allowed our clients to perform multiple test cycles in the time it would have taken to get a single prototype using more traditional methods. This accelerated feedback loop—design, machine, test, repeat—is what gets innovative products to market faster.
Material Selection: The Key to Meaningful Testing
A prototype is only as good as the data it provides. If you test a prototype made from a brittle 3D-printed plastic when your final part needs to be durable aluminum, your test results are misleading. This is where prototype CNC machining truly excels. It allows you to use the exact same production-grade materials you plan to use for the final product. Whether it’s a specific grade of aluminum like 6061-T6 for aerospace components, medical-grade PEEK for surgical instruments, or tough ABS for consumer electronics casings, you can create a prototype with identical mechanical properties, weight, and thermal resistance. This material authenticity ensures that your functional tests are not just estimates; they are real-world validations of your design’s performance. This one-to-one material match gives engineers like you the confidence that a successful prototype will translate into a successful production part.
CNC Machining vs. Other Prototyping Methods
While 3D printing has its place, especially for early-stage conceptual models, CNC machining holds a distinct advantage for functional, high-fidelity prototypes. The choice often comes down to the specific requirements of the validation stage.
Here’s how they compare:
| Method | Material Properties | Tolerance | Best Use Case |
|---|---|---|---|
| CNC Machining | Excellent (Production-grade) | Very High (±0.001") | Functional testing, tight-fit assemblies |
| 3D Printing (FDM) | Fair (Anisotropic) | Low (±0.010") | Form visualization, basic fit checks |
| 3D Printing (SLA/DLP) | Good (Brittle) | High (±0.002") | High-detail aesthetic models |
For any application where mechanical strength, dimensional accuracy, and surface finish are critical, CNC machining is the superior choice. It provides the ground truth you need before investing in expensive production tooling.

Prototype CNC machining transforms digital designs into precise, functional models using real materials. It’s invaluable for validating complex parts with tight tolerances, accelerating product development, and ensuring your final design performs exactly as intended before scaling to full production.
Key Steps in the Prototype CNC Machining Process?
Ever had a prototype arrive that didn’t quite match your design, or wondered why a simple part took so long? The issue often lies within the unseen steps of the machining process.
The prototype CNC machining process is a sequential workflow that transforms a digital design into a physical part. It includes CAD design, CAM programming, material selection, machine setup, machining, post-processing, and finally, quality inspection. Each step is critical for ensuring accuracy and speed.

From Digital Blueprint to Machinable Code
The initial stages are all about preparation and planning. Getting these right is non-negotiable because errors here will cascade through the entire process, leading to delays and increased costs. In past projects at PTSMAKE, we’ve found that a 1-hour design review can save over 10 hours of rework and machining time.
The Foundation: CAD Design
Everything starts with your Computer-Aided Design (CAD) file. This is the digital blueprint. For efficient prototype CNC machining, the design must be optimized for manufacturability (DFM). This means considering factors like tool access, minimum corner radii, and wall thickness. A common issue we see is designers specifying sharp internal corners, which are impossible for a round cutting tool to create. A small design tweak, like adding a radius, can make the part machinable and significantly reduce costs. The most reliable file formats for transferring designs are universal ones that preserve the 3D geometry accurately.
| File Format | Best For | Considerations |
|---|---|---|
| STEP (.stp, .step) | 3D Models | Universal standard, highly compatible. Our preferred format. |
| IGES (.igs, .iges) | 3D Models | Older standard, but still widely used. Can sometimes have translation issues. |
| STL (.stl) | 3D Printing | Not ideal for CNC as it’s a mesh, not a solid model. Lacks precise data. |
| Parasolid (.x_t) | 3D Models | Native format for some CAD systems; very reliable. |
The Translation: CAM Programming
Once we have a solid CAD model, the next step is Computer-Aided Manufacturing (CAM) programming. This is where a skilled programmer uses specialized software to generate the toolpaths—the exact route the cutting tool will take. The software outputs a program, typically in a language called G-code2, that the CNC machine reads. This isn’t just a simple conversion. The programmer makes critical decisions about which tools to use, the cutting speed, the feed rate, and the order of operations. A well-optimized program ensures a better surface finish, tighter tolerances, and shorter cycle times.
Choosing the Right Building Blocks
The material you choose is as important as the design itself. The right material ensures your prototype functions as intended and accurately simulates the final product’s performance. It impacts machinability, cost, weight, and durability.

Bringing the Prototype to Life
With the digital work complete, we move to the shop floor where the physical transformation happens. This is where precision in execution separates a great prototype from a mediocre one. Careful setup and monitoring are essential to translate the perfect program into a perfect part.
The Setup: Precision is Paramount
Before any material is cut, the CNC machine must be meticulously set up. This involves several key actions:
- Workholding: The raw material block, or workpiece, must be securely clamped in a vise or custom fixture. Any movement during machining will result in an inaccurate part.
- Tooling: The correct cutting tools are loaded into the machine’s tool changer. Each tool’s length and diameter are precisely measured and entered into the machine’s controller.
- Setting Offsets: The operator establishes a "zero point" or datum on the workpiece. This tells the machine exactly where the part is located in its workspace, ensuring all cuts are made in the correct position. At PTSMAKE, we often use automated probing systems to find this zero point with micron-level accuracy.
The Execution: Machining the Part
This is the most visible step of the process. The CNC machine executes the G-code line by line, moving the cutting tool along the programmed paths to remove material and shape the part. The process might involve multiple operations, such as roughing to remove large amounts of material quickly, followed by finishing passes to achieve the final dimensions and a smooth surface finish. The operator closely monitors the process, listening for any unusual sounds and watching for chip buildup, ensuring everything runs smoothly.
The Final Touches and Verification
A part isn’t finished just because it comes off the machine. The final steps are what guarantee the prototype meets every specification and is ready for testing.
Beyond Machining: Post-Processing
Raw machined parts often require additional finishing steps to meet cosmetic or functional requirements. These are determined by the application of the prototype.
| Process | Purpose | Result |
|---|---|---|
| Deburring | Remove sharp edges and burrs left by cutting tools. | Safe to handle, clean appearance. |
| Anodizing | Adds a durable, corrosion-resistant, colored oxide layer (for aluminum). | Improved durability and aesthetics. |
| Bead Blasting | Creates a uniform matte or satin surface finish. | Non-reflective, textured surface. |
| Tumbling | Smooths parts and deburrs them in bulk using abrasive media. | Smooth, polished finish. |
The Verdict: Quality Inspection
The final step is a comprehensive quality inspection. This is a non-negotiable part of our process. We use calibrated measuring tools like digital calipers, micrometers, and Coordinate Measuring Machines (CMM) to verify that the part’s dimensions match the engineering drawing. A CMM can measure thousands of points on a complex part with extreme accuracy, providing a detailed report that confirms it meets all specified tolerances.

From a digital file to a physical part, the prototype CNC machining journey is a multi-stage process. Each step, from programming to final inspection, directly influences the prototype’s quality, cost, and delivery time, making a skilled partner essential for success.
Material Choices and Their Impact on Prototyping.
Ever chosen a material for a prototype only to have it crack under pressure or completely exhaust your budget? The wrong material choice can quickly turn a promising project into a costly setback.
Selecting the right material is a foundational step in prototype CNC machining. It directly dictates the prototype’s strength, cost, and overall suitability for testing, ensuring that it accurately reflects the final product’s performance and appearance for a meaningful evaluation.

When you’re developing a new part, the material you choose is just as important as the design itself. In prototype CNC machining, your options are vast, but a few materials have become go-to choices for good reason. Let’s break down the most common metals and plastics we work with at PTSMAKE.
Common Metals in Prototyping
Metals are often chosen for their strength, durability, and premium feel, making them ideal for functional prototypes that need to withstand rigorous testing.
Aluminum (6061)
Aluminum 6061 is arguably the most popular choice for CNC machining prototypes. It offers an excellent strength-to-weight ratio, is naturally corrosion-resistant, and is highly machinable. This means we can cut it faster and with less tool wear, which translates to lower costs and quicker turnaround times for you. It’s a fantastic all-rounder, perfect for everything from aerospace components to consumer electronics enclosures.
Steel (Stainless & Mild)
When strength and hardness are non-negotiable, steel is the answer.
- Stainless Steel (e.g., 304, 316): Offers superior corrosion resistance and strength. It’s ideal for medical devices, food-grade applications, and parts exposed to harsh environments. However, it’s tougher to machine than aluminum, which can increase the cost.
- Mild Steel (e.g., 1018): A more cost-effective option than stainless steel, it’s strong and easy to machine. Its main drawback is a lack of corrosion resistance, so it often requires a finishing coat like paint or plating.
Popular Plastics for CNC Prototyping
Plastics provide a lightweight and often more affordable alternative to metals, offering a wide range of properties to suit different applications. Machining plastics can sometimes reveal properties like anisotropy3 that are important to consider.
ABS
Acrylonitrile Butadiene Styrene (ABS) is a tough, impact-resistant thermoplastic that’s easy to machine. It’s a great choice for visual prototypes, enclosures, and handheld devices. It holds details well and can be easily painted or finished, making it perfect for models that need to look like a final product for marketing photos or stakeholder presentations.
Nylon (PA66)
Nylon is known for its excellent mechanical properties, including high wear resistance and a low coefficient of friction. This makes it ideal for functional prototypes with moving parts like gears, bearings, and living hinges. It’s also chemically resistant, adding to its versatility.
Here’s a quick comparison to help you visualize the trade-offs:
| Material | Key Strengths | Relative Cost | Common Applications |
|---|---|---|---|
| Aluminum 6061 | Excellent strength-to-weight, machinability | $$ | Functional parts, enclosures, fixtures |
| Stainless Steel | High strength, corrosion resistance | $$$ | Medical devices, rugged components |
| ABS | Impact resistance, ease of finishing | $ | Visual models, form/fit prototypes |
| Nylon | Wear resistance, low friction | $$ | Gears, bearings, moving parts |

Understanding the properties of common materials is the first step. The next, more critical step is matching those properties to the specific goal of your prototype. A material that’s perfect for a visual model could be a disastrous choice for a functional test unit. The purpose of your prototype should always drive your material selection.
Defining Your Prototype’s Primary Goal
In our project discussions at PTSMAKE, one of the first questions we ask is, "What does this prototype need to do?" The answer generally falls into one of two categories, each with different material requirements.
Materials for Functional Prototypes
A functional prototype needs to perform like the final product. It’s built for testing—stress tests, cycle tests, and real-world use cases. For these, you must select a material that closely mimics or matches the mechanical properties of your intended production material.
- Strength and Durability: If your final part will be made from steel, prototyping in a weaker material like ABS won’t give you valid test results. You should use a similar grade of steel or a strong aluminum alloy to ensure the data you collect is meaningful.
- Thermal and Chemical Resistance: If the part will be exposed to heat or chemicals, your prototype material must be able to withstand those conditions. Using a low-melt-point plastic for an engine component prototype, for example, would lead to immediate failure.
Materials for Form and Fit Prototypes
The goal here is different. You need to verify dimensions, check ergonomics, or present a visual model to stakeholders. Performance is secondary to accuracy and appearance.
- Cost-Effectiveness: Since these prototypes don’t need to withstand heavy loads, you can use more affordable materials. ABS and other general-purpose plastics are excellent choices. They are inexpensive and machine quickly, allowing you to create multiple iterations without breaking the bank.
- Finish Quality: For visual models, aesthetics are key. Materials like ABS are great because they can be sanded, polished, and painted to achieve a high-quality, product-ready look. This is crucial for marketing materials or securing investor buy-in.
The Hidden Cost: Machinability
It’s a common mistake to only look at the per-kilogram cost of a material. However, the cost of a prototype cnc machining project is heavily influenced by machining time.
| Factor | Description | Impact on Cost |
|---|---|---|
| Machining Speed | Softer materials like aluminum and ABS can be cut much faster than hard materials like stainless steel or titanium. | Faster speeds mean less machine time, lowering labor and operational costs. |
| Tool Wear | Abrasive or hard materials wear down cutting tools faster, requiring more frequent and costly tool changes. | Increased tool replacement adds directly to the project’s bottom line. |
| Complexity | Certain materials are better suited for holding fine details or complex geometries without chipping or warping. | Choosing a material that matches the design complexity can prevent failures and rework. |
In past projects, we’ve seen instances where choosing a slightly more expensive but highly machinable aluminum alloy over a cheaper, tougher steel saved the client significant money on the final invoice due to the reduction in machine hours.

Choosing the right material is a critical balancing act. From strong metals like aluminum and steel to versatile plastics like ABS and nylon, each option directly impacts your prototype’s cost, performance, and testing validity. Aligning material properties with your prototype’s purpose is key to success.
Advantages of CNC Machining for Prototyping.
Have you ever faced costly redesigns and launch delays because a prototype failed under real-world conditions? Or struggled to validate a design before committing to six-figure tooling costs?
CNC machining provides critical advantages for prototyping, including unmatched speed, high precision, and the use of final production materials. This process allows engineers to conduct true functional testing and validate designs before investing in expensive mass-production tooling, accelerating the entire development cycle.

When you need to turn a complex CAD model into a tangible part you can hold, test, and trust, the method you choose matters immensely. While there are several rapid prototyping options available today, CNC machining stands out for several key reasons that directly impact your project’s timeline, budget, and ultimate success. It’s not just about creating a look-alike model; it’s about creating a functional precursor to your final product.
Speed: From Digital Design to Physical Part
One of the most immediate benefits of prototype CNC machining is the rapid turnaround. Unlike processes that require molds or specialized tooling, CNC machining works directly from a 3D CAD file. Once the file is programmed, a block of material can be machined into a finished part in a matter of hours or days, not weeks. At PTSMAKE, we’ve seen this speed directly translate into a more agile development process for our clients. It allows engineering teams to iterate on designs rapidly—they can test a part, identify a flaw, revise the CAD model, and have a new, improved version in hand in less than a week. This compresses the design-build-test cycle from months into days.
Precision and Unwavering Repeatability
For a prototype to be truly useful, it must accurately represent the final part’s dimensions and features. This is where the precision of CNC machining is invaluable. Modern multi-axis CNC machines can achieve tolerances as tight as ±0.001 inches (0.025 mm), ensuring that components fit together perfectly and perform as intended. This level of accuracy is crucial for validating complex assemblies and testing mechanical functions. This precision is defined by standards like Geometric Dimensioning and Tolerancing (GD&T)4, which ensures every feature is exactly where it needs to be. Furthermore, the process offers exceptional repeatability. If you need five or ten identical prototypes for simultaneous testing—perhaps for destructive tests, marketing samples, and investor demos—CNC ensures each one is a perfect replica of the last.
| Feature | CNC Machining | Traditional Tooling (e.g., Mold) |
|---|---|---|
| Initial Lead Time | 1-10 Days | 4-12 Weeks |
| Typical Tolerance | High (±0.025 mm) | Very High (±0.010 mm) |
| Design Iteration Cost | Low (Reprogramming) | Extremely High (Tool Modification/Remake) |
| Setup Cost | Low | Very High |
This combination of speed and precision means you’re not just getting a part quickly; you’re getting the right part quickly.

Beyond just the initial speed and accuracy, the strategic value of CNC machining for prototyping extends into material selection and its seamless connection to the entire manufacturing lifecycle. This bridge from a single prototype to low-volume production is where many projects either succeed or stumble. A prototype that can’t be properly tested or doesn’t provide a clear path forward offers limited value.
Testing with Real, Production-Grade Materials
A prototype’s primary purpose is to validate a design. This validation is only meaningful if the prototype behaves like the final product. This is arguably the single greatest advantage of prototype CNC machining. You can create your prototype from the exact same material as your final production part, whether it’s Aluminum 6061-T6, Stainless Steel 304, ABS, PEEK, or Delrin. This allows for true functional testing. You can test for:
- Mechanical Strength: Will the part withstand the loads it will see in the real world?
- Thermal Properties: How does it perform under expected operating temperatures?
- Chemical Resistance: Will it degrade when exposed to certain fluids or environments?
- Weight and Balance: Is the final weight within specification for applications like aerospace or robotics?
Testing a 3D-printed plastic part gives you form and fit, but testing a CNC-machined aluminum part gives you confidence in its actual performance.
A Seamless Bridge to Low-Volume Production
What happens when your prototype is perfect and you need 100 units for a beta test or an initial product launch while your high-volume tooling is still being manufactured? CNC machining provides the perfect solution. The same process and programming used for your single prototype can be scaled to produce a small batch of parts. This is often called "bridge production." It allows you to get your product to market faster, generate early revenue, and gather crucial user feedback before committing to mass production. This scalability eliminates the manufacturing gap that often exists between prototyping and production, ensuring a smoother product launch.
| Stage | CNC Machining | Injection Molding |
|---|---|---|
| Prototype (1-10 units) | Ideal; low cost, fast | Not feasible due to high tooling cost |
| Low-Volume (50-1000 units) | Cost-effective; "bridge production" | Cost-prohibitive due to tooling amortization |
| High-Volume (10,000+ units) | Not cost-effective | Ideal; very low per-part cost |
By using CNC machining for both prototyping and initial production, you de-risk your entire project, ensuring the part you designed is the part you can actually manufacture and sell.

CNC machining boosts prototyping with exceptional speed, precision, and the use of production-grade materials. This facilitates genuine functional testing and provides a seamless bridge to low-volume production, significantly de-risking the major investment required for mass production tooling and shortening your time-to-market.
Common Challenges and How to Overcome Them.
Have you ever faced missed deadlines, received parts that don’t match your CAD files, or struggled with suppliers who just don’t seem to understand your requirements for a critical prototype?
Overcoming common prototype CNC machining challenges hinges on two key areas: selecting a partner with proven capabilities and establishing crystal-clear communication from the start. This proactive approach prevents delays, ensures quality, and builds a reliable manufacturing relationship.

Navigating the world of CNC machining suppliers can be tricky. A low quote might be tempting, but it often hides downstream costs from delays or rework. To truly vet a potential partner for your prototype CNC machining needs, you need to look beyond the price.
Vetting Suppliers: A Deeper Dive
Your goal is to find a partner, not just a parts producer. A true partner invests in your success. In past projects with clients, we’ve found that a thorough evaluation process is the best way to mitigate risk. Start by assessing their technical capabilities. Do they have the right multi-axis machines for your part’s complexity? What quality control systems do they have in place? Ask for certifications like ISO 9001, but also ask for practical examples of their quality process, such as how they handle a First Article Inspection5 report.
Core Supplier Evaluation Criteria
A supplier’s experience with your specific material is also critical. Machining PEEK is very different from machining Aluminum 6061. A partner with deep material expertise can often suggest minor design tweaks that improve machinability and reduce cost without compromising function. We often work with clients to optimize their designs for manufacturing (DFM), a service that only an experienced team can provide.
Here’s a simple checklist to compare potential suppliers:
| Criteria | What to Look For | Why It Matters |
|---|---|---|
| Technology & Equipment | Modern 3, 4, and 5-axis CNC machines; quality inspection tools (CMM, etc.) | Ensures they can meet your tolerances and handle complex geometries. |
| Quality Systems | ISO 9001 certification; clear QC processes; traceability records. | Demonstrates a commitment to consistent, reliable quality. |
| Material Expertise | Documented experience with your specified materials; ability to source and verify. | Reduces the risk of material-related failures or machining errors. |
| Prototyping Experience | A portfolio of similar projects; dedicated rapid prototyping services. | Shows they understand the speed and flexibility required for prototypes. |
Beyond the Checklist
Finally, look for transparency and a collaborative spirit. Are they willing to have a technical call to discuss your design? Do they provide a detailed quote that breaks down costs? A supplier who is open and communicative from the beginning is more likely to be a reliable partner when challenges inevitably arise. This initial investment in due diligence pays dividends throughout the project lifecycle.
Even with the best supplier, a project can go off the rails without clear, consistent, and documented communication. Ambiguity is the enemy of precision manufacturing. Every unclear dimension or unstated assumption is a potential point of failure. The responsibility for clarity lies with both you and your machining partner.
Mastering Project Communication
Effective communication starts long before a machine is powered on. It begins with your Request for Quote (RFQ). A well-prepared RFQ package is the foundation for a successful project. Simply sending a 3D model with a request for "10 pieces" isn’t enough. Your package should be comprehensive to eliminate guesswork. At PTSMAKE, we always appreciate when a client provides a package that includes a 3D CAD model, a 2D engineering drawing with tolerances, material specifications, and desired surface finishes.
The Communication Lifecycle
Communication doesn’t stop once the purchase order is issued. It should be a continuous loop. Establishing a single point of contact on both sides is crucial. This prevents conflicting information and ensures accountability. Regular, scheduled check-ins, even if brief, can catch potential issues early. For instance, a quick update might reveal a material supply delay, allowing you to adjust your project timeline proactively rather than being surprised on the delivery date.
This table outlines a simple framework for project communication:
| Stage | Key Action | Why It Matters |
|---|---|---|
| 1. RFQ | Provide a complete technical data package (3D/2D files, specs). | Ensures an accurate quote and shared understanding of requirements. |
| 2. Pre-Production | Hold a kickoff call to confirm all details and timelines. | Aligns expectations and clarifies any final questions before machining. |
| 3. In-Production | Request regular status updates (e.g., weekly emails with photos). | Provides visibility into progress and allows for early course correction. |
| 4. Post-Delivery | Provide clear, consolidated feedback on the received parts. | Helps the supplier improve and strengthens the long-term partnership. |
Giving and Receiving Feedback
Feedback is a critical part of the process, especially in prototype CNC machining. When parts arrive, inspect them promptly. If there are issues, document them clearly with photos and specific measurements referencing the 2D drawing. Frame the feedback constructively. Instead of saying "This is wrong," try "The dimension on the drawing is 25.4mm +/- 0.05mm, but this part measures 25.6mm. Can we discuss how to correct this?" This approach fosters a problem-solving partnership, which is our goal on every project we undertake at PTSMAKE.

To ensure reliable prototype CNC machining results, it’s essential to thoroughly vet suppliers on their technology, quality systems, and material expertise. Equally important is establishing a clear and continuous communication loop, from a detailed RFQ to constructive post-delivery feedback, to align expectations and prevent costly errors.
How to Optimize Cost and Lead Time for Prototypes?
Are budget overruns and schedule delays derailing your prototype CNC machining projects? These seemingly minor issues can quickly jeopardize your entire launch timeline, turning innovation into frustration.
To optimize costs and lead times, focus on four key areas: implement Design for Manufacturability (DFM) from the start, select the most practical material for the prototype’s function, batch orders to leverage economies of scale, and partner with a supplier who offers integrated prototyping and production capabilities.

Optimizing a prototype project isn’t about cutting corners; it’s about making smarter, more informed decisions early in the process. The two most impactful areas you can control from your desk are design and material selection.
Design for Manufacturability (DFM)
DFM is the practice of designing parts in a way that makes them easier and more cost-effective to manufacture. For prototype CNC machining, this is paramount. Every complex feature, tight tolerance, and unnecessary surface finish requirement adds machine time, which directly translates to higher costs and longer lead times.
Simplify Your Geometry
The simplest path is often the fastest and cheapest.
- Avoid deep, narrow pockets: These require long, fragile tools that must run slowly to prevent breaking, significantly increasing machining time.
- Use standard tool sizes: Design holes, slots, and radii that correspond to standard drill bit and end mill sizes. Custom tooling adds significant cost and delay.
- Minimize part setups: Try to design your part so that most, if not all, features can be machined from one or two orientations. Each time the part is re-fixtured, it adds labor time and introduces potential for error.
A deep understanding of Geometric Dimensioning and Tolerancing (GD&T)6 is crucial here. Over-tolerancing is one of the most common drivers of unnecessary cost. Ask yourself: does this feature truly need a tolerance of ±0.01mm, or will ±0.05mm suffice for a prototype? In my experience, challenging every tight tolerance can yield significant savings.
Choose the Right Material
Material selection has a massive impact on both cost and machining speed. While your production part may require a high-performance aerospace-grade alloy, your prototype might not. The key is to match the material to the prototype’s specific purpose.
Match Material to Prototype Function
- Form and Fit Prototypes: If you’re just verifying the size and shape, use a cheaper, easily machinable material like ABS, POM (Delrin), or Aluminum 6061.
- Functional Prototypes: If the prototype needs to withstand loads or test mechanical properties, choose a material that simulates the end-use material’s properties but is still relatively easy to machine. For example, if your final part is 316 stainless steel, consider using 303 or 304 for the prototype, as they are more free-machining.
Here’s a quick comparison to guide your initial selection:
| Material | Relative Cost | Machinability | Common Prototype Use |
|---|---|---|---|
| ABS Plastic | Low | Excellent | Form/fit checks, visual models |
| Aluminum 6061 | Low-Medium | Excellent | Functional prototypes, structural parts |
| Stainless Steel 304 | Medium | Good | Corrosion resistance, strength tests |
| Titanium Ti6Al4V | High | Difficult | High-strength, lightweight functional tests |
Choosing a more machinable material can sometimes reduce cutting time by over 50%, a direct and substantial saving.

Beyond design and materials, your procurement strategy and supplier relationship are the next frontiers for optimization. How you order your parts and who you work with can unlock efficiencies that aren’t apparent on a design drawing.
Leverage Economies of Scale with Batching
In CNC machining, the initial setup is often a significant portion of the total cost. This includes programming the CAM software, setting up the machine, loading the tools, and calibrating the fixtures. These are fixed costs, whether you’re making one part or ten.
The Power of Small Batches
When you order parts one at a time, you pay for that setup cost every single time. By ordering in small batches—even just 5 or 10 units—you can amortize that setup cost across all the parts.
- Plan Ahead: If you anticipate needing multiple iterations or a few extra parts for destructive testing, order them all at once. The per-piece price will be significantly lower.
- Combine Similar Parts: If you have several small parts that can be made from the same material stock, ask your supplier if they can be run in the same job. At PTSMAKE, we often help clients consolidate orders this way to reduce machine setup time and material waste.
The cost difference between a single prototype and a batch of five can be surprising. While the total cost is higher, the cost-per-part often drops dramatically, providing far better value.
Choose a Partner for Prototyping and Production
The transition from a successful prototype to full-scale production can be a source of major delays and cost overruns. Using one supplier for prototyping and another for production often means starting from scratch. The production supplier has to re-learn the part, re-program their machines, and develop new workholding—all of which introduces risk and cost.
The Seamless Transition
Partnering with a company like PTSMAKE, which has robust capabilities in both prototype CNC machining and high-volume production, creates a seamless pathway.
- Shared Knowledge: We already understand the critical features and potential manufacturing challenges from the prototyping phase. This knowledge is directly applied to production, eliminating the learning curve.
- Consistent Quality: The same quality standards, inspection methods, and even sometimes the same personnel are involved, ensuring consistency from part #1 to part #10,000.
Here’s a look at the different workflows:
| Stage | Multi-Supplier Workflow | Single-Supplier Workflow |
|---|---|---|
| Prototyping | Supplier A creates prototype. | PTSMAKE creates prototype. |
| Feedback | DFM feedback for production readiness. | DFM feedback incorporated in real-time. |
| Production Handoff | Transfer all files, specs, and knowledge. | No handoff needed; internal process. |
| Production Tooling | Supplier B starts from scratch. | PTSMAKE leverages prototype tooling/programs. |
| First Article | New FAI process, potential for errors. | Streamlined FAI, reduced risk. |
Choosing a long-term partner rather than a one-off vendor is a strategic decision that pays dividends in both cost and speed, not just for one project, but for your entire product development lifecycle.
To optimize prototype projects, focus on smart DFM, select practical materials, and use batch ordering. Most importantly, partner with a supplier that can seamlessly guide your project from prototype CNC machining to full-scale production, ensuring efficiency and consistency every step of the way.
Quality Assurance and Inspection in CNC Prototyping.
Ever received a prototype that looks perfect but fails during testing? A single part that doesn’t meet spec can derail your entire project, wasting valuable time and resources.
Quality assurance in CNC prototyping is a non-negotiable process involving rigorous dimensional inspection, surface finish checks, and functional testing. This ensures every prototype precisely matches engineering specifications, guaranteeing its form, fit, and function for successful product development.

Quality isn’t just a final step; it’s woven into every stage of the prototype CNC machining process. A beautiful part that doesn’t meet tolerances is essentially useless. Rigorous quality assurance (QA) is the bridge between the digital CAD model and a functional, real-world component. It’s about providing objective evidence that the part is correct. Without it, you’re just hoping for the best, which is a risky strategy in product development.
The Core Pillars of Prototype Inspection
Effective QA for CNC prototypes rests on three fundamental pillars. Each one verifies a different aspect of the part’s integrity, ensuring it aligns perfectly with the design intent.
Dimensional Inspection
This is the most fundamental check. It verifies that all the geometric features of the part—lengths, diameters, angles, and hole positions—are within the specified tolerances. We use a variety of tools for this, from simple handheld instruments to highly advanced machinery.
- Calipers and Micrometers: These are the go-to tools for quick and accurate measurements of external and internal dimensions. They are essential for in-process checks on the shop floor.
- Coordinate Measuring Machine (CMM): For complex geometries and very tight tolerances, a CMM is indispensable. It uses a probe to touch multiple points on the part’s surface, creating a 3D map that can be compared directly against the original CAD file. In our experience at PTSMAKE, a CMM is the gold standard for verifying critical features on complex prototypes.
Surface Finish Checks
The texture of a part’s surface can be critical for its function, affecting friction, wear resistance, and even aesthetics. A surface finish check ensures the final texture, often specified as a Roughness Average (Ra), meets the drawing’s requirements. This is especially important for parts that slide, seal, or have optical properties. We use profilometers, which drag a fine stylus across the surface to measure its peaks and valleys, providing a quantifiable Ra value. It’s a detail that can make or break a prototype’s performance.
Functional Testing
Ultimately, a prototype has to work. Functional testing involves checking the part in its intended application. This can be as simple as a fit check with mating components or as complex as a load test to verify its mechanical strength. This step validates not just the dimensions and finish, but the overall design. It confirms that the part performs its job correctly in a real-world scenario, which is the ultimate goal of any prototype cnc machining7 project.
| Inspection Method | Primary Use | Precision Level | Typical Application |
|---|---|---|---|
| Digital Calipers | General dimensions | Medium | In-process checks, non-critical features |
| Micrometers | High-precision diameters/thickness | High | Shafts, bearing bores, critical thickness |
| Profilometer | Surface roughness (Ra) | Very High | Sealing surfaces, bearing journals |
| CMM | Complex geometries, GD&T | Extremely High | First Article Inspection, aerospace parts |

Ensuring a prototype meets engineering specifications requires a systematic approach, not just a final check. It’s about creating a documented process that leaves no room for error. The key is clear communication between your design team and the manufacturing partner. A detailed drawing is the foundation, but a robust inspection plan is what guarantees success. This plan acts as a shared roadmap for both the machinist creating the part and the inspector verifying it.
Building a Bulletproof Inspection Process
A well-defined process removes ambiguity and ensures everyone is aligned on the quality standards. This process should be established before the first chip is even cut.
Creating a Quality Inspection Plan (QIP)
Before starting any prototype CNC machining job, we work with clients to develop a QIP. This document outlines exactly what needs to be measured and how.
- Identify Critical-to-Quality (CTQ) Features: Not all dimensions are created equal. The QIP highlights the most critical features—those essential for the part’s function—and specifies the tightest tolerances.
- Define Inspection Methods: For each CTQ feature, the plan specifies the tool that will be used for measurement (e.g., CMM for a true position callout, micrometer for a shaft diameter).
- Establish Measurement Frequency: It determines how often checks are performed—for example, after a specific operation or on a certain percentage of parts in a small batch run.
The Power of Documentation
Proper documentation provides traceability and confidence. It’s the proof that the part was made and inspected correctly. Without it, you can’t be certain that the specifications were met.
- Material Certifications: This document traces the raw material back to its source, confirming its composition and properties (e.g., 6061-T6 Aluminum, 304 Stainless Steel). It’s the first step in ensuring material integrity.
- First Article Inspection Report (FAIR): A FAIR is a comprehensive document that verifies every dimension, note, and specification on the engineering drawing. It’s a formal record showing that the production process can reliably produce a compliant part.
- Certificate of Conformance (CoC): This is a summary document issued by the manufacturer, like PTSMAKE, stating that the parts supplied meet all the required specifications and contract requirements.
| Document Type | Purpose | When It’s Provided |
|---|---|---|
| Material Certificate | Verifies raw material type and specification | With raw material delivery |
| Inspection Report | Records actual measured dimensions | With the finished parts |
| Certificate of Conformance | Declares overall compliance with order | With the final shipment |
This structured approach, combining a clear plan with thorough documentation, is how we ensure every prototype delivered from our facility is ready for assembly, testing, and the next stage of innovation.

In summary, effective quality assurance is not an afterthought but a critical part of the prototype CNC machining process. It ensures your design intent is perfectly translated into a physical part through dimensional inspection, surface finish checks, and functional testing, preventing costly delays and project failures.
Selecting the Right CNC Partner for Prototyping Success?
Have you ever picked a CNC machining supplier based on a low quote, only to be met with frustrating delays, poor communication, and parts that don’t meet your specifications?
Choosing the right CNC partner goes far beyond the price tag. The key is to evaluate their technical expertise, quality control systems, communication responsiveness, and proven experience with projects similar to yours. A true partner ensures your prototype CNC machining process is efficient and successful.

Finding the right manufacturing partner can feel like navigating a minefield. The decision you make directly impacts your project’s timeline, budget, and final quality. In my experience at PTSMAKE, I’ve seen that the most successful projects stem from a partnership built on more than just a purchase order. It’s about finding a team that becomes an extension of your own.
Beyond the Machine List: Assessing True Technical Prowess
A long list of 5-axis machines on a website looks impressive, but it doesn’t tell the whole story. The real value lies in the expertise of the people operating that equipment and the processes that support them. When you’re vetting a partner for your prototype CNC machining needs, you need to dig deeper.
Engineering and Material Expertise
A supplier who just takes your CAD file and presses "start" is a vendor, not a partner. A true partner provides Design for Manufacturability (DFM) feedback. They should be able to look at your design and suggest minor tweaks that could reduce machining time, improve part strength, or lower costs—without compromising your design intent. This collaborative approach is invaluable during the prototyping stage. Furthermore, ask about their material knowledge. Can they confidently discuss the trade-offs between Aluminum 6061 and 7075 for your specific application? Do they have a reliable supply chain for certified materials?
Quality Control as a Non-Negotiable
You can’t have precision without a robust quality control process. This is more than just a final check before shipping. It should be integrated into every step of the manufacturing process. A fundamental requirement is an ISO 9001 certification, but that’s just the starting point. Ask potential partners about their specific inspection equipment. Do they use Coordinate Measuring Machines (CMMs) for complex geometries? How often are their tools calibrated? A deep understanding of metrology8 is crucial. Their ability to provide detailed inspection reports gives you the confidence that what you designed is what you’ll receive.
Key Technical Vetting Questions
| Question Category | Key Question to Ask | Why It Matters |
|---|---|---|
| Engineering Support | Do you provide DFM feedback on all quotes? | Identifies cost-saving and quality improvements early. |
| Material Handling | How do you source and verify your materials? | Ensures material integrity and complete traceability. |
| Quality Systems | Can you share a sample inspection report? | Reveals their documentation and quality standards. |
| Machinist Experience | What is the average experience of your machinists? | Skilled operators prevent errors and solve complex challenges. |

While technical skill is the foundation, the "soft skills" of a CNC machining partner are what elevate a relationship from transactional to transformational. This is especially true in the fast-paced, iterative world of prototyping, where clear communication and adaptability are just as important as tight tolerances. In our work with international clients, we’ve learned that transparent and responsive communication is the bridge that closes geographical distances.
Communication: The Backbone of a Strong Partnership
When you’re up against a deadline, waiting days for a response to a simple technical query is not an option. The communication protocol of a potential partner is a strong indicator of their overall professionalism and customer focus.
Responsiveness and Clarity
Evaluate how a company communicates from your very first interaction. Do they respond to your RFQ promptly? Are their answers clear, concise, and do they fully address your questions? At PTSMAKE, we assign a dedicated project manager to serve as a single point of contact. This prevents information from getting lost in translation and ensures you always know who to talk to. For international clients, confirming their team’s proficiency in English is essential for discussing complex technical details without misunderstandings.
Proactive Project Management
A great partner doesn’t wait for you to ask for updates. They manage the project proactively, informing you of key milestones and, more importantly, alerting you to any potential issues before they become major problems. Prototyping is a process of discovery, and design changes are often necessary. Your partner’s ability to be flexible and adapt to these changes is critical. Ask them how they handle engineering change orders (ECOs). Their process will reveal how agile and customer-focused they truly are. A rigid supplier can bring an innovative project to a halt, while an adaptable one becomes a catalyst for success.
Evaluating Partner-Level Qualities
| Attribute | What to Look For | Red Flag |
|---|---|---|
| Responsiveness | Replies within 24 hours; clear, direct answers. | Days without contact; vague or evasive responses. |
| Transparency | Open about their capabilities and potential challenges. | Over-promising on timelines they can’t meet. |
| Flexibility | Willingness to discuss and implement design changes. | Rigid adherence to the initial scope, no exceptions. |
| Cultural Fit | They act as an extension of your internal team. | They treat your critical project like just another order. |

Selecting the right partner for prototype CNC machining requires a holistic evaluation. Assess their technical skills, quality systems, and engineering support, but also pay close attention to their communication style and project management approach. A true partner excels in both areas, ensuring a smooth and successful project.
Learn how this fundamental process differs from additive methods and affects your prototype’s strength and surface finish. ↩
Learn more about the fundamental language that instructs CNC machines, crucial for understanding machining intricacies. ↩
Understand how a material’s directional properties can affect your prototype’s strength in real-world tests. ↩
Understand how GD&T ensures your design intent is perfectly translated into a physical, functional prototype. ↩
Learn more about this crucial quality assurance process to verify a production-ready part. ↩
Learn how proper GD&T application can drastically reduce your machining costs and improve part consistency. ↩
Learn how this symbolic language communicates precise engineering intent on drawings. ↩
Understand the science of measurement to ensure your part’s dimensional accuracy meets every specification. ↩