Many engineers struggle with achieving consistent, high-quality clear anodized finishes on aluminum parts. The process seems straightforward, but subtle variables in alloy selection, pre-treatment, and process control can make the difference between a brilliant, protective finish and a disappointing, streaky result that fails to meet specifications.
Clear anodizing is an electrochemical process that creates a transparent aluminum oxide layer on aluminum surfaces, enhancing corrosion resistance and surface hardness while maintaining the metal’s natural appearance through controlled oxidation in an acid electrolyte.
This guide covers everything from alloy selection and process variables to quality control and real-world applications. You’ll learn how to specify the right finish for your project, avoid common defects, and work effectively with your anodizing supplier to achieve the results you need.
How does clear anodizing differ from color anodizing?
When choosing a finish for aluminum parts, a common question arises. What is the real difference between clear and color anodizing?
The core process is nearly identical. But the final goals are quite distinct.
The Primary Goal
Clear anodizing aims to protect the part. It enhances corrosion resistance while keeping the aluminum’s natural metallic look.
Color anodizing adds a visual element. It uses dye to achieve a specific color for branding or functional coding.
Here is a quick breakdown of their main purposes.
| Anodizing Type | Primary Goal | Aesthetic Outcome |
|---|---|---|
| Clear Anodizing | Protection, Durability | Natural Metallic Sheen |
| Color Anodizing | Protection, Aesthetics | Specific, Consistent Color |
This choice often depends on your product’s design and functional needs.

Both processes begin with the same electrochemical step. We create a durable, porous oxide layer on the aluminum’s surface. This layer is key to anodizing’s protective qualities. The real divergence happens right after this layer is formed.
The Dyeing Stage: The Key Difference
With color anodizing, the part is submerged in a dye bath. The porous anodic oxide layer1 soaks up the dye. This is how we get those vibrant, lasting colors. The depth of color can be controlled by the immersion time and dye concentration.
After dyeing, the part is sealed. This crucial step closes the pores, trapping the dye permanently. It makes the color an integral part of the surface.
The Path for Clear Anodized Parts
Clear anodized parts skip the dye bath entirely. After the oxide layer is formed, they go directly to the sealing stage. This process seals the uncolored, porous layer.
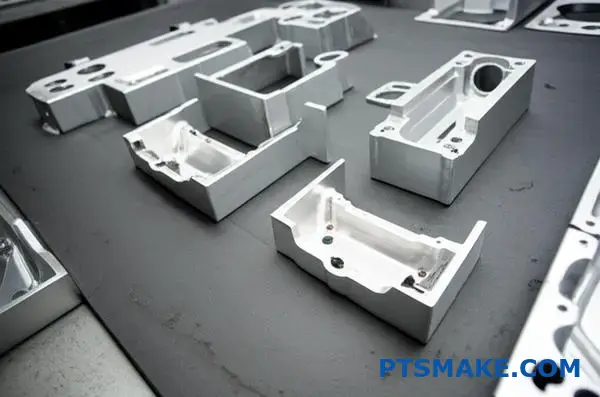
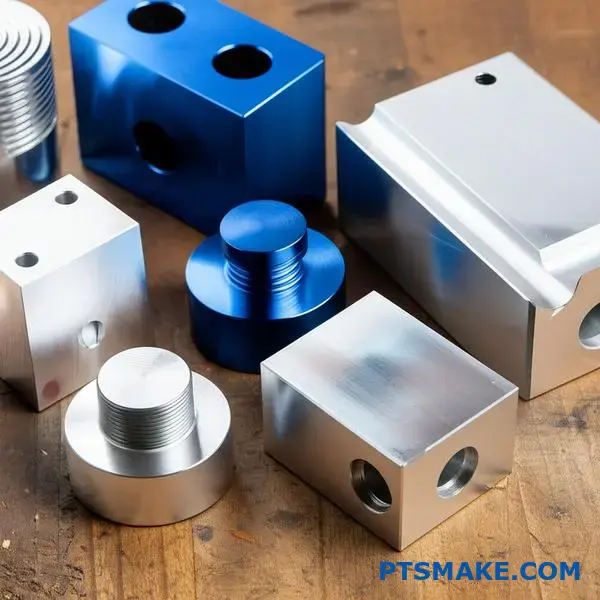
It provides the same excellent corrosion and wear resistance. But it preserves the raw, machined look of the aluminum. This is often desired for industrial or minimalist designs.
The process steps highlight this single, but significant, variation.
| Step Number | Clear Anodizing Process | Color Anodizing Process |
|---|---|---|
| 1 | Pre-treatment (Cleaning/Etching) | Pre-treatment (Cleaning/Etching) |
| 2 | Anodizing (Oxide Layer Growth) | Anodizing (Oxide Layer Growth) |
| 3 | Rinsing | Rinsing |
| 4 | Sealing | Dyeing |
| 5 | – | Rinsing |
| 6 | – | Sealing |
The choice impacts both aesthetics and production time.
The fundamental difference lies in a single step. Clear anodizing prioritizes protection while maintaining the natural metal appearance. Color anodizing adds a dyeing stage to embed color into the surface layer before sealing, offering both protection and specific aesthetics.
Which aluminum alloys are best for clear anodizing?
Choosing the right aluminum alloy is crucial for a successful clear anodized finish. The alloying elements directly impact the final appearance.
Elements like copper and silicon are the main culprits. They can cause a cloudy, gray, or yellowish tint after anodizing.
This is why some alloys are better suited than others.
Alloy Suitability for Clear Anodizing
The 5xxx and 6xxx series are excellent choices. They produce a truly transparent and uniform anodic layer.
The 2xxx and 7xxx series, however, are challenging. Their high copper and zinc content leads to discoloration.
Here’s a quick guide:
| Alloy Series | Primary Alloying Element | Clear Anodizing Suitability |
|---|---|---|
| 5xxx | Magnesium (Mg) | Excellent |
| 6xxx | Magnesium (Mg) & Silicon (Si) | Excellent |
| 2xxx | Copper (Cu) | Poor / Challenging |
| 7xxx | Zinc (Zn) | Poor / Challenging |
A Deeper Look at Metallurgy
The difference comes down to the metal’s structure. In our work at PTSMAKE, we always check the material specifications first. This step prevents costly mistakes later.
Challenging Alloys: 2xxx and 7xxx Series
Alloys with high copper (2xxx) or zinc (7xxx) content are difficult. These elements form distinct intermetallic compounds2 within the aluminum matrix.
These particles don’t anodize uniformly with the surrounding aluminum. They can either anodize at a different rate or not at all. This results in a non-uniform, often discolored surface. For example, 2024 alloy often turns a dull gray.
Excellent Alloys: 5xxx and 6xxx Series
In contrast, the 5xxx and 6xxx series alloys are ideal for a clear anodized finish. Their primary elements, magnesium and silicon, are more soluble in aluminum.
This creates a more homogenous material. During anodizing, the oxide layer grows uniformly, resulting in a clear, consistent, and protective finish. The 6061 alloy is a popular choice for this reason.
| Alloy Group | Metallurgical Behavior | Clear Anodized Result |
|---|---|---|
| Excellent (5xxx, 6xxx) | Alloying elements are well-dissolved. | Uniform, transparent oxide layer. |
| Challenging (2xxx, 7xxx) | Forms non-uniform intermetallic particles. | Discolored, cloudy, or gray finish. |
Alloy selection is the most critical factor for a quality clear anodized finish. Alloying elements like copper and zinc cause discoloration, while the 5xxx and 6xxx series provide the best clarity and consistency due to their metallurgical properties.
What are the core properties of a clear anodized finish?
A clear anodized finish does more than just protect. It fundamentally enhances the aluminum’s core properties. This process creates an incredibly hard, protective aluminum oxide layer.
This layer is not a coating; it’s part of the metal. It dramatically improves performance for functional parts.
Enhanced Corrosion Resistance
The aluminum oxide layer is chemically stable. It acts as a powerful barrier. This protects the underlying aluminum from moisture, salt, and other corrosive elements.
Increased Surface Hardness
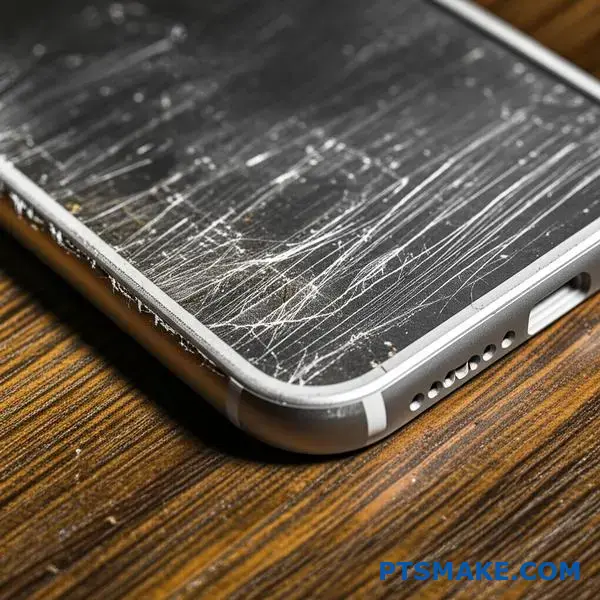
This new layer is also extremely hard. This feature directly boosts abrasion and scratch resistance.
| Property | Raw Aluminum | Clear Anodized Aluminum |
|---|---|---|
| Corrosion | Low Resistance | High Resistance |
| Hardness | Soft | Very Hard |
| Wear | Prone to Scratches | Abrasion Resistant |
This makes it ideal for parts that see regular contact or use.
The magic behind these benefits is the aluminum oxide layer itself. This layer is created through an electrochemical process. It essentially grows directly from the base aluminum part.
How the Oxide Layer Works
Unlike paint, it cannot chip or peel away. The layer is naturally porous and has a very organized structure. After the main process, we typically seal these pores. This step locks in the protective qualities.
In past projects at PTSMAKE, we’ve seen how a proper seal is crucial. It ensures maximum corrosion resistance in demanding applications.
This controlled oxidation creates a surface much harder than the original aluminum. The hardness comes from its dense, crystalline, hexagonal columnar structure3. This structure is key to its durability.
Understanding Dielectric Strength
Another key benefit is electrical insulation. Raw aluminum is a great conductor. However, the aluminum oxide layer is an excellent electrical insulator. This is called high dielectric strength.
| Feature | Impact on Performance |
|---|---|
| Integral Layer | Will not peel or chip |
| Sealed Pores | Maximizes corrosion resistance |
| Crystalline Structure | Provides high hardness and wear resistance |
| Oxide Nature | Offers excellent electrical insulation |
This property makes a clear anodized finish perfect for electronic housings. It can prevent short circuits and protect sensitive internal components.
The aluminum oxide layer provides a trio of functional benefits. It delivers exceptional corrosion resistance, superior surface hardness for abrasion protection, and reliable electrical insulation, enhancing the part’s durability and performance.
How is the ‘clarity’ of the finish defined and controlled?
Achieving the perfect clarity in a finish isn’t luck. It’s a result of carefully controlled steps. The final look depends heavily on the raw material’s surface.
A part starts with a specific texture. Think polished, brushed, or matte.
Pre-Treatment Dictates Appearance
Before anodizing, we prepare the surface. Chemical treatments can either etch the surface for a matte look or brighten it for a reflective one. The choice here is critical for the final clear anodized outcome.
| Pre-Treatment | Effect on Surface | Resulting Clarity |
|---|---|---|
| Chemical Etching | Creates micro-roughness | Diffused, Matte |
| Brightening | Smoothens the surface | High, Reflective |
This initial stage sets the foundation for everything that follows.
True clarity is a function of two things. The purity of the aluminum oxide layer and the texture of the metal underneath it. A flawless substrate is the first step.
The Science Behind the Shine
The anodizing process grows a transparent oxide layer. If this layer is pure and uniform, it clearly shows the surface beneath. Any impurities or inconsistencies will cloud the finish, reducing its visual appeal. The final appearance relies heavily on how light interacts with the surface, a principle known as specular reflection4.
Controlling for a Perfect Finish
At PTSMAKE, we manage every variable. This starts with selecting the right aluminum alloy. Some alloys, like 6063, yield a clearer finish than others, such as those with high silicon content.
We also meticulously control the pre-treatment chemistry and anodizing parameters. This ensures the oxide layer grows perfectly. Consistent results demand this level of precision.
| Control Factor | Impact on Clarity | PTSMAKE’s Approach |
|---|---|---|
| Alloy Selection | High; some alloys are clearer | Guide clients to optimal alloys |
| Surface Prep | High; defines texture | Precisely controlled chemical baths |
| Anodizing Process | High; affects oxide purity | Strict parameter monitoring |
Controlling these factors is how we deliver a predictable and high-quality clear anodized finish every time for our clients.
Clarity in a finish is engineered, not accidental. It’s the sum of a prepared substrate, precise pre-treatment, and a perfectly controlled anodizing process. The final appearance is a direct reflection of the meticulous care taken at every single stage of production.
The Go-To Standard: Understanding MIL-A-8625
When discussing clear anodizing, one standard stands above all: MIL-A-8625.
This is a U.S. military specification. However, it’s the de facto global standard for anodizing. It provides a clear, shared language.
For a clear anodized finish, we focus on two key parts. These are Type II and Class 1. This ensures everyone is on the same page.
| Specification | Description | Common Use |
|---|---|---|
| MIL-A-8625 | Military Specification for Anodic Coatings | Industry Standard |
| Type II | Sulfuric Acid Anodizing | Decorative & Protective |
| Class 1 | Non-dyed (Natural Finish) | Clear Anodizing |
This framework prevents misunderstandings. It is crucial for achieving consistent results.
MIL-A-8625 isn’t just a document. It’s the foundation for clear communication. It removes guesswork from the process. When an engineer specifies "clear anodized," this standard defines what that means in technical terms.
This prevents costly errors. It ensures the final part matches the initial design intent. At PTSMAKE, we rely on this standard daily.
Types of Anodic Coatings
MIL-A-8625 outlines several coating types. For clear finishes, Type II is our focus. It uses sulfuric acid to create a moderate-thickness coating. This is perfect for corrosion resistance and a clean look.
It differs from Type III, or hardcoat anodizing. Type III creates a much thicker, harder layer for high-wear applications.
Classes of Anodic Coatings
The standard also defines two classes. This is where "clear" comes into play.
- Class 1: This means the coating is non-dyed. It will retain the natural, clear appearance of the anodic layer. This is the specification for a true clear anodized finish.
- Class 2: This class involves adding color dyes to the coating after the electrolytic passivation5 process.
Here’s a simple breakdown:
| Designation | Meaning | Result |
|---|---|---|
| MIL-A-8625 Type II, Class 1 | Sulfuric Acid, Non-dyed | The standard clear anodized finish. |
| MIL-A-8625 Type II, Class 2 | Sulfuric Acid, Dyed | A colored anodized finish. |
So, specifying "MIL-A-8625, Type II, Class 1" is the most precise way to request a standard clear anodized part. It leaves no room for interpretation.
In short, MIL-A-8625 is the essential standard. Specifying Type II for the process and Class 1 for the finish guarantees a high-quality, non-dyed clear anodized coating. This precision is critical for predictable manufacturing outcomes, a principle we follow closely at PTSMAKE.
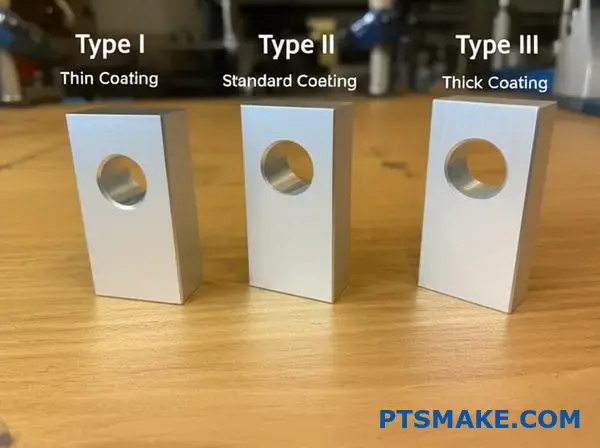
What are the main types of clear anodizing processes?
When we talk about clear anodizing, it’s not a one-size-fits-all process. The industry standard, MIL-A-8625, outlines the main types. Each can produce a clear or translucent finish.
However, their properties and best uses differ significantly. Choosing the right one is crucial for your part’s performance.
Let’s look at the primary types that can result in a clear anodized coating.
| Anodizing Type | Common Name | Key Feature |
|---|---|---|
| Type I | Chromic Acid Anodize | Thinnest film, preserves fatigue strength |
| Type II | Sulfuric Acid Anodize | Standard decorative, good corrosion resistance |
| Type III | Hardcoat Anodize | Thickest film, maximum hardness |
Understanding the differences is key to making the right choice for your project. At PTSMAKE, we guide clients through this selection process daily. It’s about balancing aesthetics with functional demands.
Type II: The Standard Choice
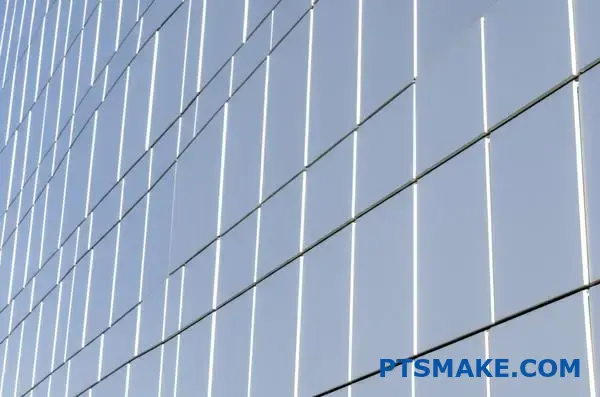
Type II, or Sulfuric Acid Anodizing, is the most common process for a decorative clear anodized finish. It creates a porous oxide layer that offers good corrosion resistance. It is perfect for consumer electronics and architectural components.
Type III: The Durable Option
Type III, or hardcoat anodizing, prioritizes function over form. While often dyed black, its natural state is a clear, gray, or bronze-hued finish. The color depends on the aluminum alloy and coating thickness. Its main benefit is extreme hardness and wear resistance. This makes it ideal for high-wear industrial parts.
Type I: The Specialist’s Pick
Type I, or Chromic Acid Anodizing, produces the thinnest anodic film. This is critical for parts with tight tolerances and in aerospace applications. It has minimal impact on the material’s fatigue strength. The process uses a different electrolytic solution6 compared to Type II and III.
Here’s a quick comparison based on our project experience:
| Feature | Type I (Chromic Acid) | Type II (Sulfuric Acid) | Type III (Hardcoat) |
|---|---|---|---|
| Typical Thickness | 0.00005" – 0.0001" | 0.0002" – 0.001" | 0.001" – 0.004" |
| Primary Use | Aerospace, precision parts | Decorative, general use | High-wear components |
| Appearance | Translucent to gray | Clear | Clear, gray, or bronze |
Choosing the right clear anodizing process—Type I, II, or III—depends entirely on your application’s needs, from aesthetic appeal to extreme wear resistance. Each type offers a unique balance of properties to ensure your part performs as intended.
How do different alloy series affect the final appearance?
Choosing the right aluminum alloy is crucial. This is especially true for a clear anodized finish. The series number tells you what’s mixed in. These additions change the final look.
The Clear vs. Cloudy Divide
Some alloys yield a bright, pristine finish. Others can appear yellowish or gray. This difference is fundamental to your design choice.
| Alloy Group | Typical Anodized Appearance |
|---|---|
| 1xxx, 3xxx, 5xxx, 6xxx | Bright, Clear |
| 2xxx, 7xxx | Yellowish, Grayish, Less Clear |
Understanding this basic split is the first step. It helps manage expectations for the final product’s appearance.
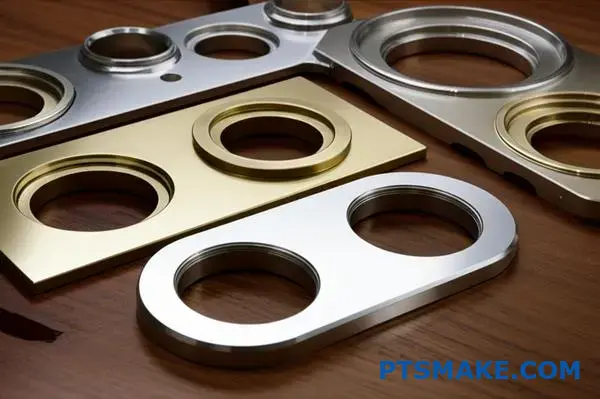
The difference comes down to chemistry. Alloying elements react uniquely during the anodizing process. This is what creates the visual variations.
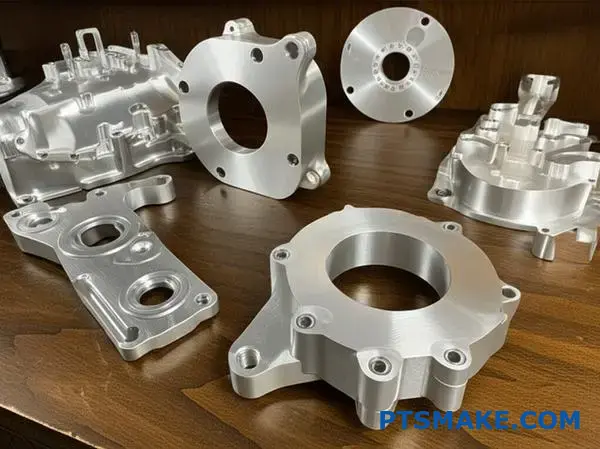
Alloys Ideal for Clear Anodizing
The 6xxx series, especially 6061 and 6063, is a popular choice. At PTSMAKE, we often recommend it for cosmetic parts. Its magnesium and silicon content creates a consistent, bright finish.
Similarly, the 5xxx series (magnesium) and 3xxx series (manganese) anodize very well. The 1xxx series, being nearly pure aluminum, provides the clearest possible finish.
Alloys That Pose Challenges
The 2xxx and 7xxx series are a different story. They are high-strength alloys. They are often used for structural parts where looks are secondary.
The copper in 2xxx series alloys can cause a yellowish or even brownish tint after anodizing. The zinc in 7xxx series alloys tends to result in a grayish or sometimes dull yellow appearance. These elements form microscopic intermetallic compounds7 that don’t anodize uniformly.
Here is a more detailed breakdown based on our project experience.
| Alloy Series | Primary Alloying Element | Common clear anodized Result | Best Use Case for Appearance |
|---|---|---|---|
| 1xxx | None (99%+ Al) | Exceptionally clear, bright | Decorative, reflective surfaces |
| 3xxx | Manganese (Mn) | Very good clarity, bright | General purpose, cookware |
| 5xxx | Magnesium (Mg) | Excellent clarity, bright | Marine, architectural parts |
| 6xxx | Magnesium (Mg) & Silicon (Si) | Excellent clarity, bright | Extrusions, cosmetic parts |
| 2xxx | Copper (Cu) | Yellowish/brown tint, cloudy | Not for cosmetic clear finishes |
| 7xxx | Zinc (Zn) | Grayish/yellow tint, cloudy | Not for cosmetic clear finishes |
This is why we always discuss the end-use with our clients. It ensures the selected material meets both mechanical and aesthetic needs.
Alloy choice is non-negotiable for appearance. For a bright, clear anodized finish, stick with 1xxx, 3xxx, 5xxx, or 6xxx series. The 2xxx and 7xxx series are strong but will yield a colored, less clear result.
How are common clear anodizing defects categorized?
To effectively troubleshoot issues, we group defects into categories. This helps us quickly pinpoint the root cause. It avoids guesswork and saves time.
Understanding these groups is key. It simplifies diagnosis for any clear anodized part. The main categories are related to process, handling, and the material itself.
Main Defect Categories
| Category | Common Examples |
|---|---|
| Process-Related | Burning, Soft Coating, Pitting |
| Handling-Related | Scratches, Rack Marks, Fingerprints |
| Material-Related | Streaks, Discoloration, Banding |
Categorizing defects streamlines our quality control process. At PTSMAKE, we use this framework to ensure every part meets specification. It’s a practical approach to a complex process.
Process-Related Defects
These issues arise during the anodizing cycle itself. Factors like incorrect temperature, current density, or chemical concentrations are typical culprits. For instance, too much current can "burn" the part, creating a dark, rough surface.
Handling-Related Defects
These occur before or after the anodizing process. Scratches from improper storage or visible rack marks are common examples. While some rack marks are unavoidable, their placement is critical and planned with the client beforehand.
Material-Related Defects
The raw aluminum alloy can also introduce flaws. Issues like extrusion lines or variations in alloy composition can become visible after anodizing. Certain impurities in the metal, such as intermetallic particles8, can cause pitting or small voids. This is why material selection is so important from the start.
| Defect Origin | Primary Cause | Diagnostic Clue |
|---|---|---|
| Process | Incorrect tank parameters | Defect is uniform or patterned across batch |
| Handling | Physical contact | Random, non-repeating marks like scratches |
| Material | Alloy composition/impurities | Follows material grain or extrusion direction |
Classifying defects into process, handling, and material-related categories is crucial. It provides a logical roadmap for troubleshooting, ensuring faster and more accurate solutions for achieving a perfect clear anodized finish. This systematic approach reduces waste and improves consistency on every project.
What are the key performance metrics for this finish?
A finish is more than just a pretty surface. Its true value lies in its performance. We must rely on objective data, not just looks.
Key metrics provide that data. They tell us how a coating will hold up in the real world. This is crucial for ensuring reliability.
Core Quality Attributes
We focus on four key areas. Each one is measured with specific industry-standard tests. This ensures consistent and reliable results for every part.
| Metric | Common Test | Purpose |
|---|---|---|
| Thickness | Eddy Current/Micrometer | Ensures proper protection |
| Corrosion | Salt Spray (ASTM B117) | Predicts lifespan in harsh environments |
| Abrasion | Taber Test | Measures wear resistance |
| Sealing | Dye Stain Test | Verifies coating integrity |
Understanding these metrics in detail is vital. It helps you specify exactly what you need for your application. Let’s break down why each test matters.
Coating Thickness (microns or mils)
Thickness is a balancing act. Too thin, and the part lacks protection. Too thick, and it can become brittle or alter critical part dimensions. For a clear anodized part, precise thickness ensures it fits perfectly in an assembly.
Corrosion Resistance (salt spray hours)
The salt spray test (ASTM B117) is an accelerated corrosion test. It mimics years of harsh environmental exposure in just a few hundred hours. Based on our testing, specifying the required hours is crucial for parts used outdoors or in corrosive settings.
Abrasion Resistance (Taber test)
This test measures durability against wear and friction. A weighted abrasive wheel spins on the surface. We count the cycles until the substrate is exposed. This data is critical for understanding the tribological properties9 of a finish, especially for moving parts.
| Test Parameter | Description |
|---|---|
| Test Load | The weight (in grams) applied to the abrasive wheels. |
| Wheel Type | The specific abrasive wheel used (e.g., CS-10, H-18). |
| Cycles | The number of rotations before failure or evaluation. |
Sealing Quality (dye stain test)
Anodized coatings are porous. Sealing closes these pores. The dye stain test reveals any flaws in the seal. A poor seal leaves the part vulnerable to corrosion, no matter how thick the coating is.
These metrics transform a subjective assessment of quality into objective, verifiable data. This ensures your finished components perform exactly as designed, providing reliability and longevity for the end product.
What variables control the matte versus bright surface appearance?
The final look of an anodized part is no accident. It comes down to a series of deliberate choices. We can break these down into two main categories.
First, the material itself plays a huge role. Second, the chemical processes we apply are just as critical.
Substrate Characteristics
The starting condition of the aluminum is foundational. The alloy and its initial surface finish set the stage for the final appearance.
Process Choices
How we treat the material chemically determines the outcome. Etching and brightening dips are key steps that define the final texture and gloss.
| Factor | Contributes to Matte | Contributes to Bright |
|---|---|---|
| Substrate | Rough initial finish | Smooth initial finish |
| Process | Long alkaline etch | Chemical brightening dip |

Let’s dive deeper into how these variables work. Achieving the perfect matte or bright finish requires controlling both the material and the process.
Substrate: The Starting Point
Alloy Selection
Different aluminum alloys react differently. For example, 6061 alloy tends to produce a less bright finish than a 5xxx series alloy after anodizing. This is due to its silicon content.
Initial Surface Finish
A part that is mechanically polished before any chemical treatment will naturally lead to a brighter finish. Conversely, a bead-blasted surface will result in a matte appearance. The initial texture is key. This is especially true for a clear anodized finish.
Process: The Chemical Touch
How we prepare the surface before anodizing is critical. The right chemical bath can completely change the surface profile.
The alkaline etch is a key step. A longer etch time creates a more diffuse surface, which scatters light. This results in a matte look. This process subtly removes material to create micro-roughness.
To get a bright finish, we often use a specific chemical brightening dip. This process smooths the surface at a microscopic level. A smoother surface increases specular reflection10, which our eyes see as bright or mirror-like.
| Process Step | Effect on Surface | Visual Outcome |
|---|---|---|
| Long Etch | Increases micro-roughness | Matte |
| Short Etch | Minimal change | Retains initial finish |
| Bright Dip | Decreases micro-roughness | Bright / Mirror-like |
| No Dip | No chemical polishing | Depends on substrate |
In our projects at PTSMAKE, we carefully balance these variables. We work with clients to match the alloy and process to their desired aesthetic, ensuring consistent results from prototype to production.
Achieving a specific matte or bright finish isn’t magic. It’s a calculated result of controlling the raw material’s characteristics and the chemical processes applied, from the initial surface texture to the duration of the alkaline etch and use of brightening dips.
How do you select pre-treatments for a desired finish?
Selecting the right pre-treatment is not just a preliminary step. It is the foundation for your final finish. The choice directly impacts aesthetics and function. Your end goal dictates the path.
For a Bright, Specular Look
If you need a brilliant, mirror-like surface, chemical brightening is the specified method. This process smooths the surface at a microscopic level, increasing its reflectivity.
For a Satin Matte Finish
For a uniform, non-reflective appearance, an alkaline etch is ideal. This creates a soft, satin look that hides minor surface imperfections effectively.
When Details Are Critical
If preserving sharp edges and intricate machined details is paramount, a light etch or simple cleaning is best. This avoids removing excess material.
| Desired Finish | Recommended Pre-Treatment |
|---|---|
| Bright, Specular | Chemical Brightening |
| Uniform, Satin Matte | Alkaline Etch |
| Preserved Details | Light Etch / Cleaning |

A Deeper Look at the Decision Methodology
Making the right choice involves more than just aesthetics. You must consider the part’s material, its final application, and dimensional tolerances. An aggressive etch, for instance, provides a great matte finish but removes material. This can be an issue for parts with tight tolerances.
At PTSMAKE, we guide clients through this. We start with the desired outcome and work backward. This ensures the pre-treatment enhances the part, rather than compromising its design. The goal is to balance visual appeal with functional requirements.
For example, a part requiring a durable clear anodized finish might undergo a specific etch to ensure optimal coating adhesion and a consistent visual appeal. The process is a careful balance. The interaction of the chemical solution with the metal’s surface creates a specific kind of light diffusion or specular reflection11, defining its final look.
| Factor | Bright Finish | Matte Finish | Detail Preservation |
|---|---|---|---|
| Primary Goal | High Reflectivity | Low Glare, Uniformity | Maintain Tolerances |
| Common Method | Chemical Brighten | Alkaline Etch | Light Clean / Deoxidize |
| Risk | Can reveal defects | Minor material removal | May not hide flaws |
Choosing a pre-treatment is a strategic decision. It balances the visual goal with the part’s function. Aligning the finish—be it bright, matte, or detailed—with the correct method is crucial for a successful outcome.
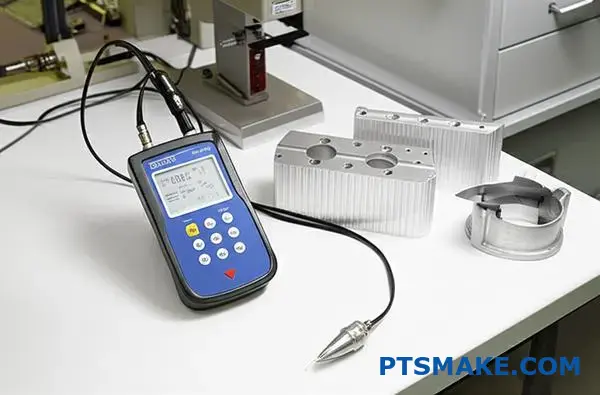
How do you perform a non-destructive film thickness test?
Using an eddy current gauge is straightforward. It is the industry standard for measuring non-conductive coatings. This includes coatings like paint or a clear anodized layer on a non-ferrous metal.
Here’s how we do it at PTSMAKE.
Step 1: Calibration
First, we calibrate the gauge. This ensures our readings are accurate from the start. We use an uncoated part or certified standards for this.
Step 2: Measurement
Next, we place the probe on the surface. It must be firm and perpendicular. This simple action prevents skewed results.
Step 3: Averaging
Finally, we take multiple readings. We measure several key spots and then average the results for a reliable final thickness value.
| Step | Action | Purpose |
|---|---|---|
| 1 | Calibrate Gauge | Ensure accuracy |
| 2 | Place Probe Correctly | Obtain a true reading |
| 3 | Average Readings | Get a reliable overall thickness |
The Importance of Precision in Each Step
Getting a reliable measurement isn’t just about placing a probe on a surface. Each step is critical for quality control. This is especially true for parts with tight tolerances where every micron matters.
Why Calibration is Non-Negotiable
Calibration sets the baseline for accuracy. At PTSMAKE, we always calibrate on the exact same substrate as the part being tested. A gauge calibrated on one aluminum alloy may read differently on another. Temperature can also affect readings, so we acclimate parts and gauges.
This process relies on the principle of Electromagnetic Induction12. The probe generates a changing magnetic field. This induces eddy currents in the metal substrate. The coating thickness affects the strength of these currents, which the gauge measures.
Mastering Probe Placement
How you place the probe matters immensely. On curved surfaces, a special adapter might be needed for stability. You also have to avoid measuring too close to an edge. This can distort the magnetic field and give false readings.
| Common Mistake | Consequence | Best Practice |
|---|---|---|
| Tilted Probe | Inaccurate low reading | Place firmly and perpendicularly |
| Edge Measurement | Inaccurate high/low reading | Stay several millimeters from edges |
| Rough Surface | Unstable readings | Average multiple close-range points |
The Rationale for Averaging
A single reading can be misleading. Anodized coatings can have slight variations across a surface. By taking several measurements on significant areas and averaging them, we get a true representation of the overall film thickness, ensuring the part meets specification.
Using an eddy current gauge involves careful calibration, precise probe placement, and averaging multiple readings. Following these steps ensures accurate, non-destructive measurement of film thickness, which is crucial for quality assurance in manufacturing and meeting client specifications.
How can you accurately estimate the cost of anodizing?
Let’s demystify the cost of anodizing. It isn’t a secret art. It is a practical formula based on clear, tangible factors. We can simplify it to get a solid estimate.
The Core Cost Drivers
The price is primarily determined by two main things. These are processing time and the part’s surface area. Think of it like painting a wall.
A larger wall costs more to paint. A thicker coat of paint takes more time and material. Anodizing works on a very similar principle.
The Basic Formula
Here is a straightforward way to conceptualize the cost:
| Factor | Description | Impact on Cost |
|---|---|---|
| Surface Area | The total area of your part to be coated. | Higher |
| Time in Tank | How long the part is in the anodizing bath. | Higher |
| Handling | The complexity of racking the part securely. | Higher |
This simple framework helps you understand any quote you receive.
Let’s make this formula more practical. The details within these factors are what truly determine the final price you will pay for your components.
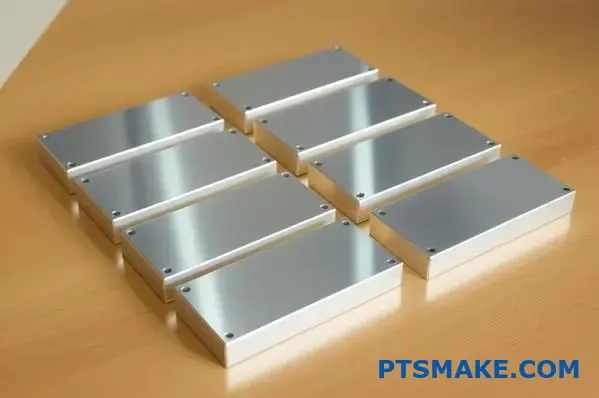
Calculating Surface Area
For simple shapes like blocks or plates, this is easy. Just use basic geometry. For more complex parts, your CAD software is the best tool. It can calculate the total surface area with a single click. Always provide this number to your supplier for an accurate quote.
Anodizing Thickness and Time
The required coating thickness directly impacts tank time. A thicker, more durable clear anodized finish requires a longer immersion. This consumes more electricity and chemicals, which increases the overall cost. The relationship between current, time, and coating deposition is governed by Faraday’s laws of electrolysis13.
The Impact of Racking and Handling
This is often a hidden cost driver. Parts must be held securely on racks to ensure an even coating and electrical contact. Complex shapes can be very difficult to rack.
This difficulty adds direct labor costs. More importantly, poor racking can lead to contact marks or other quality defects.
Here’s a general idea of how complexity affects cost:
| Racking Complexity | Example | Cost Multiplier |
|---|---|---|
| Simple | Flat plates, solid blocks | 1.0x |
| Moderate | Parts with some through-holes or curves | 1.2x – 1.5x |
| Complex | Intricate geometries, deep cavities | 1.5x – 2.0x+ |
In our work at PTSMAKE, we often design custom racks for complex projects to ensure quality and optimize costs.
To estimate anodizing costs, focus on three key variables. Calculate the total surface area, factor in the time needed for your desired thickness, and assess the part’s handling complexity for racking. These factors are the primary drivers of the final price.
What are the best practices for maintaining anodized surfaces?
Maintaining anodized aluminum is surprisingly simple. You don’t need harsh chemicals or aggressive scrubbing. The key is gentle and regular cleaning.
This approach preserves the protective anodic layer. It ensures your parts maintain their look and function for years. Proper care prevents costly replacements down the line. We always provide this guidance for parts we produce.
The Gentle Approach
Always start with the mildest cleaning method. A simple solution of mild soap and water is usually enough for most dirt and grime.
Consistency is Key
Regular cleaning prevents the buildup of contaminants. This makes each cleaning session easier and more effective. It protects the surface integrity over time.
Anodizing creates a hard, porous oxide layer. While durable, this layer is vulnerable to certain chemicals. Harsh cleaners can strip this protective coating away.
This damage can lead to discoloration and corrosion. Once the anodic layer is compromised, the underlying aluminum is exposed. The damage is often irreversible without re-anodizing the entire part.
Understanding Chemical Impact
Think of the anodic layer as a shield. Strong acids and alkalis are like hammers to this shield. They chemically attack and dissolve the aluminum oxide. This is why the pH scale14 of your cleaner is so important. A neutral pH is safest.
At PTSMAKE, we emphasize post-production care. A beautifully machined and clear anodized part deserves proper maintenance. It ensures the finish reflects our quality standards for its entire service life.
| Recommended Cleaners | Cleaners to Avoid |
|---|---|
| Mild soap or detergent | Abrasive powders or scouring pads |
| Water (distilled is best) | Cleaners with strong acids (low pH) |
| Solvents like kerosene or turpentine | Cleaners with strong alkalis (high pH) |
| A soft cloth or sponge | Steel wool or other harsh brushes |
This simple chart helps our clients avoid common mistakes. Following these rules protects their investment and ensures long-term performance.
Maintaining anodized surfaces is straightforward. Use mild soap and water for regular cleaning. Critically, avoid abrasive, highly acidic, or alkaline chemicals. This simple care routine will preserve the protective layer, ensuring durability and a lasting finish for your components.
How can a damaged anodized surface be effectively repaired?
Many people believe you can just "touch up" a damaged anodized surface. This is a common misconception. A genuine repair is a full restoration, not a quick paint job.
The Only Real Solution
The only correct way to fix the damage is to start from scratch. This involves completely removing the old layer. Then, we refinish the surface before re-anodizing the entire part.
Repair Myth vs. Reality
| Myth | Reality |
|---|---|
| Touch-up pens work. | They only cover the damage, not repair it. |
| It’s a quick fix. | It is a careful, multi-step process. |
| Partial repairs are okay. | This leads to an uneven and weak finish. |
This complete process ensures a uniform and durable finish.
Repairing an anodized surface is more involved than it looks. Simple touch-up paints cannot chemically bond with the aluminum oxide. This results in a weak, temporary fix that will quickly flake off.
Step 1: Chemical Stripping
First, the part is submerged in a chemical bath. This solution is formulated to dissolve the damaged Anodic layer15 without harming the underlying aluminum substrate. This step is critical for creating a clean foundation for the new finish.
Step 2: Surface Refinishing
After stripping, we inspect the bare aluminum. If there are deep scratches or gouges, they must be mechanically removed. This may involve light sanding, buffing, or bead blasting to restore a smooth, uniform surface. A proper surface is essential.
Step 3: Re-Anodizing the Entire Part
Finally, the part undergoes the full anodizing process again. This ensures the new protective layer is consistent across the entire surface. This is vital for both protection and aesthetics, especially for a clear anodized finish where uniformity is paramount.
| Process Step | Purpose | Key Consideration |
|---|---|---|
| Chemical Strip | Remove old anodized layer | Use correct chemicals to avoid damaging aluminum |
| Refinish Surface | Remove physical imperfections | Must match original surface texture |
| Re-Anodize | Apply new protective layer | Ensures uniform thickness and appearance |
At PTSMAKE, this is the only method we trust to deliver a flawless, like-new result.
Effectively repairing an anodized surface isn’t a simple touch-up. It demands a complete three-step process: chemically stripping the old layer, refinishing the base metal, and then re-anodizing the entire part to ensure a durable and perfectly uniform finish.
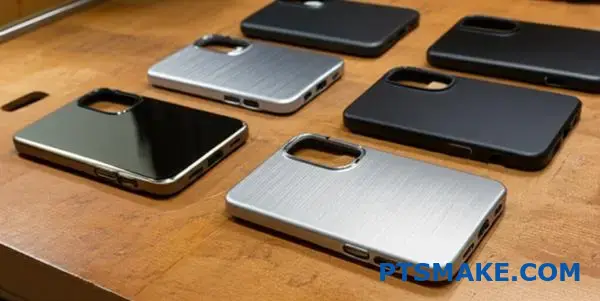
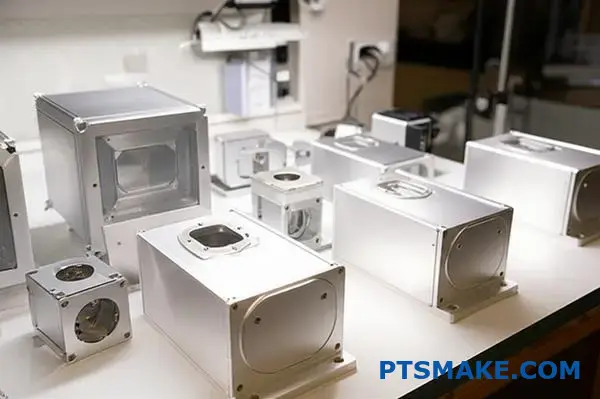
Why was clear anodizing chosen for consumer electronics casings?
Let’s look at a familiar object: a premium laptop. Why does its metal casing feel so good and look so clean? The answer is often clear anodizing.
This finish isn’t just for looks. It’s a smart engineering choice. It keeps the natural metallic sheen of aluminum. But it adds a durable, protective layer. This choice combines elegance with real-world strength.
The Perfect Balance of Form and Function
The decision to use a clear anodized finish comes from balancing multiple needs. Designers want a sleek, modern look. Engineers need it to be tough and functional.
| Feature | Raw Aluminum | Clear Anodized Aluminum |
|---|---|---|
| Look | Dull, prone to smudges | Bright, premium metallic |
| Feel | Soft, easily scratched | Hard, smooth surface |
| Consistency | Can vary | Uniform and clean |
This process gives the best of both worlds.

Think about that laptop again. The aluminum body makes it incredibly lightweight and helps dissipate heat. But raw aluminum is soft, scratches easily, and conducts electricity. This is where clear anodizing becomes essential.
The process creates a hard, ceramic-like layer of aluminum oxide on the surface. This layer is integrated into the metal, not just coated on top. So, it won’t chip or peel off like paint.
Durability Meets Electrical Safety
This hard layer dramatically improves scratch resistance. In our testing at PTSMAKE, we’ve seen it withstand daily wear and tear far better than untreated aluminum. It keeps the device looking new for much longer.
Another critical benefit is electrical insulation. The aluminum oxide layer is an excellent electrical insulator. It creates a non-conductive skin.
This prevents short circuits if internal wires touch the casing. It also protects the user. The material’s high dielectric strength16 is a key safety feature, especially in compact electronic designs.
| Property | Benefit for Electronics |
|---|---|
| Scratch Resistance | Maintains premium look over time |
| Light Weight | Improves portability and user experience |
| Non-Conductive | Prevents electrical shorts, ensures safety |
This combination of lightweight strength, durability, and electrical safety makes clear anodized aluminum a top choice. It’s a decision rooted in performance and user experience, something we prioritize in the components we manufacture.
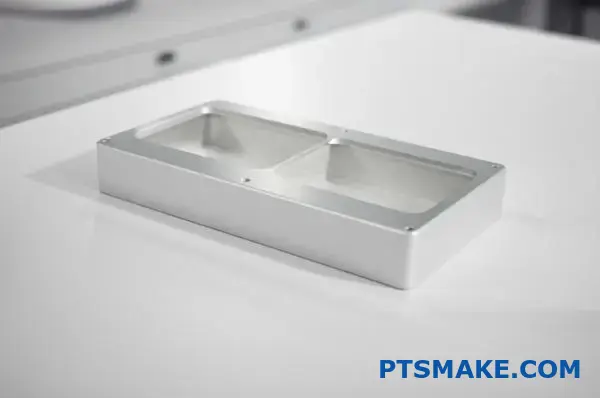
Clear anodizing offers a perfect trifecta for electronics: a premium feel, robust durability against scratches, and a non-conductive surface for safety. This makes it an ideal choice for lightweight aluminum casings, combining aesthetics with essential functional protection for internal components.
Specify the best anodize finish for outdoor architectural use.
Choosing the right finish for outdoor architectural aluminum is critical. You need a solution that withstands sun, rain, and temperature changes for decades. The goal is maximum durability.
So, what’s the best choice? You need to prioritize UV stability and corrosion resistance above all else. A standard anodize finish might not be enough.
Based on our project experience at PTSMAKE, a specific combination of factors provides the best long-term performance. We will break down this specification for you.
Let’s synthesize this into a clear specification. For any outdoor architectural application, we recommend a finish that adheres to the MIL-A-8625 standard. Specifically, we suggest Type II, Class 1.
Type II uses sulfuric acid, creating a robust protective layer. Class 1 means it is non-dyed. This is what’s commonly known as a clear anodized finish. Since there are no organic dyes, there is nothing to fade under harsh UV exposure. This is a major advantage.
The real key to longevity, however, is thickness. Standard anodizing might be too thin. We recommend a coating thickness between 18 and 25 microns. This meets the AAMA 611 standard for architectural use. This thicker porous aluminum oxide17 layer provides superior protection against corrosion and abrasion.
Finally, the sealing process is crucial. A high-quality two-step seal, often involving a hot water seal followed by a chemical seal, locks in the protection. This ensures the pores are completely closed, preventing any environmental intrusion.
| Specification | Recommendation | Reason |
|---|---|---|
| Standard | MIL-A-8625 | Ensures quality and consistency. |
| Type | Type II | Excellent corrosion resistance. |
| Class | Class 1 (Clear Anodized) | Superior UV stability, no fading. |
| Thickness | 18-25 microns | Meets AAMA 611 for durability. |
| Sealing | High-Quality Two-Step | Maximizes corrosion protection. |
For outdoor architectural parts, the optimal choice is a MIL-A-8625 Type II, Class 1 (clear anodized) finish. Ensure a thickness of 18-25 microns and a two-step seal for maximum UV stability and corrosion resistance, guaranteeing long-term performance.
Could clear anodizing be adapted for medical implant applications?
Using clear anodizing for medical implants is an advanced concept. It is not a standard practice. This is because the requirements for medical devices are extremely high. The human body is a sensitive environment.
Purity is Everything
The chemicals used in the process must be absolutely pure. Any contamination can cause a negative reaction in the patient. This requires strict process controls.
The Oxide Layer
The anodized layer must also be perfect. It cannot have any cracks or defects. Such flaws could become sites for corrosion or bacterial growth.
| Material | Key Challenge for Implants | Typical Medical Use |
|---|---|---|
| Aluminum | Potential Ion Leaching | External devices, housings |
| Titanium | Established Standard | Internal implants, joints |
Exploring clear anodized aluminum for implants pushes boundaries. The primary challenge is ensuring total safety for the patient. This goes beyond simple corrosion resistance. The main concerns are material purity and the final surface integrity.
Biocompatibility and Sealing
The aluminum oxide layer is generally inert. But the sealing agents used to close the pores can be a problem. Many common sealants are not safe for internal use. Biocompatibility18 is the most critical factor. We must prove the final surface will not harm human tissue.
Contrast with Titanium Anodizing
Titanium is the industry standard for implants. Its oxide layer, often created through Type II anodizing, is known to be highly biocompatible and stable. Unlike aluminum anodizing, it typically does not require a separate sealing step, which removes a major source of potential contamination.
At PTSMAKE, we understand process control. For any high-spec application, every step from chemical sourcing to final inspection is documented and verified.
| Feature | Clear Anodized Aluminum | Type II Titanium Anodizing |
|---|---|---|
| Base Material | Aluminum Alloys | Titanium Alloys (e.g., Ti-6Al-4V) |
| Sealing Step | Usually Required | Not Required |
| Biocompatibility | Questionable (depends on sealant) | Excellent, well-established |
| Primary Challenge | Proving sealant and layer safety | Process consistency |
Adapting clear anodizing for medical implants is a significant challenge. The process requires absolute purity and a flawless, biocompatible surface, which is a major hurdle compared to the established safety of titanium anodizing.
How can the anodizing process be made more sustainable?
Moving beyond basic compliance requires innovation. We can significantly reduce the environmental footprint of anodizing.
This means smarter chemistry, energy efficiency, and better resource management. Let’s look at some key actions we can take.
Key Areas for Sustainable Innovation
The table below outlines a few high-impact changes. These shifts move us toward greener manufacturing.
| Area | Traditional Method | Sustainable Solution |
|---|---|---|
| Deoxidizing | Hexavalent Chrome | Non-Chrome Deoxidizers |
| Sealing | High-Temp Steam | Mid-Temperature Seals |
| Rinsing | Static Tanks | Spray/Counterflow Rinses |
| Acid Use | Dispose | Recover and Recycle |
Adopting Smarter Chemistry
Non-Chrome Deoxidizers
Hexavalent chromium is a known carcinogen. Shifting to non-chrome alternatives is vital for safety and the environment. These modern formulas perform well without the heavy regulatory burden. This change protects both people and the planet.
Enhancing Energy and Water Efficiency
Mid-Temperature Sealing
Traditional sealing often uses boiling water. This consumes a massive amount of energy. In our work at PTSMAKE, we’ve found mid-temperature seals highly effective.
They operate at lower temperatures, cutting energy costs. They work exceptionally well for finishes like clear anodized aluminum, maintaining quality while saving resources.
Advanced Rinsing Techniques
We can use spray or counterflow rinses to reduce water usage dramatically. This simple change minimizes wastewater. It also lowers the cost and complexity of water treatment.
Closing the Loop with Recovery Systems
Investing in acid recovery is a game-changer. Technologies like diffusion dialysis19 allow us to reclaim and reuse acids from the process. This practice reduces chemical waste and lowers purchasing costs. It effectively turns a waste stream into a valuable resource for the facility.
By implementing non-chrome deoxidizers, energy-saving seals, efficient rinses, and acid recovery, we create a truly sustainable process. It’s a win for the environment, worker safety, and operational efficiency.
How to anodize parts for subsequent laser engraving?
Combining anodizing with laser engraving is a popular choice. This process requires careful planning for optimal results. The laser works by removing the anodized layer. This exposes the raw aluminum underneath.
The Role of Coating Thickness
A key factor is the thickness of the anodized layer. It directly impacts the final look. A thicker coat provides better contrast. This is true for both colored and clear anodized finishes.
| Thickness (microns) | Engraving Result | Recommendation |
|---|---|---|
| < 8 | Poor contrast, risk of damage | Not Recommended |
| 10 – 15 | Good contrast, clean lines | Ideal Range |
| > 18 | Deep contrast, slower engraving | For specific needs |
Getting this right prevents damage to the part itself. It ensures a sharp, high-contrast mark.
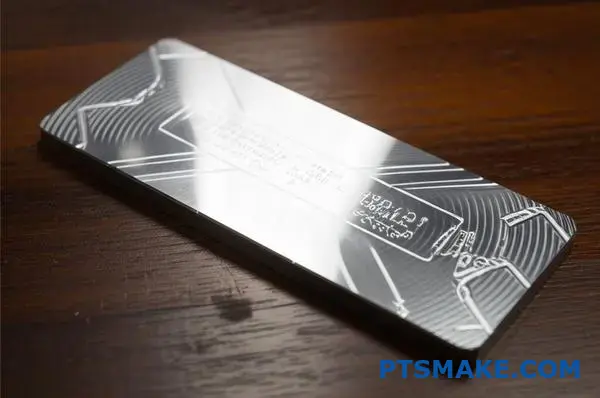
Integrating Anodizing and Engraving
The magic of laser engraving on aluminum happens through ablation. The laser’s energy vaporizes the anodized coating. This reveals the bright, metallic aluminum. The contrast between the two creates the permanent mark.
It is a delicate balance. The laser’s power and speed must be calibrated. This is to remove only the coating. If the coating is too thin, the laser can easily damage the aluminum substrate20.
Why Thickness Matters
In past projects at PTSMAKE, we’ve found that a thin coating leads to issues. The laser can melt or pit the underlying aluminum. This results in a messy, unprofessional finish. It compromises the part’s integrity.
A sufficient thickness, which we recommend as over 10 microns, acts as a protective buffer. It allows for a clean removal of the color or clear anodized layer. This creates a crisp and visually appealing mark.
Achieving High Contrast
The thickness also determines the visual depth of the engraving.
| Feature | Thin Anodizing (<10µm) | Thick Anodizing (>10µm) |
|---|---|---|
| Contrast | Low to Moderate | High and Sharp |
| Substrate Risk | High | Low |
| Process Window | Narrow | Wide |
| Aesthetic | Washed out | Crisp and Bold |
This is why specifying the right coating thickness is not just a suggestion. It is a critical requirement for high-quality laser engraving results.
Laser engraving works by removing the anodized layer. To achieve high contrast and protect the aluminum part, specifying an anodized coating thickness of over 10 microns is essential. This ensures a clean, professional result without damaging the substrate.
Elevate Your Clear Anodized Projects with PTSMAKE Expertise
Ready to achieve flawless clear anodized finishes for your precision parts? Contact PTSMAKE for a fast, competitive quote and discover why leading engineers and manufacturers trust us. Experience exceptional clarity, proven reliability, and true manufacturing excellence—from prototype to production. Send your inquiry today!

Discover the material science behind this protective and porous aluminum surface structure. ↩
Click to understand how these microscopic particles affect your final product’s appearance and performance. ↩
Explore the microscopic structure of the anodized layer and its impact on material performance. ↩
Understand this optical principle to better specify the exact finish your project needs. ↩
Explore this electrochemical process to understand how the protective oxide layer is formed on aluminum surfaces. ↩
Learn how the composition of this solution directly impacts the final properties of the anodic coating. ↩
Learn how these microstructures influence material strength and surface finish. ↩
Understand how these microscopic alloy elements can affect your final product finish. ↩
Learn how surface friction, wear, and lubrication studies can predict the real-world durability and lifespan of your parts. ↩
Understand the science of light reflection to better specify your desired surface finish. ↩
Understand how light reflection affects surface finish and perceived quality. ↩
Click to understand the core physics behind how eddy current gauges operate. ↩
See the science that connects electricity to coating thickness for precise process control. ↩
Learn how acidity and alkalinity levels can directly impact the durability of your anodized parts. ↩
Learn more about this crucial protective layer and how it is formed to protect your parts. ↩
Learn how this property is crucial for ensuring the electrical safety of your electronic devices. ↩
Understand the microscopic structure of the anodized layer and its importance for performance and sealing. ↩
Learn what makes a material safe for direct contact with human tissue and biological systems. ↩
Learn how this membrane process recovers acid, reducing waste and raw material costs in your operations. ↩
Learn how the base material’s properties influence the success of surface treatments. ↩