Finding a reliable bronze casting manufacturer can feel overwhelming when your project demands both precision and artistic quality. You’re dealing with complex metallurgy, intricate processes, and the constant worry about defects that could ruin months of development work.
Bronze casting combines ancient metallurgical principles with modern manufacturing precision, requiring expertise in alloy selection, mold design, thermal management, and specialized finishing techniques to produce high-quality custom parts.
At PTSMAKE, I’ve guided clients through every aspect of bronze casting projects, from initial design optimization to final patination. This guide breaks down the technical fundamentals you need to understand before partnering with any bronze casting manufacturer.
What are the first principles of bronze metallurgy for casting?
Understanding bronze metallurgy is key for a successful casting process. It all starts with the first principles. These are the core properties that control how the metal behaves from liquid to solid.
Core Metallurgical Properties
We must focus on four main aspects. These are melting point, fluidity, solidification shrinkage, and thermal conductivity. Each one plays a critical role in the outcome.
These properties dictate the entire bronze casting process. They determine mold filling, cooling rates, and final part integrity. Getting them right is essential for quality.
| Property | Silicon Bronze (C87300) | Tin Bronze (C90700) |
|---|---|---|
| Melting Point | ~954°C (1750°F) | ~1000°C (1832°F) |
| Fluidity | High | Moderate |
| Shrinkage | Low | Moderate |
| Thermal Cond. | Low | Moderate |
Deeper Dive into Casting Behavior
These principles don’t work in isolation. They interact in complex ways that define the casting’s success. For instance, an alloy’s thermal conductivity directly impacts its solidification rate and final structure.
A slower cooling rate allows more time for gases to escape. This can reduce porosity defects. It also influences how crystals form as the metal cools. This dendritic growth1 determines the final grain structure and the part’s mechanical properties.
Managing Shrinkage
Solidification shrinkage is a major challenge in bronze casting. As the molten metal cools and solidifies, it contracts. If not managed properly, this leads to internal voids or surface cracks in the final part.
In our projects at PTSMAKE, we design molds with risers. These are reservoirs of molten metal. They feed the casting as it shrinks, ensuring the final component is solid and sound. Understanding an alloy’s specific shrinkage is crucial.
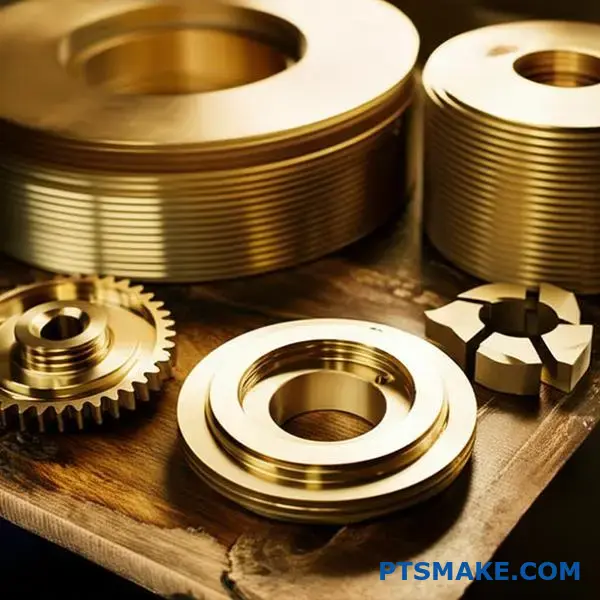
Fluidity’s Impact on Detail
Fluidity affects how well molten bronze fills intricate mold details. Silicon bronze is known for its high fluidity. This makes it excellent for detailed artistic pieces or complex industrial parts. Tin bronzes are less fluid and may require different designs to ensure the mold fills completely before freezing.
| Principle | Impact on Casting | Common Defect if Ignored |
|---|---|---|
| Shrinkage | Affects final dimensions | Porosity, Hot Tears, Voids |
| Fluidity | Governs mold fill detail | Misruns, Cold Shuts |
| Thermal Cond. | Controls cooling rate | Warping, Inconsistent Grain |
Mastering bronze casting requires understanding these core principles. Properties like fluidity and shrinkage aren’t just data points; they directly influence the quality, integrity, and precision of the final component. Controlling these variables is the key to success.
How does wall thickness fundamentally impact a bronze casting design?
Wall thickness is a critical factor in bronze casting. It directly controls the cooling rate of the molten metal.
Think of it this way. Thicker sections retain heat much longer than thinner sections. This imbalance is where problems begin.
The Goal: Uniform Cooling
Our primary goal is to achieve uniform cooling across the entire part. This ensures the bronze solidifies predictably, minimizing internal stress and potential defects.
Cooling Rate Impact
A design with varied wall thickness will cool unevenly. This creates a battle within the material itself as it solidifies.
| Feature | Uniform Thickness | Varied Thickness |
|---|---|---|
| Cooling | Even & predictable | Uneven & differential |
| Stress | Minimized | High & localized |
| Defect Risk | Low | High |
The consequences of ignoring wall thickness are significant. Non-uniform cooling is a direct cause of several common and severe casting defects. Understanding these risks is essential for any designer. In our work at PTSMAKE, we often help clients refine designs to mitigate these issues early on.
Understanding Shrinkage Porosity
When molten bronze cools, it shrinks. Thicker sections are the last to solidify.
As these areas cool, they pull liquid metal from adjacent sections to compensate for the volume loss. If no molten metal is available, small voids or pores form. This is known as shrinkage porosity, and it weakens the final part.
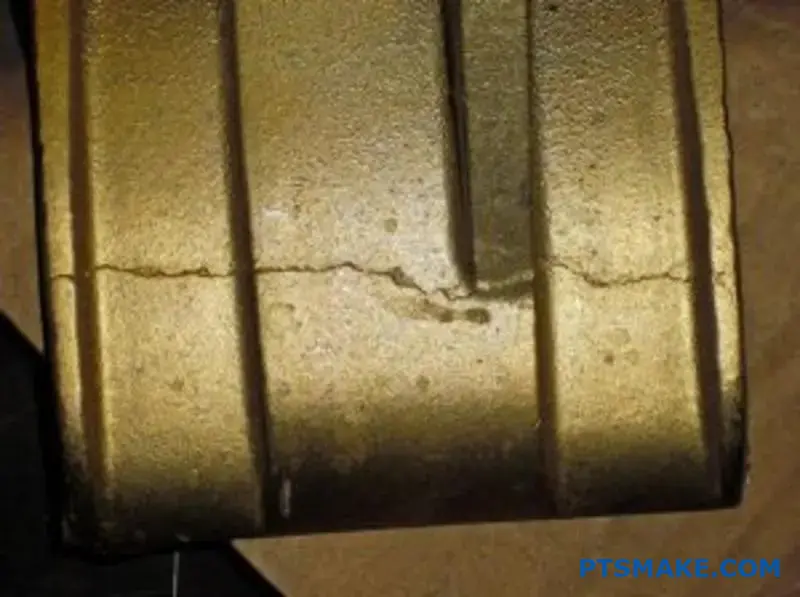
The Danger of Hot Tears
Hot tears are essentially cracks that form while the casting is still hot and weak.
This happens when thinner sections have already solidified and started to contract. They pull on the adjacent, still-molten thicker sections. This metallurgical stress2 can be strong enough to tear the semi-solid metal apart, creating critical failures.
Preventing Warping and Distortion
Warping is a result of uneven internal stresses. As different sections cool and contract at different speeds, they generate opposing forces within the casting.
Once the part is fully cooled and removed from the mold, these locked-in stresses can cause it to twist or bend. This distortion compromises the part’s dimensional accuracy.
Uneven wall thickness causes differential cooling in bronze casting. This leads to critical defects like shrinkage porosity, hot tears, and warping. Designing for uniform thickness is fundamental to producing a sound, reliable, and dimensionally accurate part.
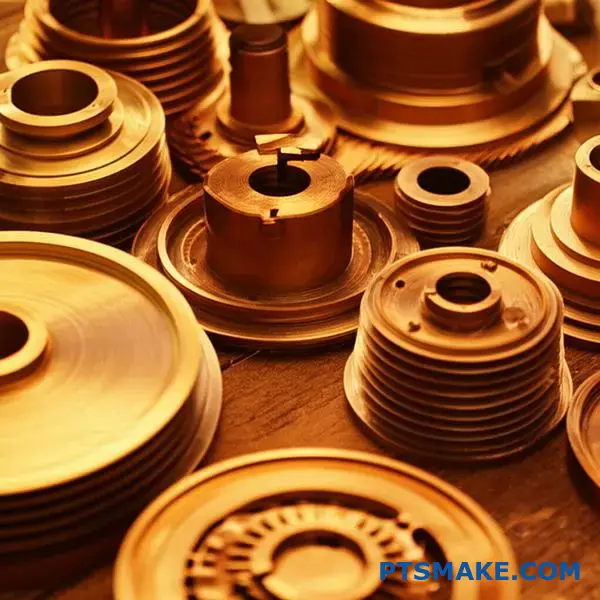
What are the main categories of bronze casting techniques?
Bronze casting is not a single method. Different techniques serve unique purposes. It’s about matching the process to your project’s needs.
The main methods are investment casting, sand casting, and centrifugal casting. Each offers distinct advantages for specific applications.
Let’s look at a quick comparison.
| Casting Method | Key Feature |
|---|---|
| Investment Casting | High complexity and detail |
| Sand Casting | Cost-effective for large parts |
| Centrifugal Casting | High density for symmetrical parts |
This choice directly impacts your part’s final quality and cost.
A Deeper Look at Casting Methods
Choosing the right bronze casting process is crucial. In past projects at PTSMAKE, we’ve seen this decision affect everything from detail fidelity to structural integrity.
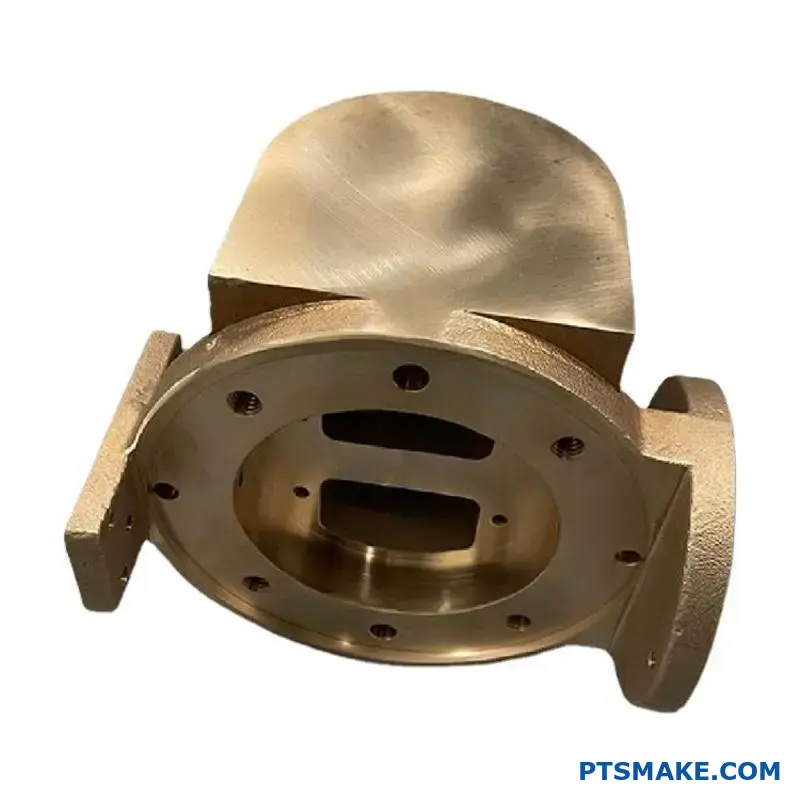
Investment Casting (Ceramic Shell)
This is the "lost-wax" technique. It excels at producing highly intricate parts with smooth surface finishes. It’s ideal for complex geometries where precision is non-negotiable. Think of detailed sculptures or aerospace components.
The main drawback is cost. It is a multi-step process, which also means longer lead times. It is not the most economical choice for simple, large-volume parts.
Sand Casting
Sand casting is a versatile and common method. It uses a sand-based mold. There are two main types: green sand and resin-bonded sand. Green sand is cheaper and faster. Resin-bonded sand offers better dimensional accuracy.
This method is great for larger, less complex components. However, achieving a fine surface finish can be a challenge. The mold’s permeability3 is also a critical factor for preventing gas-related defects.
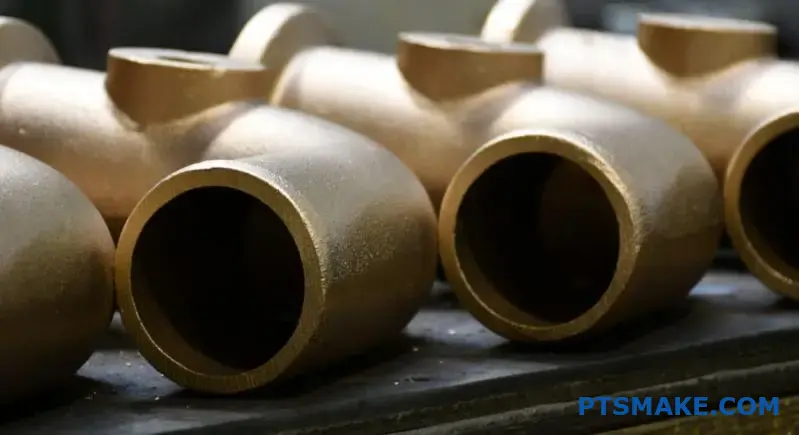
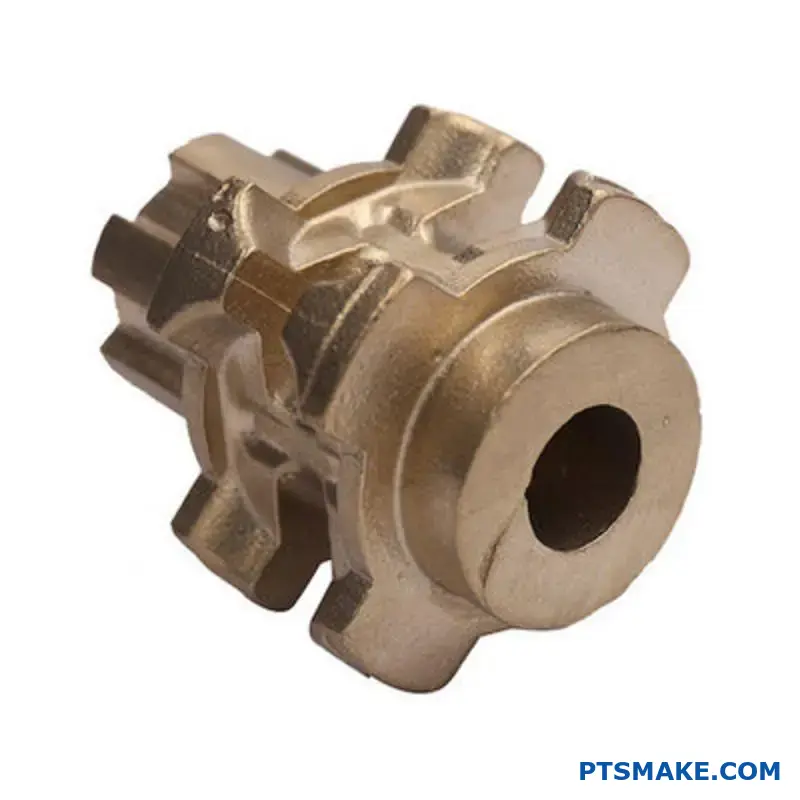
Centrifugal Casting
This technique uses a spinning mold. The centrifugal force distributes molten bronze evenly. This creates a very dense, pure casting that is free of impurities.
It is perfect for symmetrical, hollow objects like pipes, bushings, or rings. Its primary limitation is that it is only suitable for producing cylindrical shapes.
| Method | Best For | Main Limitation |
|---|---|---|
| Investment Casting | Complex shapes, fine details | Higher cost, longer lead time |
| Sand Casting | Large, simple parts | Lower precision, rougher finish |
| Centrifugal Casting | Symmetrical, hollow parts | Limited to cylindrical shapes |
Selecting the right bronze casting method is a balance. You must consider part complexity, required precision, production volume, and budget. Each technique offers a unique set of trade-offs that can significantly influence your project’s outcome and success.
How are common bronze casting defects systematically classified?
To solve problems effectively, we need a clear system. I classify bronze casting defects into four main groups. This framework helps us pinpoint the root cause quickly, a method we’ve refined at PTSMAKE.
Key Defect Categories
These categories cover most issues in bronze casting. They are Gas Porosity, Shrinkage Defects, Pouring Metal Defects, and Mold Defects. Each points to a different stage of the process.
Here’s a quick overview:
| Defect Category | Common Examples |
|---|---|
| Gas Porosity | Pinholes, blowholes |
| Shrinkage Defects | Voids, sinks |
| Pouring Metal Defects | Misruns, cold shuts |
| Mold Defects | Cracks, inclusions |
This structure is my starting point for any diagnosis.
A good diagnostic framework does more than just name problems. It connects the defect you see to the process step that went wrong. This is how we build reliable and repeatable manufacturing systems.
Deeper Dive into Causes
Understanding the "why" is crucial. A simple defect like a surface crack could originate from the mold, the metal’s temperature, or even the cooling rate. You must look beyond the symptom.
For example, shrinkage voids are not just empty spaces. They are signs of improper solidification. The liquid metal supply was cut off too early during cooling. This disrupts the natural dendritic solidification4 process, creating internal weak spots.
Connecting Defect Categories
Often, defects are linked. A poorly designed mold (a Mold Defect) can create turbulence. This turbulence then traps air, leading to Gas Porosity in the final bronze casting.
Let’s look at the root causes for each category.
| Defect Category | Potential Root Causes |
|---|---|
| Gas Porosity | Dissolved gases in melt, moisture in mold |
| Shrinkage Defects | Poor riser design, incorrect pouring temp |
| Pouring Metal Defects | Low fluidity, slow pour rate, gating issues |
| Mold Defects | Weak sand, improper mold handling, poor design |
This systematic approach prevents guesswork. It turns troubleshooting into a science. In past projects, this method has saved clients significant time by avoiding repeated production failures.
This systematic classification provides a clear roadmap. It helps us move from identifying a defect, like a pinhole or crack, to understanding its root cause in the bronze casting process. This framework is essential for consistent quality control.
What constitutes the complete workflow from clay model to finished bronze?
The journey from a soft clay model to a finished bronze sculpture is a multi-step process. Each stage is crucial for the final outcome. It’s a method refined over centuries.
This traditional bronze casting process requires precision and patience. Let’s map out the entire workflow.
The 10 Core Stages of Bronze Casting
Here is a breakdown of the sequential stages. Each step builds upon the last, transforming the artist’s vision into a permanent work of art.
| Stage Number | Step Name | Primary Function |
|---|---|---|
| 1 | Original Sculpture | Creating the initial artwork in clay or wax. |
| 2 | Rubber Mold | Capturing every detail of the original sculpture. |
| 3 | Wax Pattern | Making a hollow wax replica from the rubber mold. |
| 4 | Gating/Spruing | Adding wax channels for molten bronze to flow. |
| 5 | Investment | Building a ceramic shell around the wax pattern. |
| 6 | Burnout | Melting the wax out to create a hollow cavity. |
| 7 | Casting (Pour) | Pouring molten bronze into the ceramic shell. |
| 8 | Devesting | Breaking away the ceramic shell to reveal the bronze. |
| 9 | Chasing/Finishing | Grinding, sanding, and welding to perfect the surface. |
| 10 | Patination | Applying chemicals and heat to color the bronze. |
This complete workflow ensures the highest fidelity from the original concept to the final piece. At PTSMAKE, we appreciate this level of detail. It mirrors the precision required in our CNC machining and injection molding projects.
A Deeper Look into the Process
The initial rubber mold is a critical step. It must capture every subtle texture from the artist’s original work. Any flaw here will be magnified later.
From this mold, we create a wax pattern. This is an exact replica of the original sculpture, but in wax. This wax copy is what will eventually be replaced by bronze.
From Wax to Ceramic Shell
Next, we attach a system of wax rods called gates and sprues. These act as channels. They allow molten bronze to flow in and air to escape during the casting.
The wax pattern is then dipped into a ceramic slurry repeatedly. This process, called investment, builds a durable shell around the wax. The thickness of this shell is vital for a successful pour.
| Process Stage | Key Consideration | Impact of Error |
|---|---|---|
| Gating | Proper placement and size | Incomplete fill or trapped air bubbles |
| Investment | Shell thickness and integrity | Shell cracking during burnout or casting |
| Burnout | Complete wax removal | Bronze reacting with residual wax, causing defects |
After burnout, we are left with a hollow ceramic mold. This mold is the negative space of the final sculpture. The final step before finishing is the bronze pour itself. After the pour, the final color is achieved through a process called patination5.
The ten-stage bronze casting process is a testament to meticulous craftsmanship. From the initial clay model to the final colored bronze, each step is vital for ensuring the integrity and detail of the final artwork.
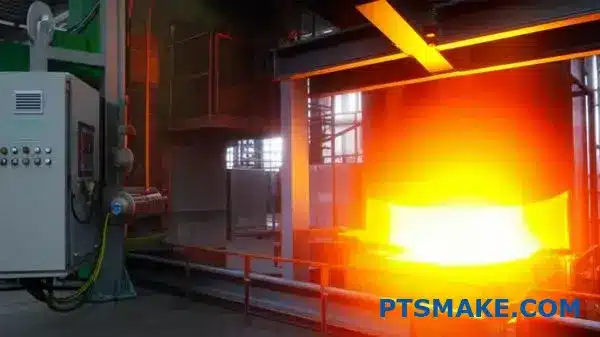
What are the key types of foundry furnaces for bronze?
Choosing the right furnace is a critical decision. The heating technology directly impacts cost, speed, and the final quality of your bronze parts. Each type comes with its own set of trade-offs.
Gas-Fired Furnaces
These are often the entry point for many foundries. Their initial investment is relatively low. They are robust and can melt bronze quickly.
Electric Furnaces
Electric options include resistance and induction types. They generally offer much finer temperature control and a cleaner melting environment, which is vital for high-specification alloys.
| Furnace Type | Initial Cost | Melting Speed |
|---|---|---|
| Gas-Fired | Low | Fast |
| Electric Resistance | Medium | Slow |
| Induction | High | Very Fast |
Let’s dive deeper into the operational differences. The best choice often depends on the specific requirements of the bronze casting project, from production volume to alloy sensitivity.
Gas-Fired Furnaces: A Closer Look
Gas furnaces are powerful and reliable. In our experience, they are excellent for general-purpose work where pinpoint temperature accuracy is less critical than speed and initial cost.
Forced Air vs. Venturi
Forced air systems use a blower to mix air and fuel. This provides better efficiency and temperature control. Venturi systems are simpler and cheaper but are less precise and consume more fuel.
Electric Furnaces: Precision and Purity
Electric resistance furnaces provide exceptionally stable heat. This precision is essential for bronze alloys with narrow melting ranges. They heat cleanly, minimizing contamination from combustion byproducts.
Induction furnaces represent the peak of melting technology. They use an electromagnetic field to heat the bronze directly. This is extremely fast and energy-efficient. The process also creates a natural stirring effect, ensuring a homogenous melt. The quality of the refractory lining6 is vital for performance.
| Feature | Gas-Fired | Electric Resistance | Induction |
|---|---|---|---|
| Upfront Cost | Low | Medium | High |
| Operating Cost | High (Fuel) | Medium (Electricity) | Varies (Efficient) |
| Temp. Control | Fair | Excellent | Excellent |
| Melt Purity | Good | Excellent | Excellent |
| Best for Scale | Small to Medium | Small | Medium to Large |
The choice between gas, electric resistance, and induction furnaces involves balancing upfront cost with long-term efficiency, speed, and precision. The ideal furnace aligns with your production scale, alloy requirements, and quality standards for a successful bronze casting operation.
The Post-Casting Finishing Process
After a bronze piece is cast, the real work begins. The finishing process is where a raw casting transforms into a final product. This journey involves several distinct stages.
It starts with removing excess material. Then, we refine the surface details. After that, we prepare the surface for its final look. The last step adds color and protection.
Here is a simple breakdown of the key stages:
| Stage Number | Process Name | Goal |
|---|---|---|
| 1 | Gate/Sprue Removal | Remove casting system parts |
| 2 | Surface Chasing | Repair and refine details |
| 3 | Surface Preparation | Create a uniform surface |
| 4 | Patination/Sealing | Add color and protection |
This systematic approach ensures high quality.
The journey from a raw bronze casting to a finished piece is methodical. At PTSMAKE, we’ve refined this process over many projects to ensure every detail meets specification. Each step has a specific purpose.
Stage 1: Gate and Sprue Removal
The first step is purely mechanical. We must remove the gates, runners, and sprues. These are channels that allowed molten bronze to fill the mold.
Cutting and Grinding
We use saws and grinders for this task. The key is to cut close to the part’s surface without damaging it. Careful grinding then smooths the area, blending it with the surrounding surface. Precision here prevents issues later.
Stage 2: Surface Chasing
Chasing is where artistry meets engineering. This stage involves repairing any minor imperfections from the casting process, such as small voids or surface flaws.
Our technicians use specialized tools to match the original texture. Sometimes, this involves welding to fill imperfections before re-texturing the surface. The goal is a seamless, flawless appearance.
Stage 3: Surface Preparation
Before any final finish, the entire surface must be uniform. This is achieved through abrasive methods.
Sandblasting is often used to remove any remaining investment material. It also creates a consistent matte texture. Following this, we might use various grits of sandpaper to achieve the desired smoothness.
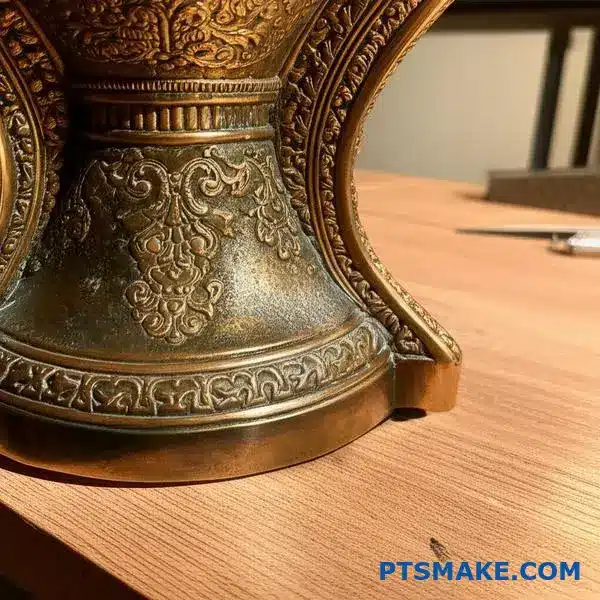
Stage 4: Patination and Sealing
The final step is applying the patination7. This is a chemical process that creates color on the bronze surface. It can produce a range of colors, from traditional browns and blacks to more vibrant greens and blues. After patination, a sealant like wax is applied to protect the finish.
In short, post-casting finishing involves four key stages. From the rough removal of gates to detailed chasing, surface prep, and final patination, each step builds upon the last. This meticulous process ensures the final bronze part is both beautiful and durable.
How do you effectively weld and chase bronze casting repairs?
Chasing is the final, artistic step. It’s where skill truly shows. It involves re-texturing the welded area. The goal is to make the repair invisible.
This process ensures the new surface perfectly matches the original bronze casting.
Key Tools for Chasing
You need the right tools for the job. Each one has a specific purpose in restoring the texture and finish.
| Tool | Primary Use |
|---|---|
| Grinders | Removing excess weld material |
| Files | Fine shaping and smoothing |
| Pneumatic Tools | Re-creating original textures |
| Sandpaper | Final surface blending |
This combination allows for detailed control.
The TIG Welding Foundation
First, we handle the TIG welding. This method offers excellent control. It’s essential for the delicate nature of bronze. We choose a filler rod that matches the parent bronze alloy. This ensures color and strength consistency.
Proper heat management is critical. Too much heat can warp or damage the casting. We work carefully to minimize the heat-affected zone8. This protects the integrity of the surrounding material.
From Rough Weld to Seamless Finish
After welding, the real finishing begins. The repair area is often raised and rough. We start by grinding down the excess weld material carefully.
Next, we use hand files for finer shaping. This step smooths the transition between the repair and the original surface. It requires a patient and steady hand.
Re-creating Texture
The final step is re-texturing. We use various pneumatic tools with special tips. These tools help us replicate the original surface pattern. It could be a stippled, grooved, or smooth finish.
| Finishing Step | Objective |
|---|---|
| Grinding | Bulk material removal |
| Filing | Precise shaping and smoothing |
| Texturing | Matching original surface detail |
At PTSMAKE, this final touch is what defines a quality bronze casting repair.
Effective bronze repair combines precise TIG welding with meticulous chasing. This two-part process ensures the repaired area is not only strong but also visually indistinguishable from the original surface, restoring the casting’s initial integrity and appearance.
How do you accurately calculate the bronze needed for a piece?
Ready for the practical formula? Calculating the bronze for your piece isn’t guesswork. It’s a clear, three-step process. This method ensures you melt just enough material, preventing waste and failed pours.
The Core Calculation
The basic formula is straightforward: Bronze Weight = Wax Volume × Bronze Density + Safety Factor. It’s simple but powerful.
Step 1: Volume via Water Displacement
First, find the volume of your wax pattern, including its gating system. Submerge it in water and measure the displaced volume.
| Step | Action | Purpose |
|---|---|---|
| 1 | Fill a container with water. | Establish a baseline. |
| 2 | Submerge the wax pattern. | Measure displaced water. |
| 3 | Record the volume change. | This is your wax volume. |
This gives you the precise volume needed for the final bronze casting.
Step 2: Applying Bronze Density
Once you have the wax volume, the next step is converting it to the required weight of bronze. This is where material science comes into play. Different bronze alloys have different densities.
You must multiply your measured volume by the specific density of the bronze alloy you are using. This is a critical step for accuracy. Using a generic density value can lead to significant errors, especially on larger parts.
Common Bronze Alloy Densities
| Alloy | Density (g/cm³) |
|---|---|
| Silicon Bronze | 8.53 |
| Aluminum Bronze | 7.70 |
| Tin Bronze | 8.80 |
Based on our tests, even a small density miscalculation can affect the outcome. It’s a detail we manage carefully in projects at PTSMAKE. This entire process is part of a method known as lost-wax casting9.
Step 3: The Crucial Safety Factor
Finally, always add a safety factor. This extra metal accounts for the sprue button and any potential shrinkage. A 10-20% addition is a safe range for most projects. This buffer prevents a "short pour," where the mold doesn’t fill completely. It’s a simple step that saves a lot of headaches.
To calculate the bronze needed, measure the wax model’s volume using water displacement. Then, multiply this volume by the specific density of your bronze alloy. Finally, add a 10-20% safety factor to ensure a complete and successful pour.
How would you scale your workflow from one-off to a limited edition?
Let’s move from theory to a real production scenario. Scaling up requires a focus on repeatability. A single perfect piece is an accomplishment. But a limited edition demands absolute consistency.
This transition is all about building a solid, repeatable system. It begins with the master mold and carries through every subsequent step.
Core Pillars of Scalability
Your workflow must be predictable and controlled.
| Stage | Primary Goal | Key Action |
|---|---|---|
| Molding | Durability | Use high-tear-strength materials. |
| Casting | Consistency | Optimize wax and gating systems. |
| Finishing | Uniformity | Create a Standard Operating Procedure (SOP). |
This framework ensures every piece is a faithful copy.
For a limited edition, the master mold is your foundation. A simple silicone mold might work for one or two copies. But for a series of 20 or 50, you need something more durable, like a high-durometer urethane rubber. This material withstands repeated use without losing detail.
Next, optimize wax pattern production. We standardize the wax injection process. This means controlling temperature, pressure, and injection time precisely. Every single wax pattern must be a perfect replica. This is non-negotiable for consistent results.
Designing for Repetition
The gating system also needs careful planning. Its design directs the flow of molten metal during the bronze casting process. For a limited edition, we must place gates and sprues identically on every wax pattern. This simple step prevents inconsistencies and defects.
Standardizing the Final Touch
Finally, we standardize finishing. A clear, documented procedure is created for chasing, sanding, and the chemical patination10. This ensures piece #1 has the exact same color and texture as the final piece in the edition.
| Process Step | One-Off Approach | Limited Edition Approach |
|---|---|---|
| Mold Making | Quick, soft mold | Durable, high-durometer mold |
| Gating | Intuitive, single-use | Planned, repeatable system |
| Finishing | Artistic, experimental | Documented, standardized SOP |
In past projects at PTSMAKE, establishing these SOPs early has been the key to successfully scaling from a prototype to a full run.
Scaling from a single item to a limited edition is about systemizing your process. It requires a durable master mold, optimized wax and gating systems, and a standardized finishing procedure to ensure absolute consistency across every unit.
Get a Fast Quote on Bronze Casting with PTSMAKE Today!
Ready to take your bronze casting project to the next level? Partner with PTSMAKE for precision, consistency, and seamless communication from prototype to production. Send us your RFQ now and let our expert team deliver reliable, high-quality bronze casting solutions tailored to your specifications!

Explore how crystal formation impacts the mechanical strength and integrity of your final bronze casting. ↩
Discover the forces at play within solidifying metal and how to manage them. ↩
Learn how mold permeability impacts casting quality and helps prevent defects in your final parts. ↩
Learn how metal crystal growth impacts the final quality of your bronze casting parts. ↩
Discover the chemical artistry behind creating vibrant colors and finishes on bronze surfaces. ↩
Learn how this material impacts furnace efficiency and the quality of your final cast part. ↩
Learn more about how this chemical process creates unique colors and protective layers on bronze. ↩
Understand why controlling this area is vital for the strength and look of your final bronze casting repair. ↩
Discover the details of this precise and ancient casting method. ↩
Explore our guide on chemical finishing to control the final color and texture of your metal parts with precision. ↩